180
14-4. Event Tally
Event tally function allows you to send tallies that notify discrepancy between FA-9600 settings and
setting values in events. Two events can be set as event tally reference. Event tallies are also sent
periodically if no changes are made in FA-9600.
◆ Communication Specifications
Ethernet: IEEE802.3u/ab
(100BASE-TX / 1000BASE-T)
60000 (Default setting)
(*1)
Event tallies (Diff or Same) are periodically
(Default setting: 30 sec. interval)
(*1)
sent.
Event tallies (Diff) are sent when there is discrepancy between FA-9600
settings and setting values in events.
Destination 1: 0. 0. 0. 0 (Default setting)
(*1)
Destination 2: 0. 0. 0. 0 (Default setting)
(*1)
(*1)
Settings can be changed in Web GUI. See the next section.
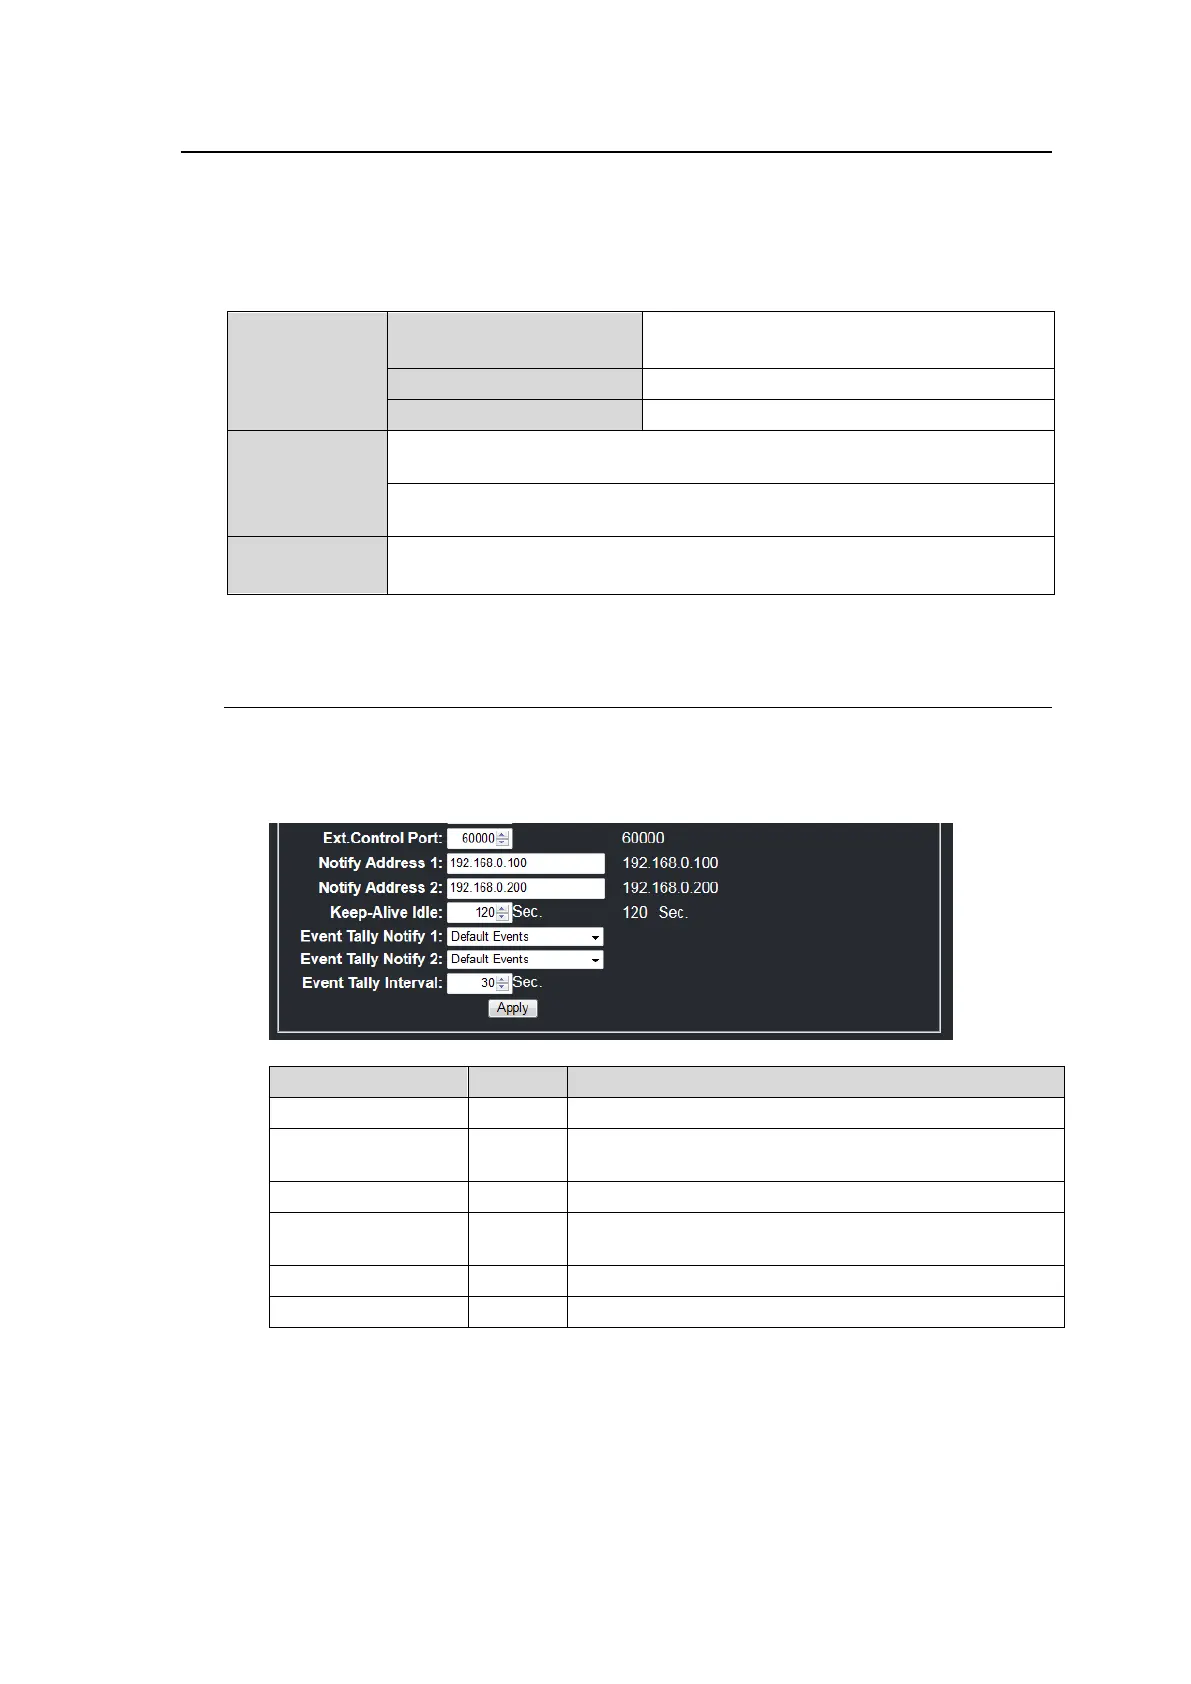
14-4-1. Event Tally Setup (Web GUI)
1) Connect to FA-9600 from Web GUI. (See Sec. 12. “Web GUI Setup.”)
2) Click the Network Settings tab and set the following items in the tab window. (See Sec.
13-2-1. ”Network Settings.”)
Sets the port number for sending tallies.
Sets event tally destination addresses 1 and 2.
Sets the idle timeout period for event tally sessions.
Event Tally Notify
1, 2 *
Specifies two events (1 and 2) used for FA-9600
change monitoring.
Sets the interval time for sending tallies from 5 to 255.
(*1)
These communication settings are shared with external command control / status
change messages. (See the FA-9600 Command Operation Manual, separate file)
If addresses are changed here, destination addresses of status change messages
are also changed.
3) Click Apply after changing settings. A confirmation message window will appear. Click
OK to confirm the change.
4) A message appears and prompts you to restart the FA-9600. Close the message window
and restart the FA-9600 to apply the change.
 Loading...