2. Replacement and adjustment of parts
27320
2/3
27320
Drive section
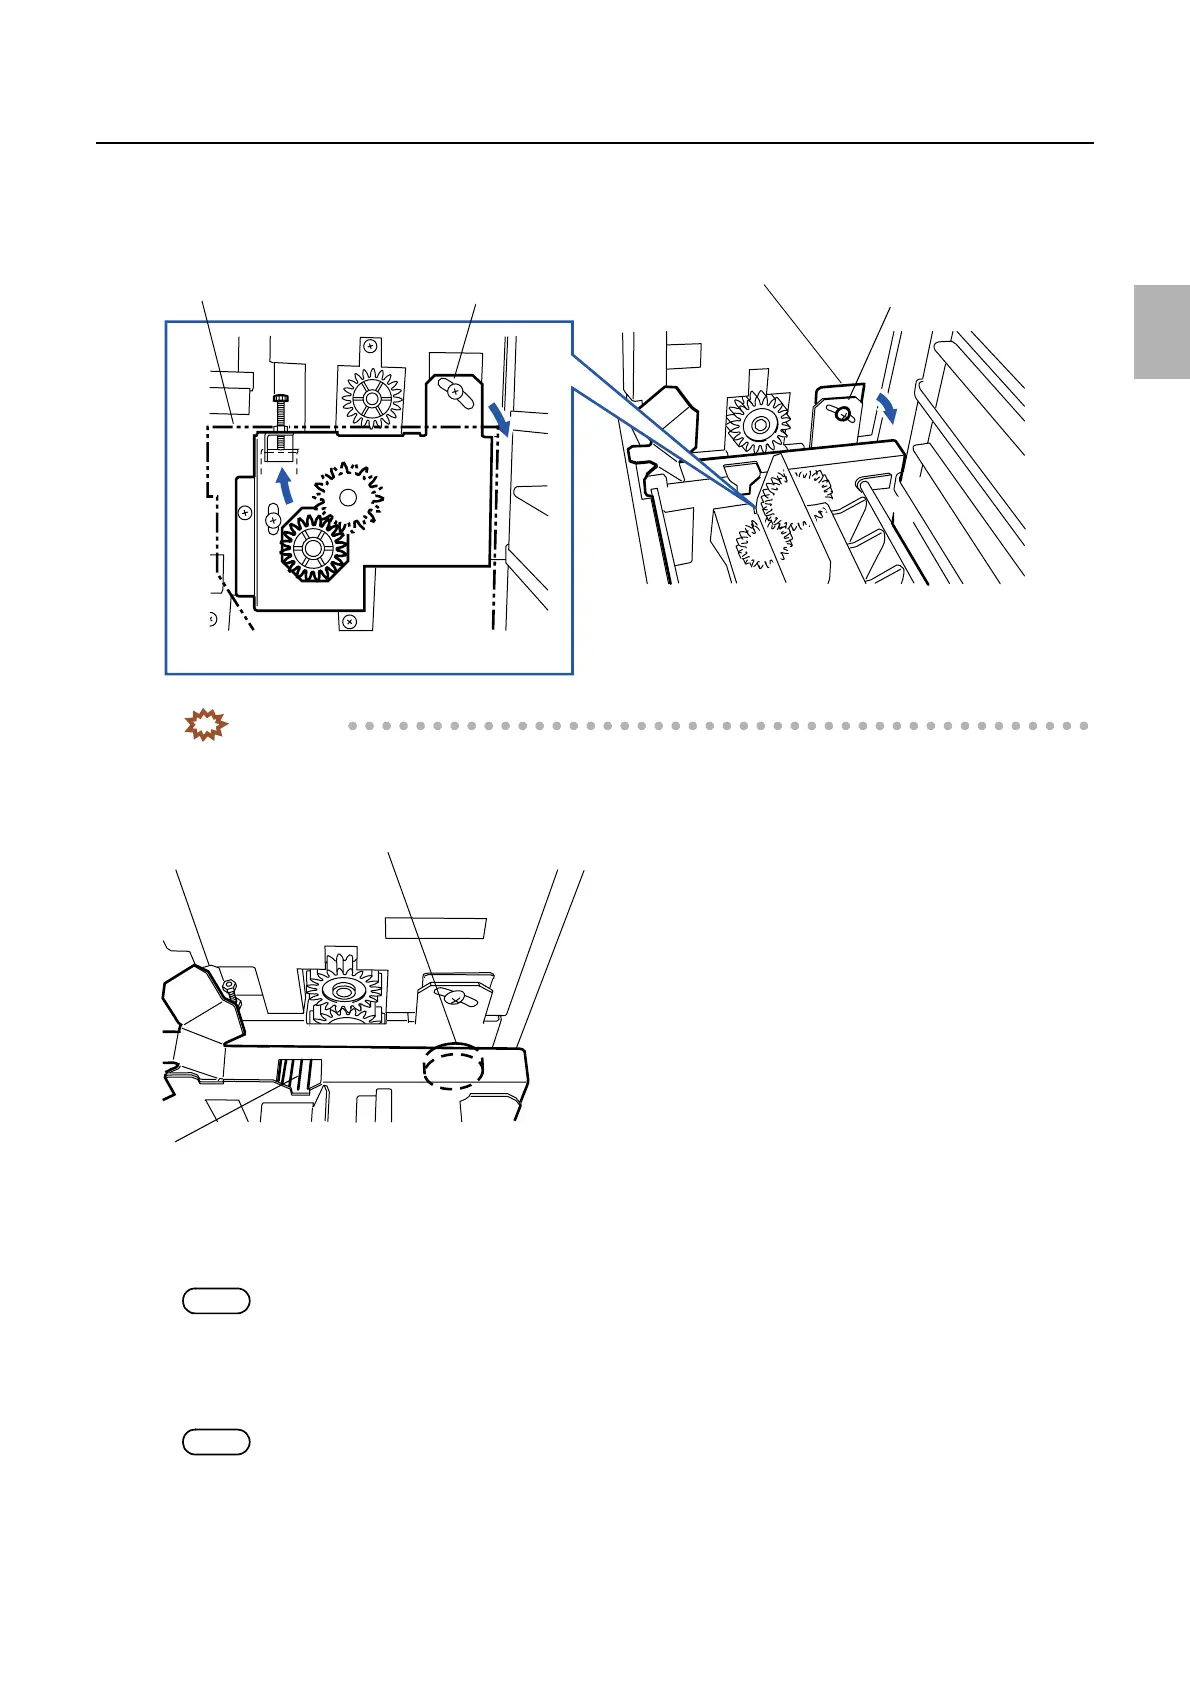
4. Move the gear adjusting plate by holding the top end of the plate, make the gear of the gear adjusting
plate to contact with the drive gear of the dryer rack, and then tight screw A temporarily.
IMPORTANT
• Rotate the knob and check that the both gears of the gear adjusting plate and the dryer unit (lower) are
engaged.
5. Remove the dryer rack (lower).
6. Tighten the adjusting screw until its end touches the C side of the gear adjusting plate.
NOTE
• The position of the adjusting bolt and the C side of the gear adjusting plate can be checked from the front hole.
• There is no such a hole for checking the position on some machines. In this case, adjust so that the tip of the bolt touches
the C side of the gear adjustment plate by yourself.
7. Loosen the screw A and rotate the adjusting bolt two times to the right, and tighten the lock nut.
NOTE
• The backlash between the gears can be secured about 0.5 mm by rotating the adjusting bolt two times to the right.
Dryer rack (lower)
Screw A
Screw A
Gear adjusting plate
G085390
The drive gear of the dryer rack (lower)
Knob
G054653
Distributed by: minilablaser.com