3. Mode
32515
2/2
32515
Setup
5. Carefully check the test print and perform adjustment as necessary.
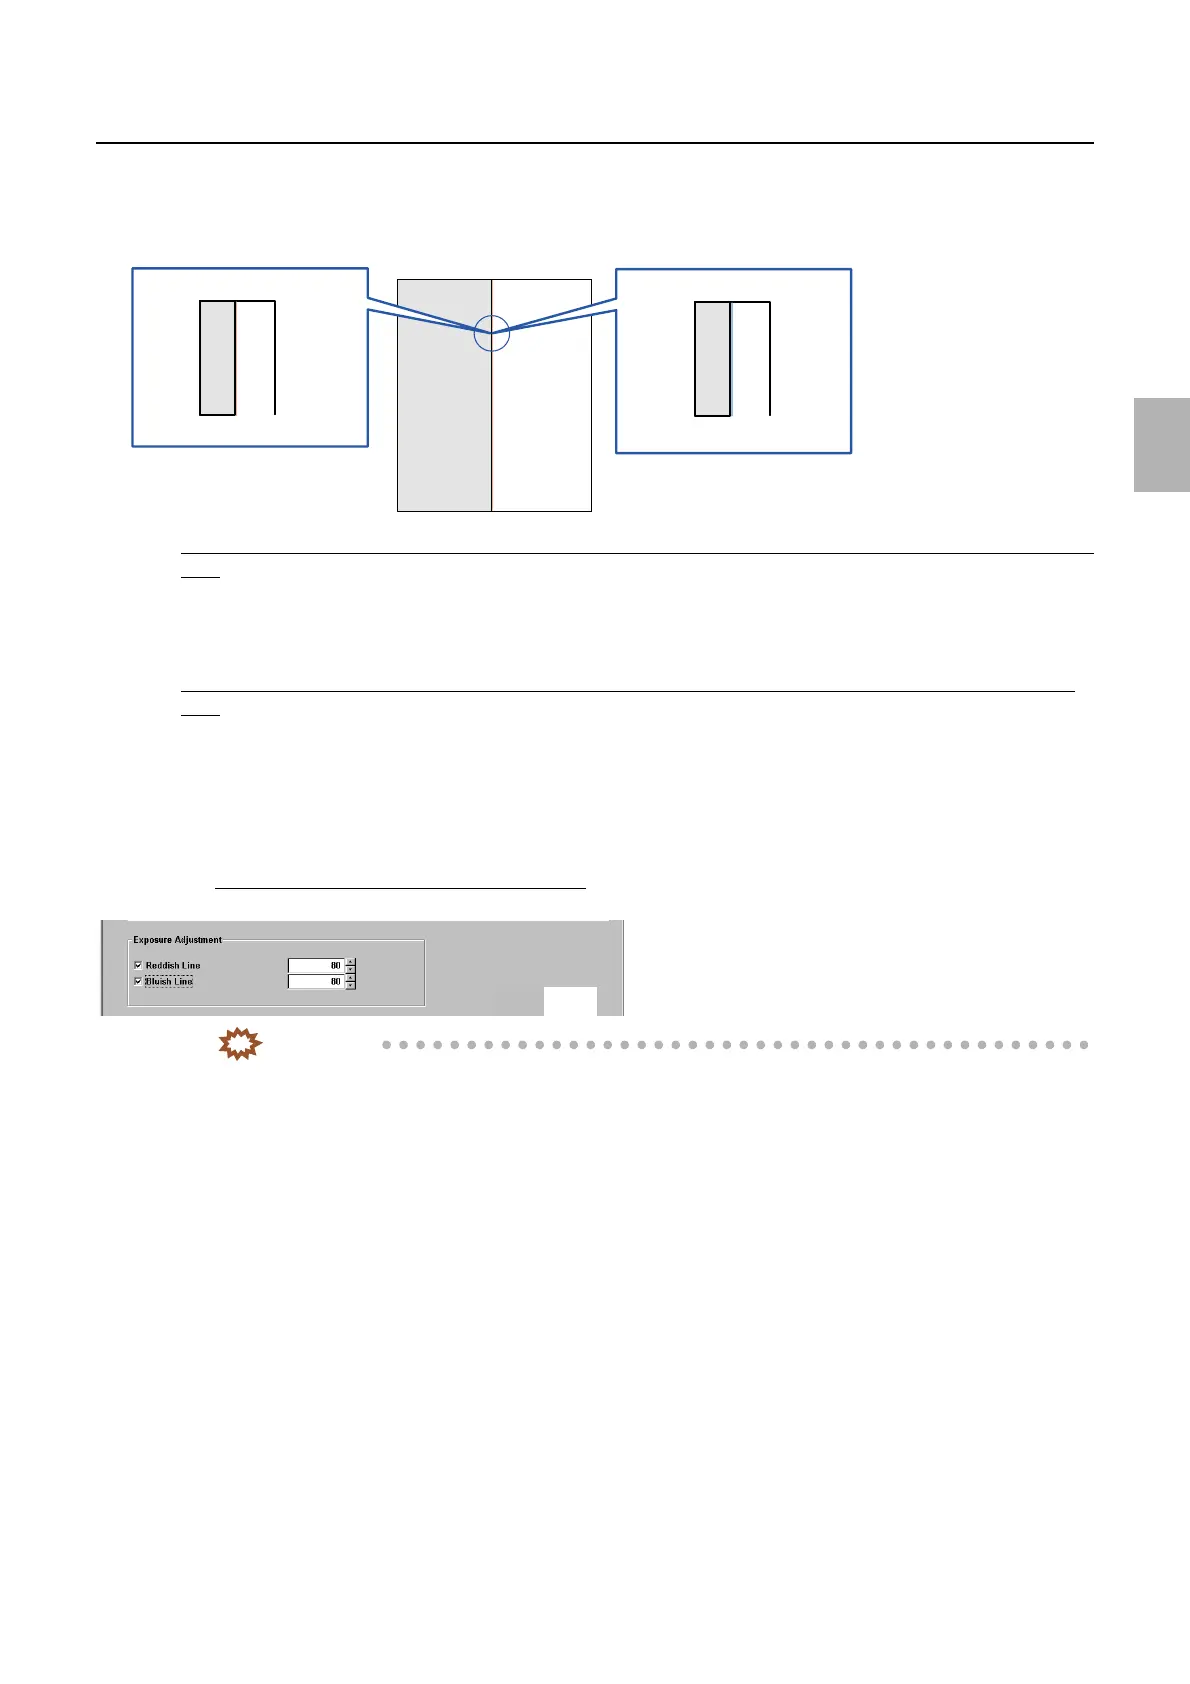
If a reddish or bluish line is not printed on the boundary line between the white and gray areas of the test
print
1. It is not necessary to select the Reddish Line or Bluish Line.
2. This completes Exposure Adjustment.
If a reddish or bluish line is printed on the boundary line between the white and gray areas of the test
print
1. Select the Red Line or Bluish Line, and click YES: OK.
2. Click Functions→Test Print.
3. If a reddish or bluish line is printed on the boundary line between the white and gray areas of the test print, increase the
correction value. Then click YES: OK.
Exposure Adjustment (input range: from 80 to 200)
IMPORTANT
• Increase the correction value for Exposure Adjustment by five as a guide.
• If Exposure Adjustment is required, Exposure Position Adjustment may not be performed normally.
☞36030
• Making a large correction for Exposure Adjustment may cause fog on white borders of prints.
4. Perform step 2 and step 3 until a reddish or bluish line is not printed on the test print.
5. This completes Exposure Adjustment.
6. Back up the data.
Reddish line
Bluish line
Test print
G085337
M5431-01
Distributed by: minilablaser.com