6. Electrical parts
68550
2/2
68550
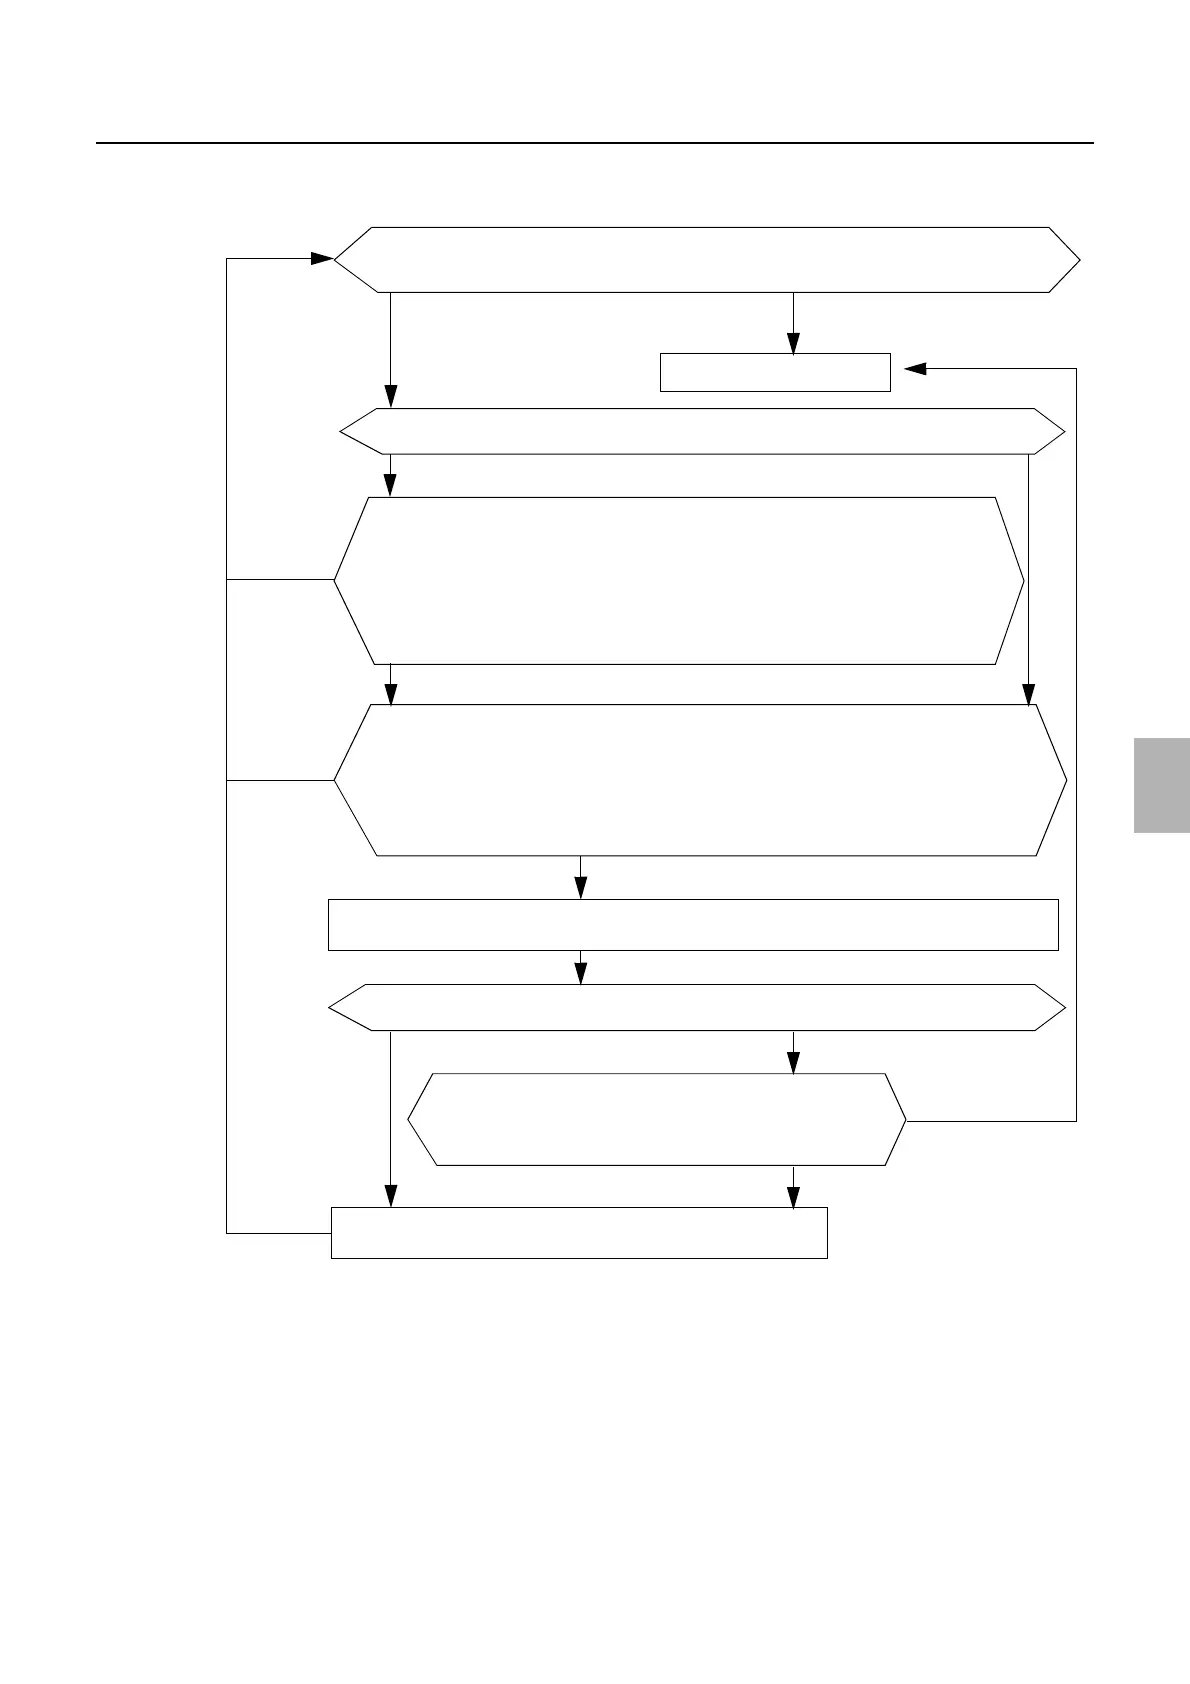
Power ON/OFF
!
!!
! Diagnosis
On
Off
Upgrade the software.
Turn off the power and remove the starter jumper. Turn on the power
again, and then check that LED9 of the processor relay PCB is ON.
There is a
problem.
There is a
problem.
Processor control PCB failure
Version can be checked.
No problem.
Version cannot be checked.
Check the version of processor via System Version Check.
Operating
Is LED9 on the processor relay PCB on?
On Off
Check if the connector is connected correctly, or cables are not disconnected.
J/P690 (processor relay PCB) ↔ J/P794 (processor power supply 2)
Check whether there is blown fuse.
F14, F15 (125 V/6.3 A) (processor relay PCB)
Check if the connector is connected correctly, or cables are not disconnected.
J/P646 (processor relay PCB) ↔ J/P355 (connecting) ↔ J/P238 (printer I/O PCB 1)
J/P646 (processor relay PCB) ↔ J/P355 (connecting) ↔ J/P433 (laser power supply), J/P432
(printer power supply 5)
Check the Processor relay PCB.
Check the Processor relay PCB.
Does each unit operate?
Not operating
No problem.
No problem.
Turn off the power supply and attach the starter jumper on the connector (P647) of processor relay PCB. Make
the main relay between 200 V and 240 V turn ON forcibly.
Repair or
replace
Distributed by: minilablaser.com