Section 4. System Quickstart
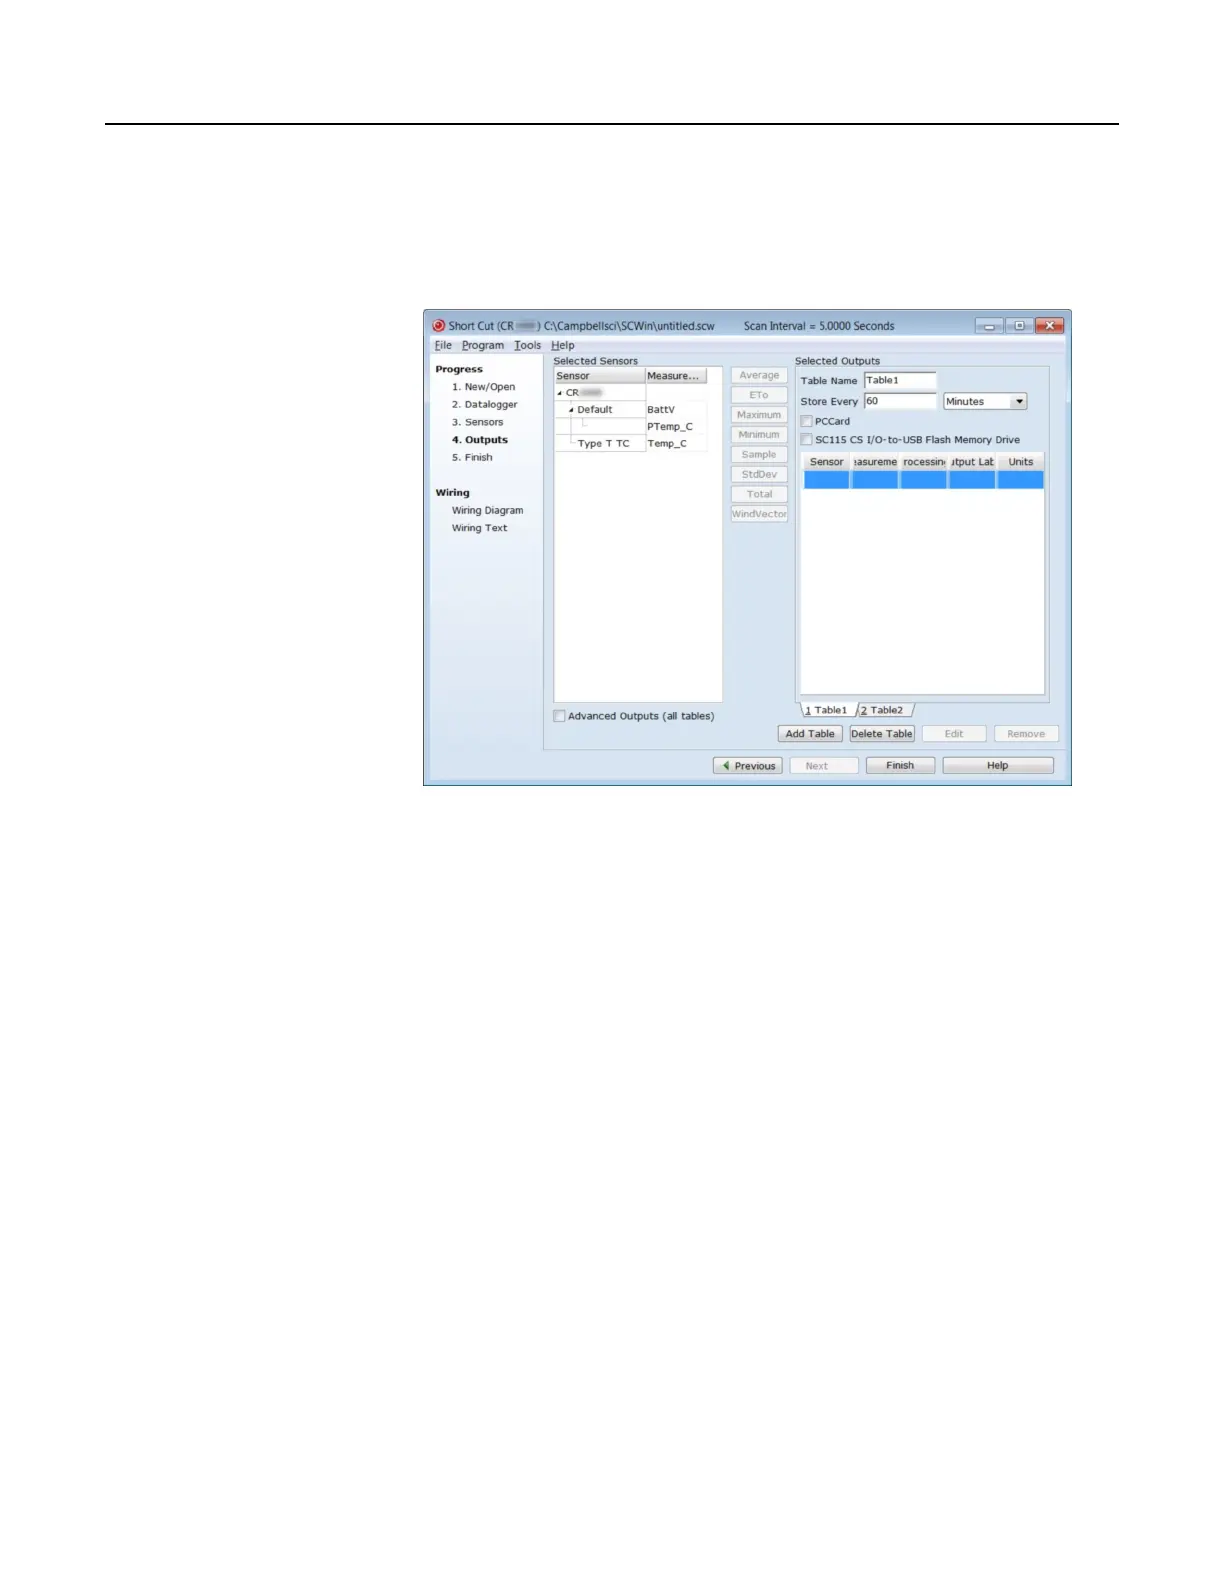
8. Click Next to advance to the Outputs tab, which displays the list Selected
Sensors to the left and data storage tables to the right under Selected Outputs.
Figure 7. Short Cut Outputs Tab
4.7.4.4 Procedure: (Short Cut Steps 9 to 12)
9. Two output tables (1 Table1 and 2 Table2 tabs) are initially available. Both
tables have a Store Every field and a drop-down list from which to select the
time units. These are used to set the time intervals when data are stored.
10. Only one table is needed for this tutorial, so Table 2 can be removed. Click 2
Table2, then click Delete Table.
11. Change the name of the remaining table from Table1 to OneMin, and then
change the Store Every interval to 1 Minutes.
12. Add measurements to the table by selecting BattV under Selected Sensors,
and then clicking Average in the center column of buttons. Repeat this
procedure for PTemp_C and Temp_C.
53
 Loading...