277Service Manual – CS7010™ 48 - Sweep System, Side Broom
Removal and Installation
CAUTION: Before removing or reinstalling any machine components, make sure the key switch is
off, the key is removed from the machine and the parking brake is engaged.
Side Broom Motor
1. Empty the hopper.
2. Make sure the parking brake is engaged.
3. Turn the key switch on and switch the machine to the Service Mode.
4. Raise the hopper so the side brooms are at a convenient working height, then support the hopper with
jack stands or other suitable supports.
CAUTION: Always make sure the raised hopper is adequately supported before performing any
work on or underneath the hopper.
5. Extend the side brooms in the Service Mode to access
the mounting hardware.
6. Open the hopper door.
7. Remove the side broom.
8. Disconnect the side broom motor electrical connector.
Note that you may need to cut the wire tie holding the
wires to the motor.
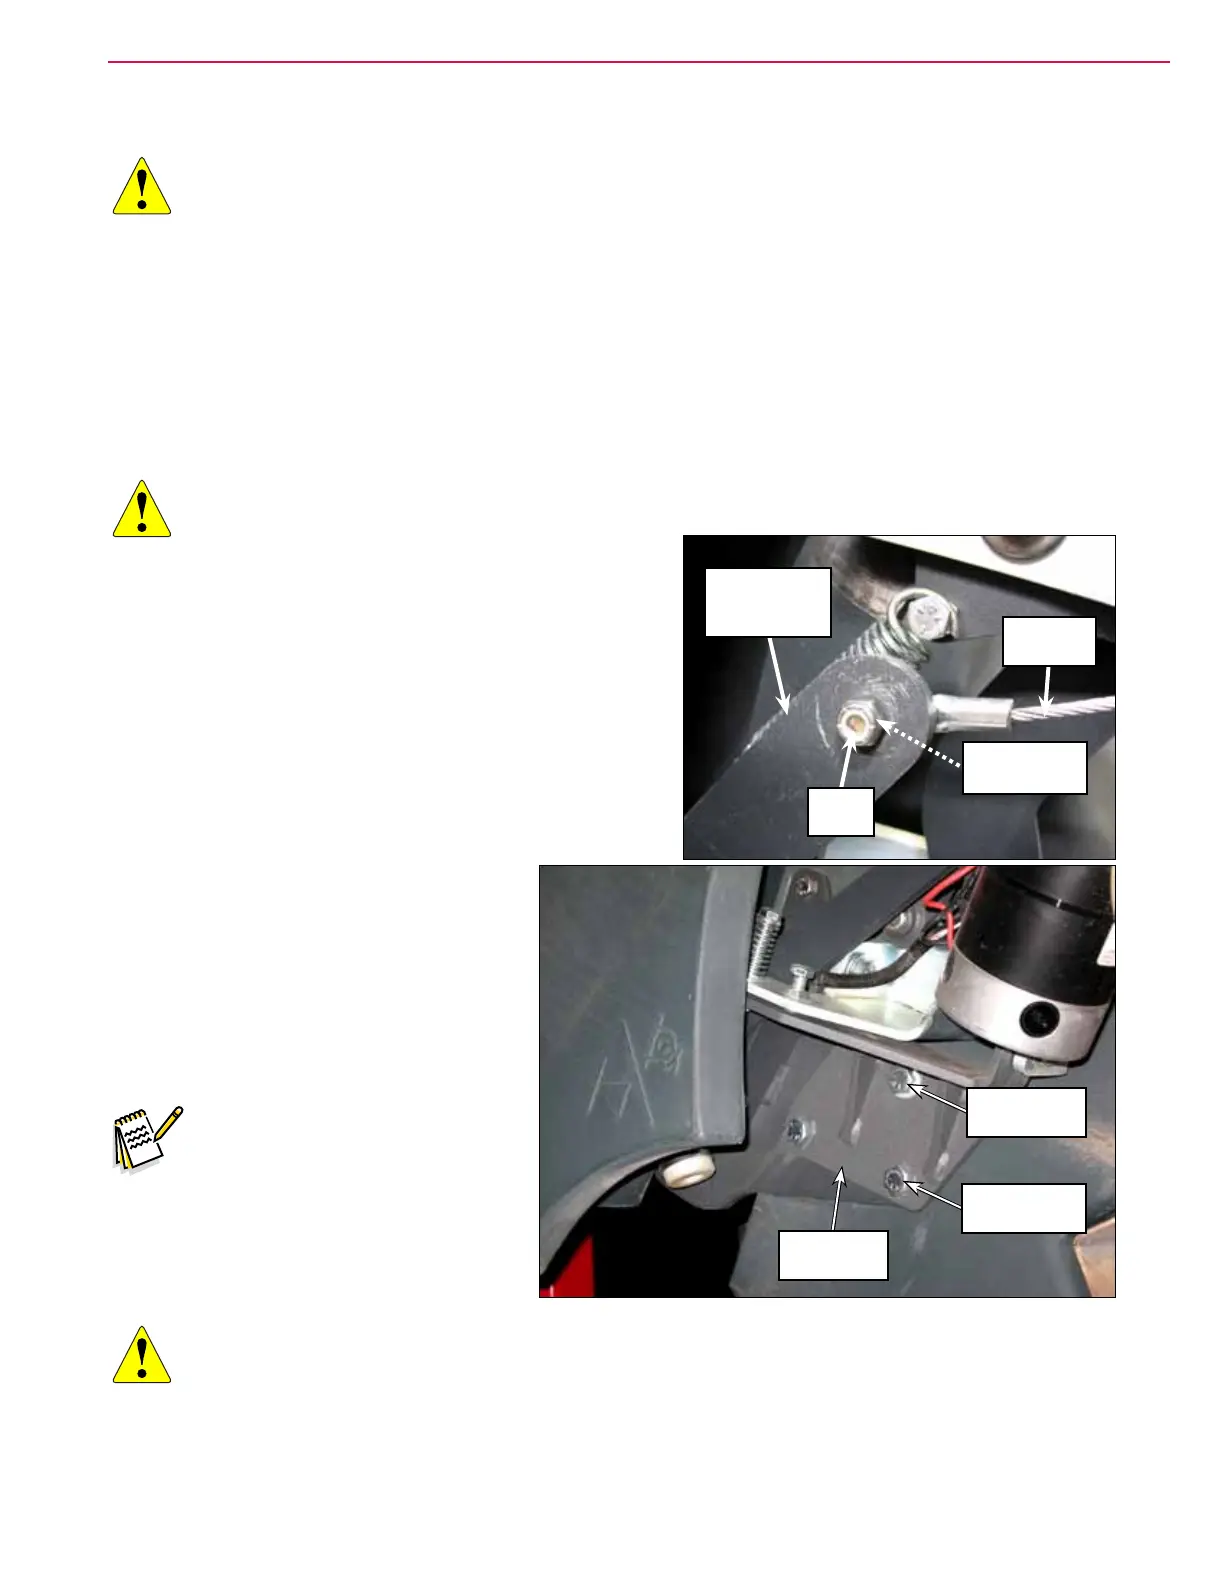
9. Remove the Phillips Screw and Nyloc® Nut holding
the Cable Assembly to the Arm on the Side Broom Lift
Weldment.
10. Slightly loosen the 1/2”-13 x .75” Hex
Screw. Note that this screw is threaded
directly into the hopper lift weldment.
11. Remove the two 1/2”-13 x 1.5” Hex
Screws, washers and Nyloc
®
nuts. Note
that the washers and Nyloc
®
nuts are
located inside the hopper.
Note: Removing the side broom
assembly is easier if one
person holds the side broom
assembly in place while
another person removes the
1/2”-13 x .75” Hex screw.
CAUTION: Handle the Side Broom Assembly carefully as you remove it from the machine. The
Motor Bracket Weldment and attached Motor Assembly are free to move on the Side
Broom Arm Assembly and can create pinch points.
Cable
Assembly
Arm on Side
Broom Lift
Weldment
Nyloc
®
Nut
Phillips Screw
(behind arm)
1/2”-13 x .75”
Hex Screw
1/2”-13 x 1.5”
Hex Screw (2)
Side Broom
Assembly