279Service Manual – CS7010™ 48 - Sweep System, Side Broom
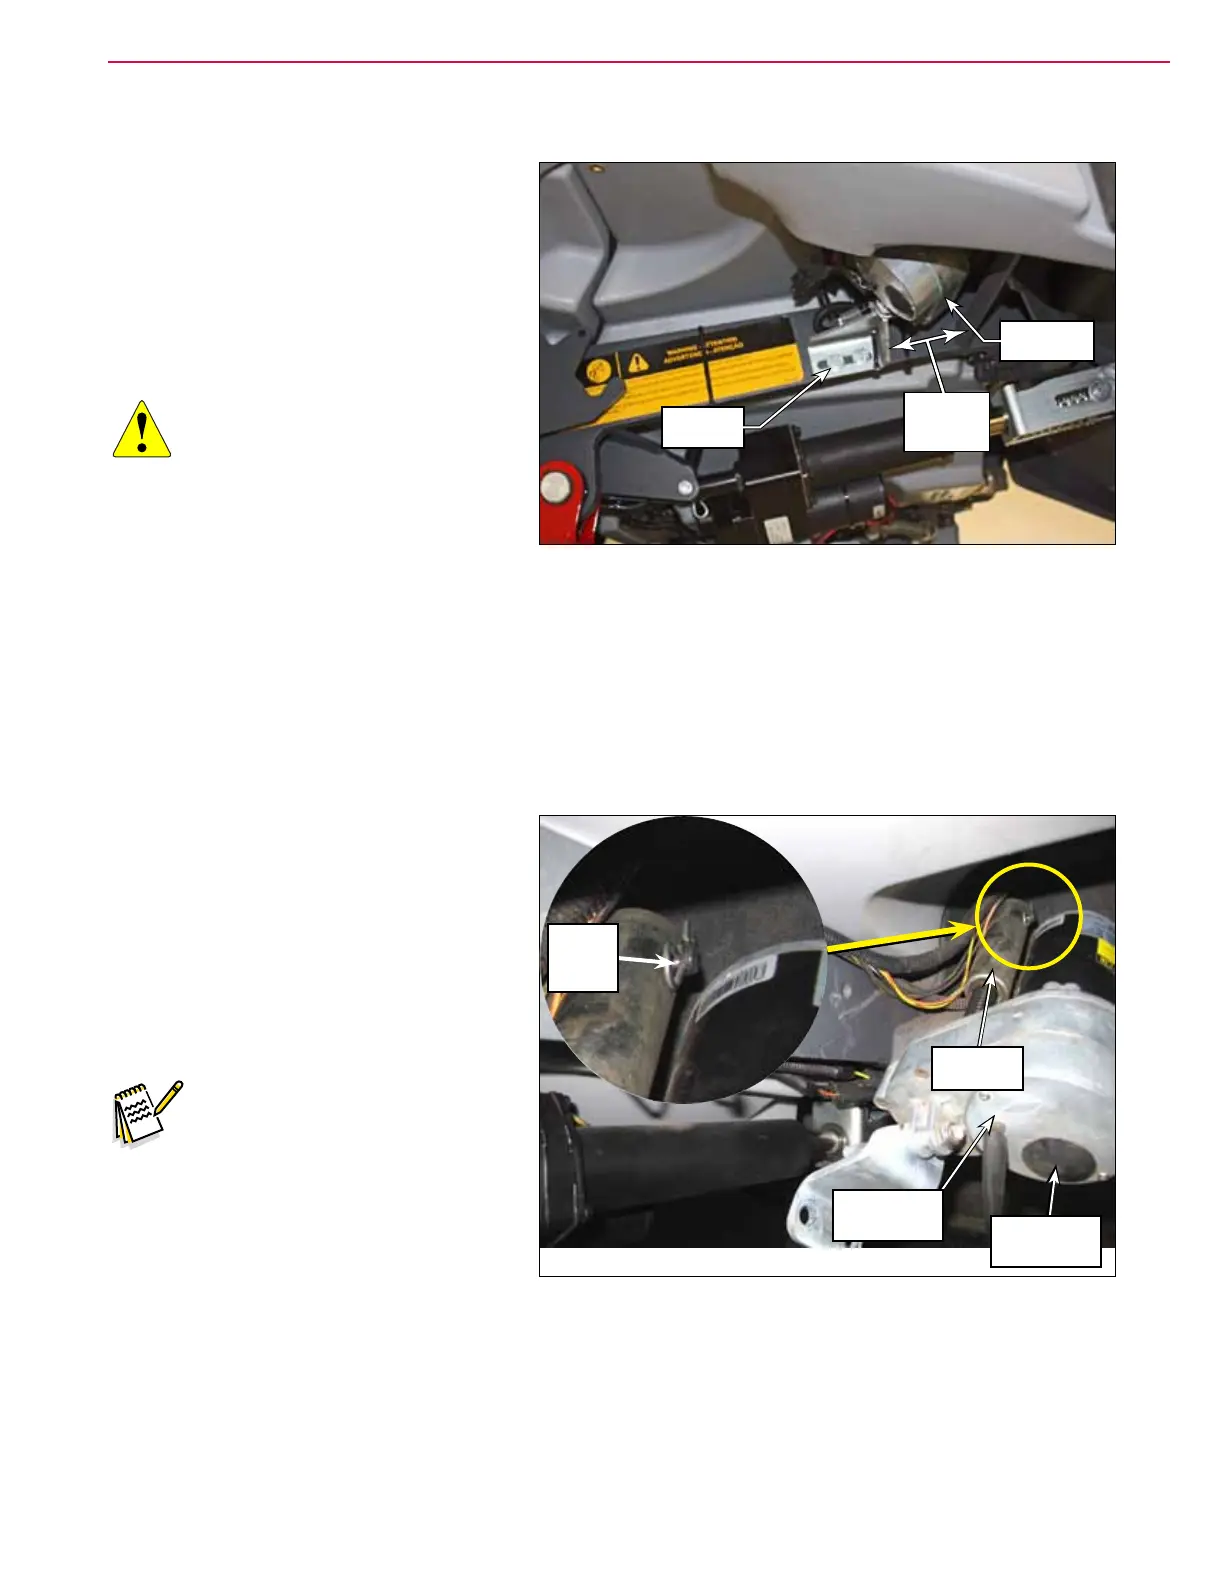
Side Broom Actuator
1. Empty the hopper and make sure the
parking brake is engaged.
2. Turn the key switch on and switch the
machine to the Service Mode.
3. Raise the hopper far enough to minimize
the weight of the side brooms on the
actuator, then support the hopper with
jack stands or other suitable supports.
CAUTION: Always make sure the
hopper is adequately
supported before
performing any work on
or underneath the hopper.
4. Cut the wire tie and disconnect the side
broom actuator electrical connector.
5. Remove the two 3/8”-16 x .75” Screws holding the actuator bracket to the hopper lift frame.
• Note the position of the bracket for later replacement. The bracket should be 3 inches away from the
frame, as shown above.
6. Extend the side brooms in the service mode to extend the side broom actuator. This will give you some
additional clearance for better access to the hair cotter pin holding the side broom actuator to the side
broom lift weldment.
7. Use a long needle-nose pliers to remove
the Hair Cotter Pin, then slide the Side
Broom Actuator off of the pin on the side
broom lift weldment and remove it from
the machine.
8. Reinstall the Side Broom Actuator by
following the above steps in reverse
order.
Note: Be careful not to rotate the
drive nut cylinder on the
side broom actuator when
it’s disconnected from the
machine. This can change
the extended and retracted
positions of the side broom
actuator, and the subsequent
extended and retracted
positions of the side brooms.
3 Inch
(76mm)
Mounting
Screws
Side Broom
Actuator
Hair
Cotter
Pin
Side Broom
Actuator
Adjustment
Cover
Drive Nut
Cylinder