Do you have a question about the Crescent CS7010 and is the answer not in the manual?
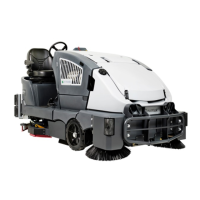
Overview of the CS7010 sweeper/scrubber, its capabilities, and model variants.
Defines the manual's role as a resource for service personnel.
Records changes and updates made to the service manual.
Lists related manuals and information sources for Nilfisk-Advance equipment.
Explains terms and references used in the manual for clarity.
Details requirements for performing repairs and obtaining parts.
Locates and describes the machine's identification nameplate.
Explains hazard symbols used in the manual for safety recognition.
Provides essential safety warnings and precautions for operating the machine.
Lists important guidelines to prevent damage to the machine and property.
Details the procedure for engaging and disengaging the hopper prop rod.
Provides safety precautions and guidelines for lifting the machine.
Outlines procedures and safety measures for transporting the machine.
Explains the correct procedures and precautions for towing the machine.
Lists essential tools required for troubleshooting and repair.
Lists key technical specifications for various CS7010 models.
Provides dimensional data for the machine.
Details torque specifications for fasteners used in machine assembly.
Outlines recommended maintenance intervals for optimal machine performance.
Lists specific lubricants, fluids, and materials for servicing the machine.
Details regular maintenance tasks to be performed on the machine.
Identifies key lubrication points on the machine for proper upkeep.
Provides procedures for maintaining the EcoFlex detergent system.
A checklist for periodic maintenance inspections and defect tracking.
Overview of the CS7010 control panel layout and component grouping.
Details the function of various miscellaneous controls on the panel.
Explains the operation and functions of the scrub system controls.
Describes the operation and functions of the sweep system controls.
Details the operation and functions of the hopper control buttons.
Explains the indicators and icons displayed on the OLED screen.
Describes the steer-by-wire system and steering wheel operation.
Explains the function of the drive and brake pedals.
Overview of the CS7010's distributed controller network.
Illustrates the interconnections of the machine's control system components.
Details the function and role of the system's power modules.
Explains the CAN Bus communication protocol used in the machine.
Identifies the physical locations of key control system components.
Describes how to program the Main Machine Controller for machine functions.
Procedure for entering Service Mode to access advanced configurations.
Explains how to navigate through the machine's menu system.
Provides an overview of the available programming menu options.
Displays machine operating time for various functions.
Lists active and past machine faults for troubleshooting.
Provides access to diagnostic tools for machine troubleshooting.
Allows manual control of system functions for testing purposes.
Verifies the functionality of control panel switches, LEDs, and display pixels.
Allows adjustment of machine settings for specific uses and needs.
Enables configuration of machine options based on installed equipment.
Displays firmware revision and control board serial number.
Procedure for updating the machine's firmware via USB.
Lists and explains error codes reported by controllers for diagnostics.
Details fault codes and conditions specific to the A1 Main Controller.
Lists fault codes and conditions for the A2 Power Module.
Lists fault codes and conditions for the A3 Power Module.
Lists fault codes and conditions for the A4 Drive Controller.
Lists fault codes and conditions for the A5 Steering Controller.
Details operating conditions required for various device outputs.
Procedure for removing and installing the Main Machine Controller.
Provides pinout specifications and shop measurements for the J1 connector.
Provides pinout specifications and shop measurements for the J2 connector.
Specifies pinout and voltage/condition data for A2 Power Module 1.
Specifies pinout and voltage/condition data for A3 Power Module 2.
Describes the chassis as the primary structural backbone of the machine.
Details the non-traction wheel system and its brake components.
Provides instructions for adjusting the machine's brake system.
Lists common problems and solutions related to wheels and brakes.
Outlines procedures for removing and installing wheels and bearings.
Procedure for removing and installing the machine's wheel.
Details the removal and installation of wheel bearings.
Procedure for removing and installing the brake and spindle assembly.
Overview of the traction drive system components.
Describes the 3-phase AC induction motor used for traction drive.
Explains the function and setup of the drive pedal potentiometer.
Details the InMotion AC Superdrive controller for the drive motor.
Explains the circuit operation of the drive controller.
Describes the sequence for powering up the drive controller.
Explains the communication between the drive controller and main controller.
Identifies the physical locations of drive system components.
Covers maintenance and adjustment procedures for the drive system.
Procedure for checking and changing the gearbox oil.
Procedure for adjusting the drive pedal neutral position.
Lists common problems and solutions for the drive system.
References fault codes for the A4 Drive Controller.
Provides steps for removing and installing the drive motor and gearbox.
Procedure for removing and installing the drive motor and gearbox.
Procedure for removing and installing the drive wheel.
Procedure for removing and installing the drive controller.
Lists specifications for drive system components.
Provides shop measurements for the drive controller.
Overview of the steer-by-wire system and its components.
Describes the function and location of steering limit switches.
Details the 3-phase AC permanent magnet remotely commutated steering motor.
Explains the commutation process using a resolver for steering motor feedback.
Describes the steering wheel position sensor and Torque Feedback Device.
Details the operation and function of the steering controller.
Illustrates the steering system's wiring and component connections.
Identifies the physical locations of steering system components.
Lists common steering system problems and their solutions.
References fault codes for the A5 Steering Controller.
Guides troubleshooting based on observed steering system symptoms.
Troubleshooting steps for issues related to steering resistance.
Diagnosing steering issues related to resistance and drive wheel position.
Procedure for testing the steering system's limit switches.
Provides steps for removing and installing steering components.
Procedure for removing and installing the steering wheel sensor and TFD.
Procedure for removing and installing the steering controller.
Procedure for removing and installing the steering actuator motor.
Lists specifications for steering system components.
Provides shop measurements for the steering controller.
Details pinouts and voltage measurements for the steering controller.
Describes the CS7010's electrical system and power configurations.
Details the layers of circuit protection within the machine's electrical system.
Explains power supply that remains active when the machine is off.
Describes power that is activated by the ignition switch.
Details the function of the alternator in providing power and charging.
Information on standard and optional lighting systems.
Explains the system's protection against low battery voltage.
Identifies the physical locations of electrical system components.
Describes the battery interlock switch and bypass jumper.
Details the battery setup for hybrid machine models.
Overview of circuit protection elements and system control.
Illustrates the layout and components within the electrical panel.
Shows locations of key harness connectors for system integration.
Provides pinout and wire color details for the J1 connector.
Provides pinout and wire color details for the J2 connector.
Provides pinout and wire color details for the J3 connector.
Provides pinout and wire color details for the J4 connector.
Provides pinout and wire color details for the J5 connector.
Provides pinout and wire color details for the J6 connector.
Details the pinout for the X113 Hopper Harness 2.
Details the pinout for the X112 Hopper Harness 1.
Provides pinout information for the X45 Engine Interface connector.
Provides pinout information for the X98 Steering Motor connector.
Provides pinout information for the X91/92 Wheel Drive Motor connectors.
Details the pinout for the X56 Steering Wheel Position Sensor.
Details the pinout for the X82 Main Broom Actuator connector.
Details the pinout for the X130 Dump Door Actuator connector.
Details the pinout for the X85 Vacuum Motor Harness.
Details the pinout for the X99 Tail Light Harness.
Details the pinout for the X47 Foot Pedal connector.
Details the pinout for the X124 Shaker Motor connector.
Details the pinout for the X107 Main Broom connector.
Details the pinout for the X104 Right Brush connector.
Details the pinout for the X106 Center Brush connector.
Details the pinout for the X105 Left Brush connector.
Details the pinout for the X48 Foot Brake connector.
Details the pinout for the X57 Beacon connector.
Details the pinout for the X84 Extended Scrub Level connector.
Details the pinout for the X86 Backup Alarm connector.
Details the pinout for the X87 Squeegee Actuator connector.
Details the pinout for the X93 Left Limit Switch connector.
Details the pinout for the X94 Right Limit Switch connector.
Details the pinout for the X100 Deck Actuator connector.
Details the pinout for the X101 Extended Scrub Pump connector.
Details the pinout for the X102 Solution Control Pump connector.
Details the pinout for the X103 Low Pressure Pump connector.
Details the pinout for the X114 Dust Guard Valve connector.
Details the pinout for the X115 Dust Guard Pump connector.
Details the pinout for the X123 Dust Fan connector.
Details the pinout for the X125 Left Side Broom connector.
Details the pinout for the X127 Left Headlight connector.
Details the pinout for the X132 Side Broom Actuator connector.
Details the pinout for the X133 Right Side Broom connector.
Details the pinout for the X135 Dump Door Closed Switch connector.
Details the pinout for the X136 Right Headlight connector.
Describes the function and operation of K1 and K5 relays.
Covers maintenance tasks for the electrical system.
Instructions for charging the battery on battery-powered models.
Information on the generator drive belt tension and adjustment.
Diagnoses common electrical system issues.
Troubleshooting steps for a non-charging alternator/generator.
Troubleshooting battery life issues on battery models.
Troubleshooting battery life issues on hybrid models with engine off.
Procedure for removing and installing the alternator-generator drive belt.
Steps for removing and installing the alternator-generator drive belt.
Procedure for removing the alternator-generator assembly.
Introduction to understanding wiring diagrams and schematics.
Explains how to interpret and navigate wiring schematics.
Describes how to use tags and coordinates for referencing drawings.
Explains common symbols used in electrical schematics.
Details specific symbols for control board inputs and outputs.
Explains how components are identified within schematics.
Describes different types of switches and their schematic representation.
Explains how relays are represented and function in schematics.
Presents the electrical schematic of the main controller.
Part 1 of the main controller's electrical schematic.
Part 2 of the main controller's electrical schematic.
Electrical schematic for the A2 Power Module #1.
Electrical schematic for the A3 Power Module #2.
Electrical schematic for the A4 Drive Controller.
Electrical schematic for the A5 Steering Controller.
Electrical schematic for the Kubota Diesel Engine System.
Electrical schematic for the Kubota Gasoline Engine System.
Part 1 of the Kubota LEV Engine System electrical schematic.
Part 2 of the Kubota LEV Engine System electrical schematic.
Electrical schematic detailing Trackclean system connections.
Diagrams illustrating the routing of main wiring harnesses.
Wiring diagram for the main harness, section 1.
Wiring diagram for the main harness, section 2.
Wiring diagram for the main harness, section 3.
Wiring diagram for the hopper harness.
Wiring diagram for the LEV engine interface harness.
Wiring diagram for glow plug, vacuum, and tail light systems.
Wiring diagram for engine battery and generator harnesses.
Wiring diagram for the Trackclean harness.
Overview of the Kubota propane LEV engine and its systems.
Explains the operation of key engine circuits.
Describes the control circuit for the engine starter.
Explains how the engine RPM is managed by the ECU and controller.
Procedure for normal engine shutdown via the key switch.
Details engine shutdown modes for overheating or low oil pressure.
Identifies key components of the LPG LEV engine.
Covers maintenance tasks for the LPG LEV engine.
Provides a checklist for routine LPG LEV engine maintenance.
Procedure for changing engine oil and oil filter.
Procedure for changing engine coolant.
Guidance on inspecting the air filter using the service indicator.
Procedure for replacing the engine's air filter elements.
Diagnoses common issues with the LPG LEV engine management system.
Details troubleshooting the engine management system using KGST software.
Procedure for checking the engine's spark system.
Procedure for checking the LPG primary pressure.
Procedure for removing and installing the engine assembly.
Steps for removing and reinstalling the complete engine assembly.
Lists technical specifications for the LPG LEV engine.
Lists special tools required for engine system diagnostics and maintenance.
Overview of the Kubota Diesel engine and its systems.
Describes the control circuit for the engine starter.
Explains the control circuit for the fuel pump.
Details engine shutdown modes for overheating or low oil pressure.
Explains the automatic shutdown mechanism for engine overheating.
Explains the automatic shutdown mechanism for low oil pressure.
Describes how the engine RPM is controlled via the Woodward governor.
Diagnoses common issues with the diesel engine management system.
Lists and explains fault codes for the APECS governor control system.
Explains the operation of the glow plug system for cold starting.
Identifies key components of the diesel engine.
Provides a maintenance schedule for the diesel engine.
Outlines recommended maintenance intervals for the diesel engine.
Procedure for changing engine oil and oil filter.
Procedure for changing engine coolant.
Procedure for replacing the diesel engine's fuel filter.
Procedure for bleeding air from the diesel fuel system.
Guidance on inspecting the air filter using the service indicator.
Procedure for replacing the diesel engine's air filter elements.
Diagnoses common diesel engine starting problems.
Troubleshooting steps when the starter does not engage.
Troubleshooting steps when the engine cranks but does not start.
Diagnostic step to check the governor control system status.
Diagnostic step to check the fuel actuator's resistance and function.
Diagnostic step to check the fuel system for contamination and pressure.
Diagnostic step to check the mechanical engine for issues.
Troubleshooting engine speed control issues.
Procedure for testing engine cylinder compression.
Procedure for removing and installing the engine assembly.
Procedure for installing the engine RPM sensor.
Steps for removing and reinstalling the complete engine assembly.
Lists technical specifications for the diesel engine.
Specifications for the diesel engine's fuel pump.
Specifications for the diesel engine's glow plugs.
Specifies engine compression values for diesel models.
Specifies the engine oil capacity for diesel models.
Recommends API classifications and SAE viscosity for engine oil.
Provides engine oil viscosity recommendations based on temperature.
Recommends coolant mixture for the engine's cooling system.
Specifies the recommended coolant mixture for the engine.
Specifies the pressure rating for the radiator cap.
Provides shop measurements for engine RPM sensor and actuator.
Lists resistance and output measurements for the engine RPM sensor.
Lists resistance measurement for the engine actuator.
Details the diesel compression gauge and its components.
Specifies the fitting for glow plug threads used with compression testing.
Describes the coupler required for connecting the compression test components.
Overview of the Kubota gasoline engine and its systems.
Explains the operation of key engine circuits.
Details the components and operation of the ignition system.
Describes the control circuit for the engine starter and choke.
Explains different modes for engine throttle control.
Describes the machine state when the ignition is off.
Describes the machine state when the ignition is on.
Explains the engine cranking sequence and related circuits.
Describes the engine operation during normal running conditions.
Explains how engine RPM is controlled via the Woodward actuator.
Details engine shutdown modes for overheating or low oil pressure.
Explains the automatic shutdown mechanism for engine overheating.
Explains the automatic shutdown mechanism for low oil pressure.
Identifies key components of the gasoline engine.
Identifies components located at the front of the engine.
Identifies components located at the right side of the engine.
Identifies components located at the left side of the engine.
Identifies components located at the back of the engine.
View showing components on the right side of the engine.
View showing components on the back side of the engine.
View showing components on the left side of the engine.
Shows the location and components of the fuel tank system.
Provides a maintenance checklist for the gasoline engine.
Outlines daily, periodic, and annual maintenance tasks for the engine.
Procedure for changing engine oil and oil filter.
Procedure for changing engine coolant.
Guidance on inspecting the air filter using the service indicator.
Procedure for replacing the engine's air filter elements.
Diagnoses common engine starting and running problems.
Procedure for checking the engine's spark system.
Troubleshooting steps when the starter does not engage.
Troubleshooting steps when the engine cranks but has no spark.
Troubleshooting steps when the engine cranks but does not start with spark.
Troubleshooting engine RPM control issues.
Procedure for removing and installing the engine assembly.
Procedure for installing the engine RPM sensor.
Steps for removing and reinstalling the complete engine assembly.
Lists technical specifications for the gasoline engine.
Specifies engine oil capacity, type, and viscosity recommendations.
Specifies the recommended coolant mixture for the engine.
Provides shop measurements for ignition system components.
Lists specifications for the ignition system components.
Overview of the solution system and its components.
Describes the function of the solution system in delivering water/detergent.
Explains solution flow control for non-EcoFlex machines.
Explains solution flow control for EcoFlex machines.
Details the EcoFlex detergent injection system.
Describes the operation of the extended scrub system.
Details the optional hot water system for EcoFlex models.
Describes the optional wash hose kit and its operation.
Details the optional high-pressure spray system for LP and Diesel models.
Explains the function and display of the solution level sensor.
Illustrates the wiring for the solution system components.
Explains the operation of the solution system circuits.
Details the operation and requirements of the extended scrub system.
Explains the EcoFlex detergent injection system using solenoid pumps.
Identifies the physical locations of solution system components.
Locates the solution tank and its drain hose.
Locates the solution filter and shutoff valve and their functions.
Explains the solution level detection via pressure sensor.
Locates the solution pump for EcoFlex models.
Locates the optional low pressure wash hose pump.
Describes the solution solenoid valve and its maintenance.
Locates the solution nozzles on the scrub deck.
Describes the location and function of EcoFlex detergent bottles and pumps.
Details the high-pressure spray system pump driven by an electric clutch.
Covers maintenance and adjustment procedures for the solution system.
Procedure for cleaning the solution filter screen.
Procedure for cleaning the extended scrub system strainer.
Procedure for cleaning the high pressure solution filter.
Procedure for adjusting belt tension on the high-pressure pump.
Diagnoses common problems with the solution system.
Troubleshooting steps for inadequate solution flow during scrubbing.
Troubleshooting steps for lack of detergent flow.
Troubleshooting issues with the optional hot water system.
Troubleshooting steps when the high-pressure spray system is inactive.
Troubleshooting issues with the low-pressure wash hose.
Procedure for removing and installing the solution tank.
Steps for removing and installing the solution tank.
Procedure for removing and installing the solution shutoff valve.
Procedure for removing and installing the solution filter assembly.
Procedure for removing and installing the solution solenoid valve.
Procedure for removing and installing the EcoFlex detergent pump.
Lists technical specifications for solution system components.
Overview of the scrub system components and operation.
Describes the function of the scrub system.
Illustrates the wiring for the main and side broom scrub systems.
Explains the operation of the scrub system circuits.
Details the operation of the scrub deck actuator motor.
Identifies the physical locations of scrub system components.
Locates the scrub motor assemblies and their gearboxes.
Describes the right swingarm, gas spring, and service access.
Describes the side squeegee assemblies and their components.
Details the scrub deck actuator and its mounting.
Covers maintenance and adjustment procedures for the scrub system.
Procedure for replacing the leading deck blade.
Procedure for replacing the trailing deck blade.
Procedure for removing and installing the side squeegee assembly.
Steps for removing and reinstalling the side squeegee assembly.
Procedure for removing and installing the scrub deck actuator.
Procedure for adjusting the scrub deck actuator's retracted position.
Procedure for removing and reinstalling the scrub motor.
Procedure for inspecting and replacing scrub motor carbon brushes.
Lists technical specifications for scrub system components.
Overview of the squeegee system and its function.
Describes how the squeegee picks up and directs solution.
Illustrates the wiring for the squeegee and recovery systems.
Identifies the physical locations of squeegee system components.
Locates the side brooms on the machine.
Locates the side broom motor assemblies and gearboxes.
Locates the side broom actuator and describes its function.
Covers maintenance and adjustment procedures for the squeegee system.
Procedure for changing the front and rear squeegee blades.
Procedure for replacing the front squeegee blade.
Procedure for replacing the rear squeegee blade.
Maintenance task for lubricating squeegee end wheels.
Maintenance task for greasing squeegee caster wheel bearings.
Procedure for adjusting the squeegee's tilt angle.
Procedure for adjusting the height of squeegee casters.
Diagnoses common problems with the squeegee system.
Troubleshooting steps for poor water pick-up by the squeegee.
Procedure for removing and installing the squeegee lift actuator.
Steps for removing and installing the squeegee lift actuator.
Procedure for adjusting the squeegee lift actuator's retracted position.
Procedure for removing and installing the squeegee support assembly.
Procedure for removing and installing the squeegee lift arm.
Lists technical specifications for squeegee system components.
Lists material and hardness specifications for squeegee blades.
Lists specifications for the squeegee lift actuator.
Recommends a spring puller for squeegee assembly removal.
Overview of the recovery system and its function.
Describes how the recovery system picks up solution and directs it to the tank.
Illustrates the wiring for the recovery and squeegee systems.
Identifies the physical locations of recovery system components.
Locates the recovery tank and its drain hose.
Locates the recovery tank cover and debris basket.
Describes the vacuum fan cover assembly and its components.
Locates the vacuum motors within the fan cover assembly.
Describes the float cage and ball assemblies for preventing water intake.
Covers maintenance procedures for the recovery system.
Procedure for cleaning the vacuum filter and filter screen.
Procedure for cleaning the debris basket.
Diagnoses common problems with the recovery system.
Troubleshooting steps when a vacuum motor fails to run.
Troubleshooting steps for poor water pick-up performance.
Procedure for removing and installing the recovery tank.
Steps for removing and reinstalling the recovery tank.
Procedure for removing and installing the vacuum motor.
Lists technical specifications for vacuum system components.
Lists a special tool for vacuum system measurements.
Overview of the main sweep system components and operation.
Describes the function of the main sweep system.
Illustrates the wiring for the main broom and side broom circuitry.
Explains the operation of the main broom actuator and motor circuits.
Details the function and control of the main broom actuator.
Describes the operation of the main broom motor.
Identifies the physical locations of main broom components.
Locates the main broom, motor, and lift actuator assembly.
Covers maintenance and adjustment procedures for the main sweep system.
Procedure for adjusting the main broom's operating height.
Procedure for adjusting the main broom's tilt angle for sweep pattern.
Procedure for removing and installing the main broom.
Steps for removing and reinstalling the main broom.
Procedure for replacing the main broom.
Procedure for removing and reinstalling the broom motor.
Procedure for inspecting and replacing main broom motor carbon brushes.
Lists technical specifications for main broom motor and actuator.
Overview of the side broom system and its function.
Describes how side brooms direct debris and their operation.
Illustrates the wiring for side broom and main broom systems.
Identifies the physical locations of side broom components.
Locates the side brooms on the machine.
Locates the side broom motor assemblies and gearboxes.
Locates the side broom actuator and describes its function.
Covers maintenance procedures for the side broom system.
Procedure for replacing the side broom.
Procedure for inspecting and replacing side broom motor carbon brushes.
Procedure for removing and installing the side broom motor.
Steps for removing and reinstalling the side broom motor.
Procedure for removing and reinstalling the side broom hub assembly.
Procedure for removing and installing the side broom actuator.
Lists technical specifications for side broom system components.
Overview of the dust control system and its function.
Describes how the dust control system filters dust and sprays water.
Details the impeller and filter assembly for dust control.
Describes the optional DustGuard spray system for dust suppression.
Illustrates the wiring for the dust control and hopper systems.
Identifies the physical locations of dust control system components.
Locates the impeller and filter system components.
Describes the function and location of the dust control filter switch.
Describes the DustGuard pump, solenoid valve, and spray nozzles.
Covers maintenance procedures for the dust control system.
Procedure for cleaning the dust control filter.
Procedure for cleaning the DustGuard strainer screen.
Procedure for cleaning the DustGuard spray nozzles.
Procedure for adjusting the spray angle of the DustGuard nozzles.
Diagnoses common problems with the dust control system.
Troubleshooting steps when the DustGuard system is inactive.
Troubleshooting steps for inadequate water flow to DustGuard nozzles.
Procedure for removing and installing dust control system components.
Procedure for removing and installing the DustGuard solenoid valve.
Procedure for removing and installing the dust control filter switch.
Procedure for removing and installing the DustGuard pump.
Procedure for removing and installing the impeller assembly.
Lists technical specifications for dust control system components.
Overview of the hopper system and its functions.
Describes the hopper's role in collecting debris and its lift mechanism.
Describes the upper and lower hopper components and their connection.
Locates and describes the hydraulic power pack assembly.
Illustrates the wiring for the hopper and dust control systems.
Identifies the physical locations of hopper system components.
Locates the upper and lower hopper assemblies.
Locates the hydraulic power pack assembly and its function.
Describes the hopper dump door and its purpose.
Details the electric actuator for the hopper dump door.
Describes the proximity sensor that detects the closed dump door.
Describes the hopper interlock switch and its function.
Explains the safety mechanism for working under the raised hopper.
Covers maintenance and adjustment procedures for the hopper system.
Procedure for changing and flushing the hydraulic oil.
Procedure for adjusting the dump door actuator's potentiometer and position.
Procedure for adjusting the dump door's open position.
Procedure for removing and installing the hydraulic power pack assembly.
Steps for removing and installing the hydraulic power pack assembly.
Procedure for removing and installing the hopper lift cylinder.
Procedure for removing and installing the hopper interlock switch.
Procedure for removing and installing the hopper dump door actuator.
Lists technical specifications for hopper system components.
Describes the seat belt kit option.
Describes the recovery tank clean out kit option.
Describes the back-up alarm kit option.
Describes the fire extinguisher kit option.
Describes the LED brake and turn signal kit option.
Describes the rear corner roller kit option.
Describes the hopper temperature sensor kit option.
Describes the plugged filter switch kit option.
Describes the high-pressure pump kit for engine-powered hybrids.
Describes the front corner roller kit option.
Describes the extended scrub kit option.
Describes the EcoFlex chemical injection kit.
Describes the overhead guard kit with standard clearance.
Describes the overhead guard kit with low clearance.
Describes the overhead guard canopy kit.
Describes the deluxe seat kit with seat belt and arm rest.
Describes the hot water scrub kit with heat exchanger.
Describes the front bumper kit and its components.
Describes the super duty kit components.
Describes the spray wash hose kit and its operation.
Describes the overhead guard beacon kit.
Describes the warning beacon kit.
Describes the solution fill shut-off kit for tank filling.
Describes the vacuum wand kit accessory.
Describes the accessory socket kit for powering electronics.
Describes the drain hose extension accessory.
Describes the arm rest option for the seat.
| Model | CS7010 |
|---|---|
| Category | Scrubber |
| Power Source | Electric |
| Type | Walk-behind |
| Brush Deck Size | 710 mm |
| Frequency | 60 Hz |
| Brush Width | 710 mm |