2. Replacement and adjustment of parts
27830
2/4
27830
Replenishment package unit
6. Adjust each VR depending on each LED condition which is off.
!
!!
! VR adjustment procedure of SM I/O PCB
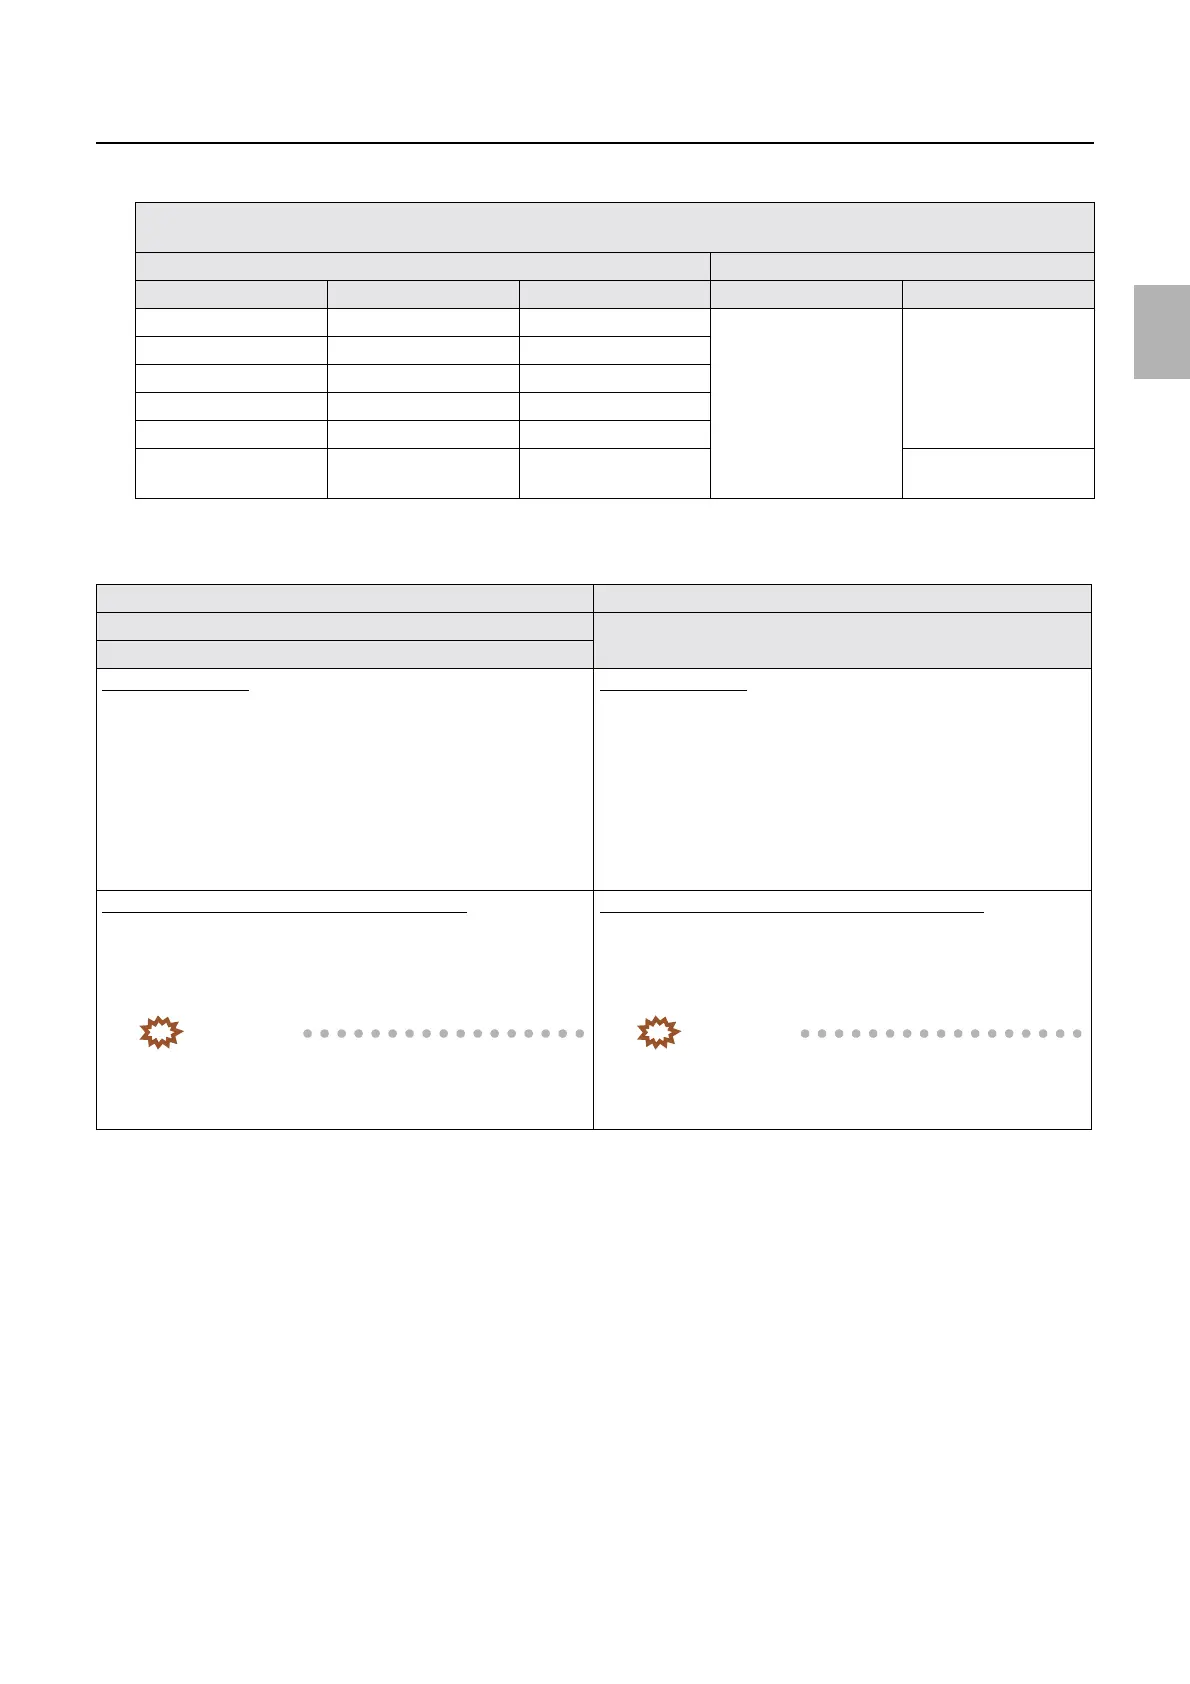
• Replenishment solution sensor sensitivity adjustment method varies depending on the part number and VR number of the
mounted SM I/O PCB.
Details about SM I/O PCB SM I/O PCB part number
Chemical VR No. LED No. J391191, J390330 J391378
CD-A VR1 LED1
☞Adjustment
procedure 1
☞Adjustment
procedure 2
CD-B VR2 LED2
CD-C VR3 LED3
STB VR4 LED4
BF-A VR5 LED5
BF-B VR6 LED6
☞Adjustment
procedure 1
Adjustment procedure 1 Adjustment procedure 2
• J391191, J390330 (adjustment method for VR1 to VR6)
• J391378 (adjustment method for VR6) • J391378 (adjustment method for VR1 to VR5)
Adjusting procedure
1. Adjust each VR depending on each LED condition which is
off.
1. If turning the VR clockwise less than twice from the
leftmost position turns LED on, carry out
☞If LED turns
on by turning the VR less than twice:.
2. If turning VR clockwise twice or more from the left most
position turns LED on, carry out
☞If LED turns on by
turning the VR twice or more:.
Adjusting procedure
1. Adjust each VR depending on each LED condition which is
off.
1. If turning the VR clockwise less than one-half from the
leftmost position turns LED on, carry out
☞It LED turns
on by turning the VR less than one-half:.
2. If turning clockwise the VR one-half or more from the left
most position turns LED on, carry out
☞If LED turns on
by turning the VR one-half:.
If LED turns on by turning the VR less than twice:
1. If turning the VR of each replenishment solution sensor
clockwise less than twice from the leftmost position turns on
LED, return the VR to the leftmost position, and turn it
clockwise three times.
IMPORTANT
• This includes the case when LED turns on while the
VR is at the leftmost position.
2. Reassemble the parts as they were.
It LED turns on by turning the VR less than one-half:
1. If turning the VR of each replenishment solution sensor
clockwise less than one-half from the leftmost position turns
on the LED, return the VR to the leftmost position, then turn it
clockwise twice.
IMPORTANT
• This includes the case when LED turns on while the
VR is at the leftmost position.
2. Reassemble the parts as they were.
Distributed by: minilablaser.com