2/3
3. Mode
36060
36060
Printer Mechanical Adjustment
!
!!
! Adjusting procedure
1. Check that the zigzagging adjustment of the exposure advance unit has been completed.
☞36080
2. Check that the zigzagging adjustment of the magazine mount has been completed.
☞22100
3. Check that the right angle adjustment of the cutter unit has been finished.
See ☞ The right angle adjustment of the cutter unit in 25620.
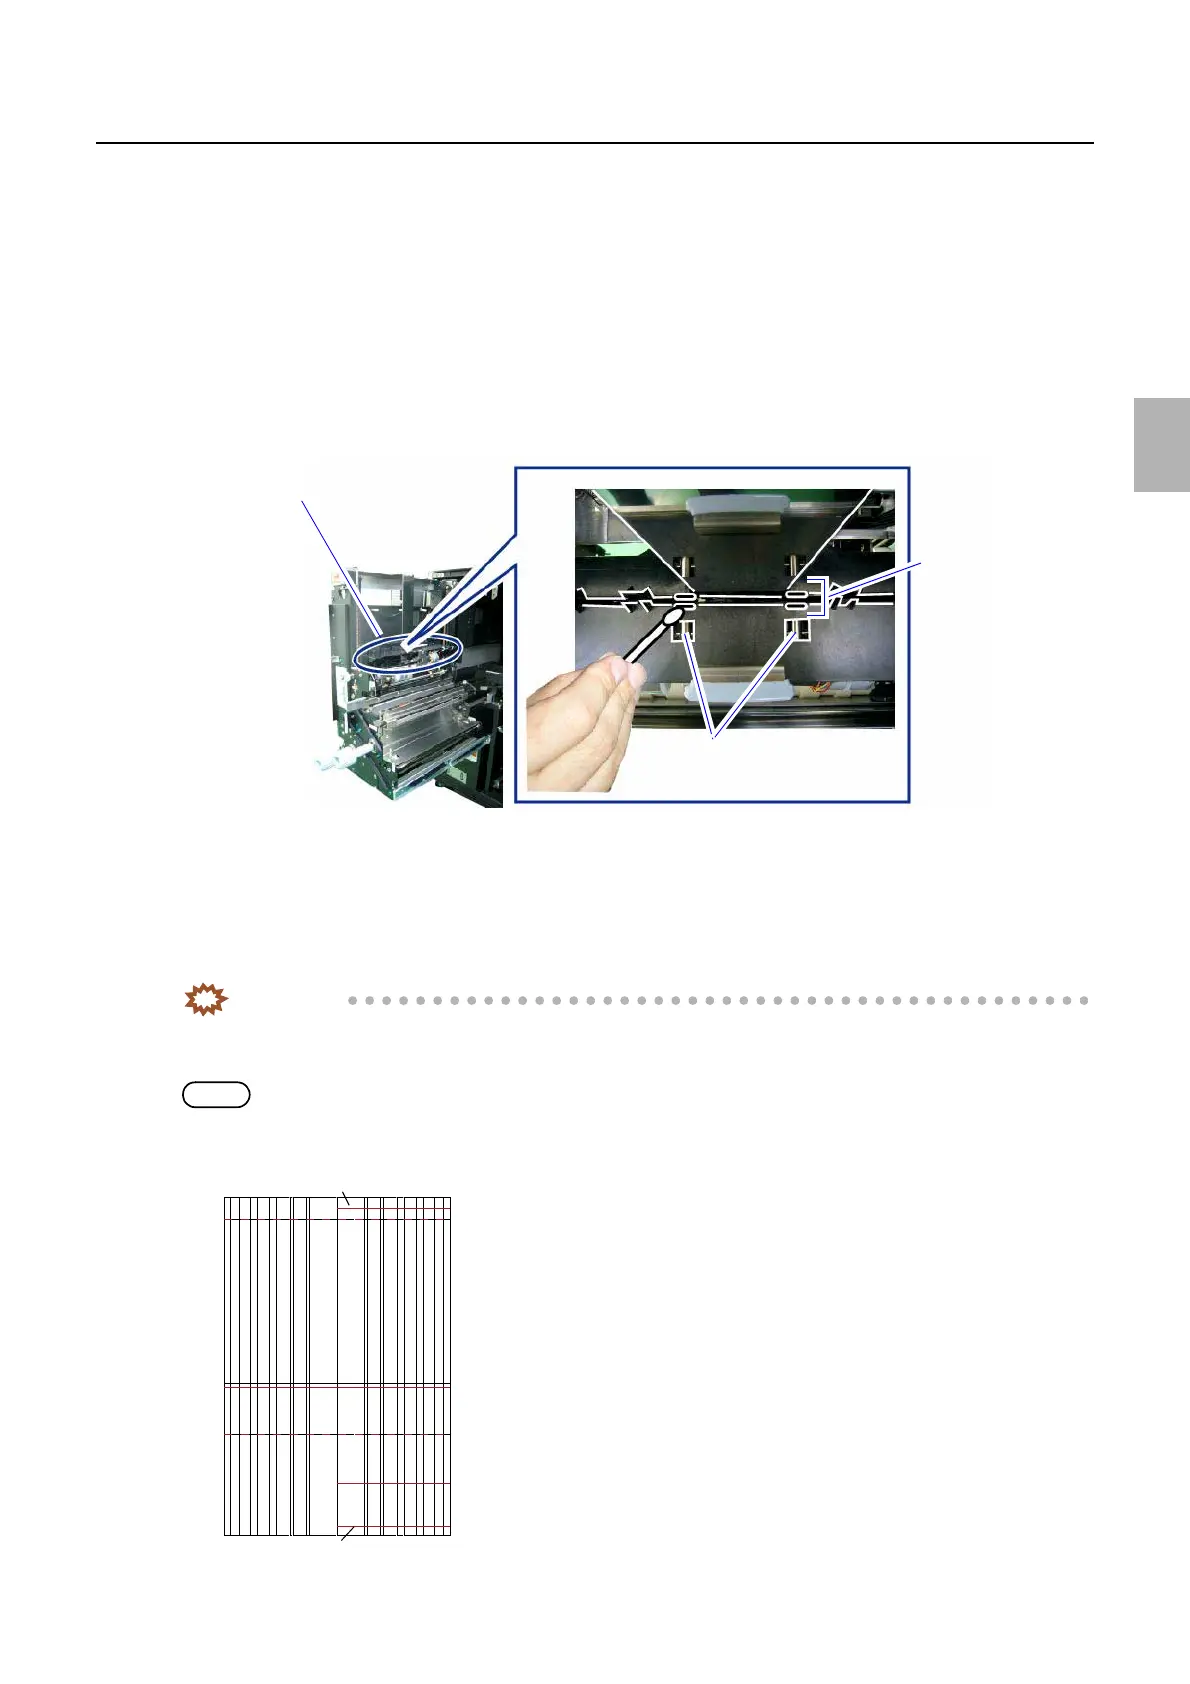
4. Clean pressure pins of arm unit 1 with cotton swab. (two places)
Insert cotton swab into the space of arm unit 1 to clean the pins.
5. Attach the paper magazine to be carry out arm unit 1 zigzagging correction to magazine mount
A/A2/B/C.
6. Select paper magazine A/A2/B/C.
7. Execute Test Print 1 or Test Print 2 of F: Functions.
8. Measure the difference of lines A and C on the second test print. And input the value to (A−C).
IMPORTANT
• Input the correction value in millimeter (mm).
• Use a scale to measure the dimensions of lines A and C on the test print.
NOTE
• When the measured values of the test print are line A: 121 mm and C: 120 mm, for example, see the below.
• Line A (121 mm) − Line C (120 mm) = Correction value A − C (1 mm)
Arm unit 1
Pressure pins
Clean the space.
G089218
A
BC
Line A
Line C
G085491
Distributed by: minilablaser.com