6. Electrical parts
66007
2/7
66007
Description of PCB (printer section)
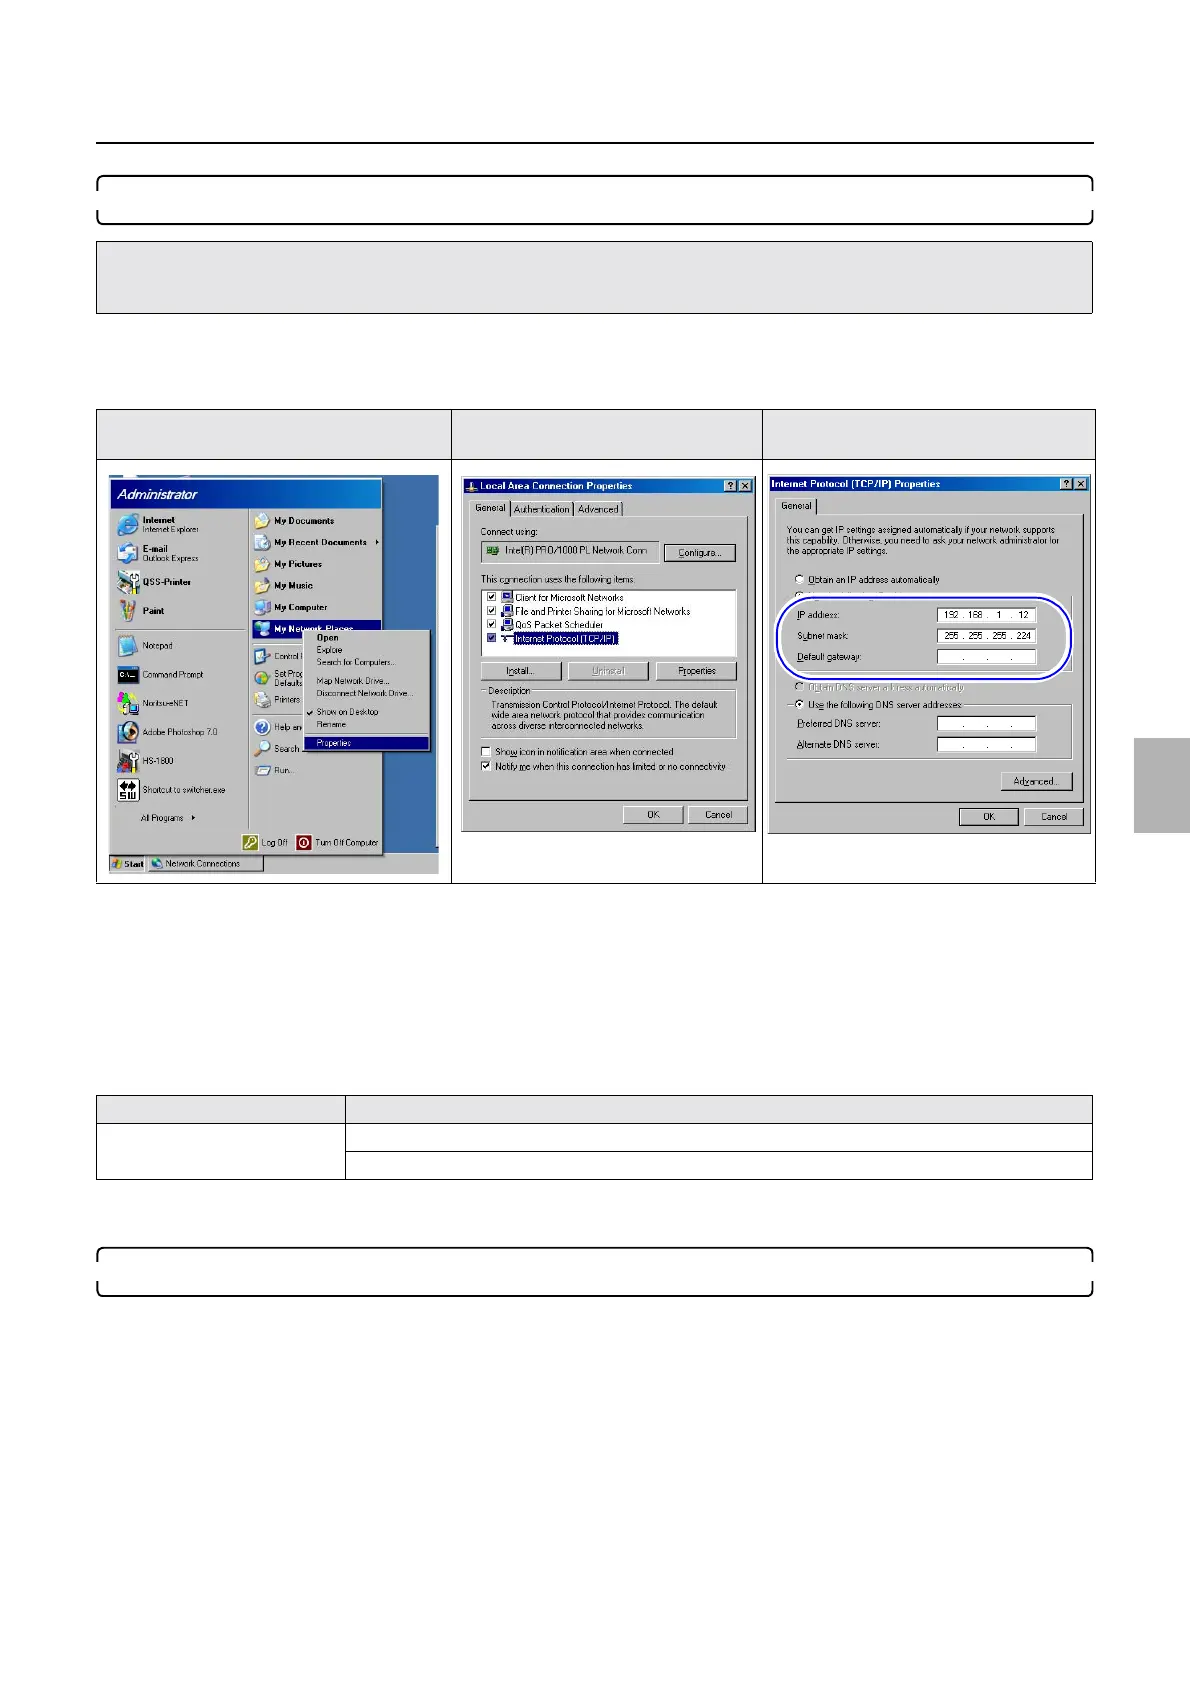
7. Confirm the network setting of the operation PC.
Bringing up the display
Start → Right-click My Network Place. → Click Properties. → Right-click Local Area Connection. → Click Properties. →
Local Area Connection Properties
(1) Select Internet Protocol (TCP/IP).
(2) Click Properties.
(3) Write down IP Address, Subnet mask and Default gateway.
(4) Change IP Address, Subnet mask , and Default gateway of the operation PC to connect IP Address : 192 .
168 . 1 . 11, Subnet mask : 255 . 255 . 255 . 224 and Default gateway : No setting of the printer I/F main
PCB.
(5) Click OK.
8. Perform Output Device Registration.
Bringing up the display
Start → All Programs → Select FRONTIER-Printer. → Click Output Device Registration.
• If the settings of IP Address: 192 . 168 . 1 . 11, Subnet mask: 255 . 255 . 255 . 224 and Default gateway: 0 . 0 . 0 . 0 (default settings
of the printer I/F main PCB when shipping) of Machine Specification noted in Step 1 before replacing the printer I/R main PCB are
not changed, go to Step 9.
Start→My Network Place Protocol of the Local Area
Connection
Protocol of the Internet Protocol
(TCP/IP)
Example
Operation PC IP Address : 192 . 168 . 1 . 12, Subnet mask : 255 . 255 . 255 . 224
Default gateway : No setting
Distributed by: minilablaser.com