2/3
2. Replacement and adjustment of parts
25910
25910
Exposure advance unit
!
!!
! Banding shooting
Print condition Banding position Status Corrective action Refer to
All Around 0 to 11 mm from the
paper leading edge
The bumper rubber for the laser control
box is detached.
Attach the bumper
rubber.
-
The exposure advance unit vibrates
during printing operation.
Attach the reinforcement
angle bracket to the
exposure advance unit.
☞25810
At the area 33.5 mm from the
paper leading end
The pressure of the exit side pressure
roller in the exposure advance unit is
uneven.
Adjust the zigzagging of
the exposure advance
unit.
☞25830
• The advance belt is removed from
the pressure guide.
• The advance belt of the pressure
guide is damaged.
Check the condition of
the advance belt of the
pressure guide.
☞20110
Around 17 mm from the
paper rear edge
The inlet side pressure roller release
amount of the exposure advance unit is
too small.
Perform the paper
pressure operation
correction.
☞36090
Around 26 mm from the
paper rear edge
The inlet side pressure roller release
amount of the exposure advance unit is
too big.
Around 24 to 27 mm from
the paper rear edge
The pressure of the inlet side pressure
roller in the exposure advance unit is
uneven.
Adjust the zigzagging of
the exposure advance
unit.
☞25830
Banding is generated over
the print in a cycle (210 mm).
The belt tension of exposure advance
motor 2 belt is maladjusted.
Check exposure advance
motor 2 belt.
☞20110
Banding is generated over
the print in a cycle (55 mm).
Whole of the print (no
repetition)
The screws of the exposure advance unit
are loose.
Tighten the screws of the
exposure advance unit.
☞25810
External vibration is applied to the
system.
--
All jack bolts are not effective. Check the level of the
printer.
-
The strength of the floor is insufficient. - -
The banding cannot
be found on the first
and the last prints in
the Continuous
Print. The banding
cannot be found on
the print when only
one print is made.
Around 55 mm from the
paper rear edge
The bumper rubber for the laser control
box is detached.
Attach the bumper
rubber.
-
around 45 to 48 mm from the
paper rear edge
IMPORTANT
• This banding occurs
when a paper is being
exposed while the
next paper to expose
is advanced from the
paper supply unit to
the exposure advance
unit.
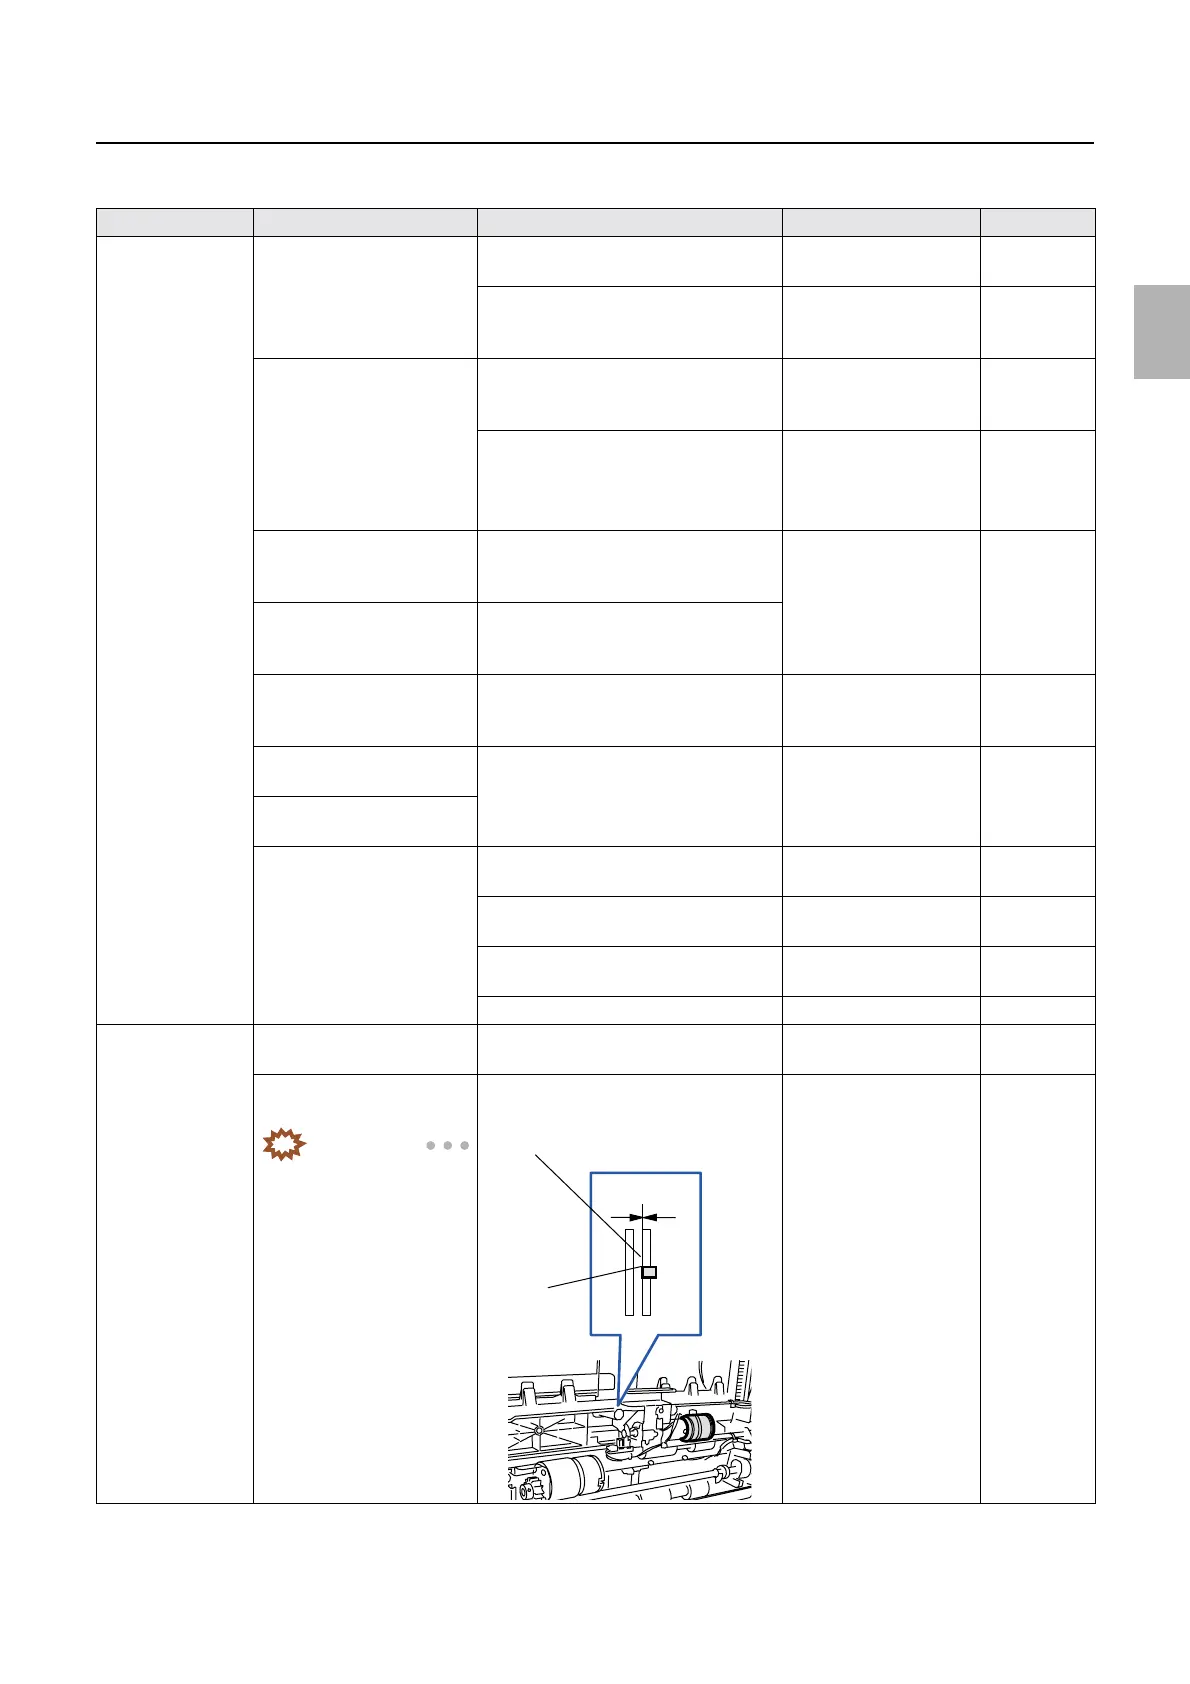
The pressure pin of the paper supply unit
comes out of the guide.
Adjust the position of the
pressure pin of the paper
supply unit.
☞25640
0.0 mm
Pressure
pin
Guide
Distributed by: minilablaser.com