2. Confirm that you know which power supply must be replaced. Go to
“Procedure: Identifying which Storwize V7000 Gen2 enclosure or canister to
service” on page 252.
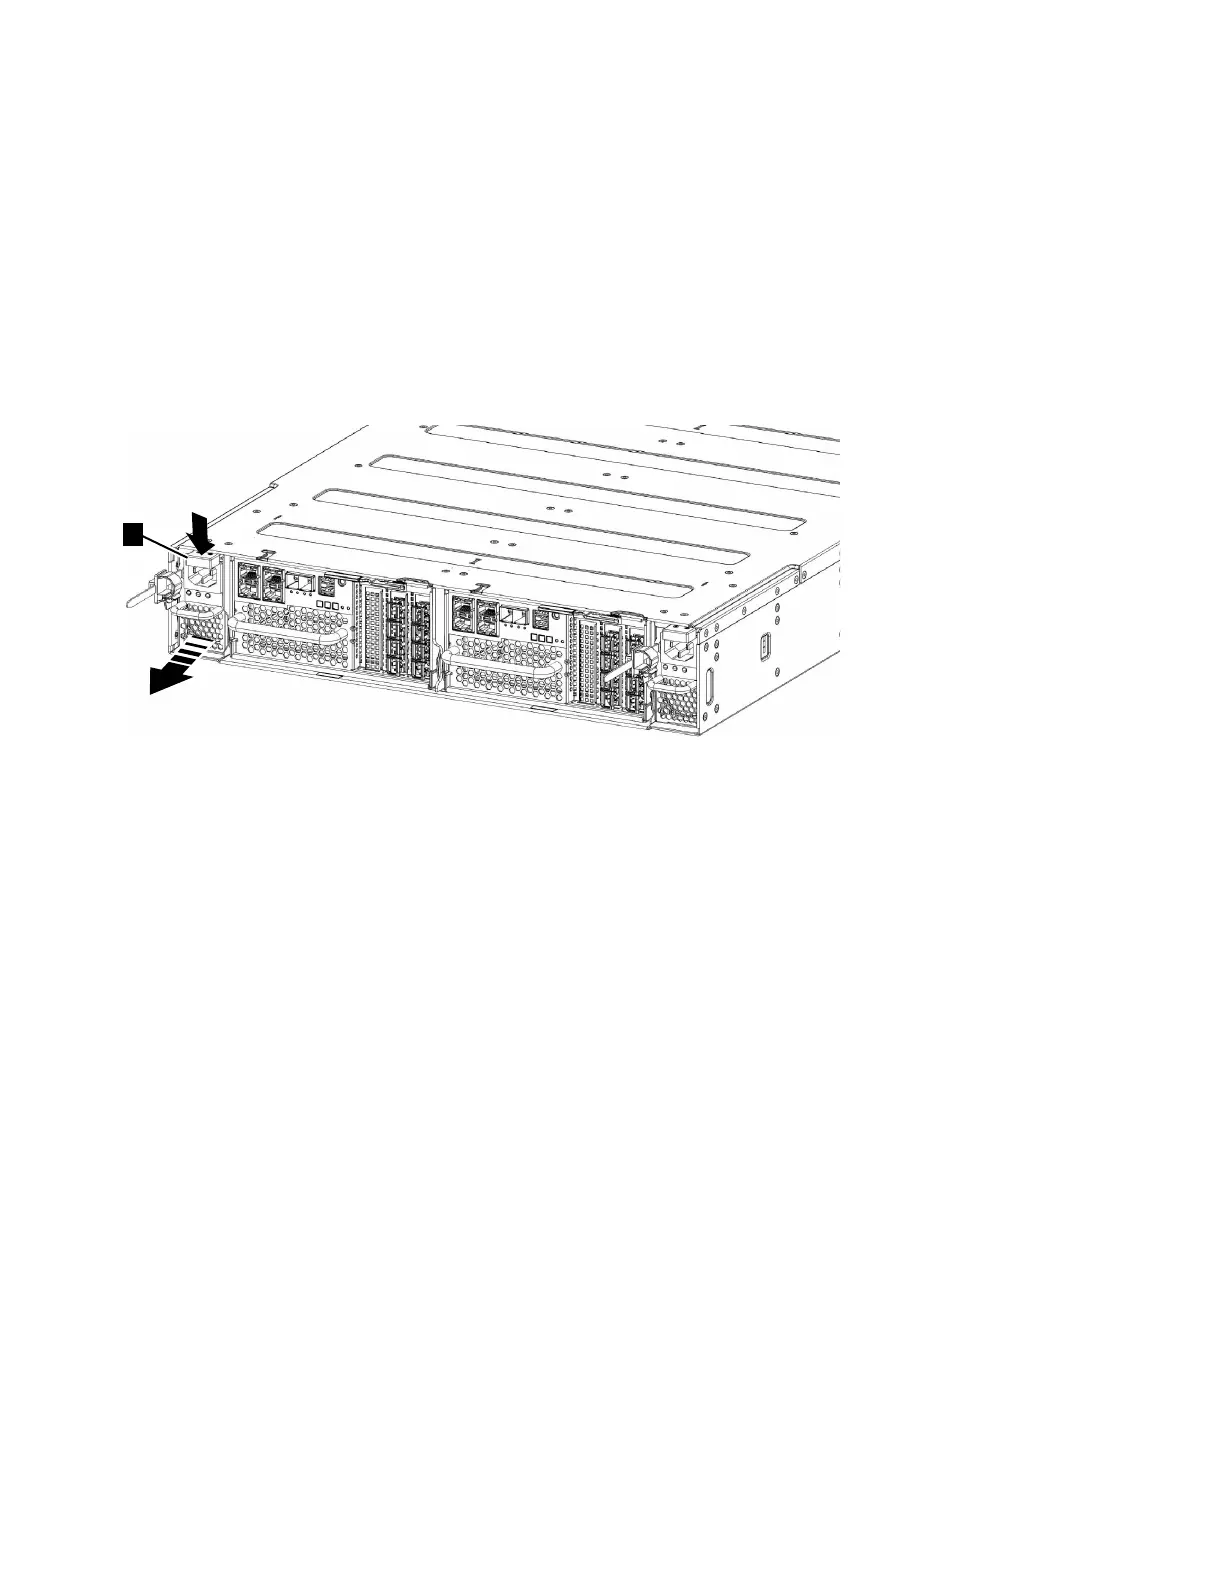
3. Disconnect the power cord from the electrical outlet. Release the cable retention
clip and disconnect the power cord from the power supply that you are
replacing.
4. Locate the orange release tab at the top edge of the power supply unit. Press
the release tab gently until it stops.
5. Using the handle, firmly pull the power supply out of the enclosure shown in
Figure 86.
6. Hold the new power supply so that the handle is fully extended.
7. Slide the power supply into the enclosure until it stops. Push it firmly into
position until it clicks.
8. Connect the power cord to the power supply and to a properly grounded
electrical outlet. Secure the cable with the cable retention clip on the rear of the
power supply unit.
Note: After the power cord is connected to the electrical outlet, make sure that
the ac and dc power (green) LEDs are lit and the fault (amber) LED is off.
Replacing a Storwize V7000 Gen1 power supply unit for a control
enclosure
You can replace either of the two 764 watt hot-swap redundant power supplies in
the control enclosure. These redundant power supplies operate in parallel, one
continuing to power the canister if the other fails.
Figure 86. Removing the power supply unit (left side of enclosure)
306 Storwize V7000 Unified: Problem Determination Guide 2073-720
 Loading...


