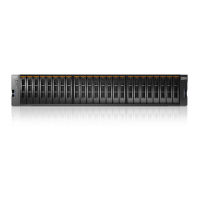
Attention:
The control enclosure must be replaced only by a trained service provider.
Complete this procedure only if instructed to do so by a service action or the IBM
support center.
If you have a single control enclosure, this procedure requires that you shut down
your system to replace the control enclosure midplane assembly. If you have more
than one control enclosure, you can keep part of the system running, but you lose
access to the volumes that are on the affected I/O group and any volumes that are
in other I/O groups that depend on the drives that are in the affected I/O group.
If the system is still doing I/O requests in all the I/O groups, schedule the
replacement during a maintenance period or other time when the I/O can be
stopped.
When replacing hardware components in the back of the enclosure, ensure that
you do not inadvertently disturb or remove cables that you are not instructed to
remove.
Ensure that you are aware of procedures for handling static-sensitive devices
before you remove the enclosure.
Procedure
To replace the control enclosure midplane, complete the following steps:
1. Log in to the service assistant on one of the node canisters in the control
enclosure.
2. Navigate to the Enclosure Information panel.
Important: Do NOT select the Reset the system ID check box.
Record the following information for use in subsequent steps:
v WWNN 1
v WWNN 2
v Machine type and model
v Serial number
3. Read the safety information in “Preparing to remove and replace parts” on
page 295.
4. If the control enclosure is still active, stop host I/O and Metro Mirror and
Global Mirror activity on all the volumes that depend on the enclosure This
step applies to all I/O group volumes that are managed by this enclosure plus
any volumes in other I/O groups that depend on the drives in the affected
I/O group.
5. Complete “Procedure: Powering off a Storwize V7000 Gen2 control enclosure”
on page 281 for the control enclosure that requires the midplane assembly
replacement.
6. Disconnect both power cables from the rear of the enclosure.
7. Write down which port connects to which cable before disconnecting all cables
from the rear of the enclosure.
8. Carefully remove each drive and label it with the drive slot from which it was
removed.
You can use the drive-slot information to insert the drives into the correct
drive slots at the end of this procedure.
354 Storwize V7000 Unified: Problem Determination Guide 2073-720
 Loading...


