Rev. 1
Card Gr1-
21
CUSTOM PRINTER UNIT
C#5BP4630000
FENIX PRINTER UNIT
C#5BP2550000
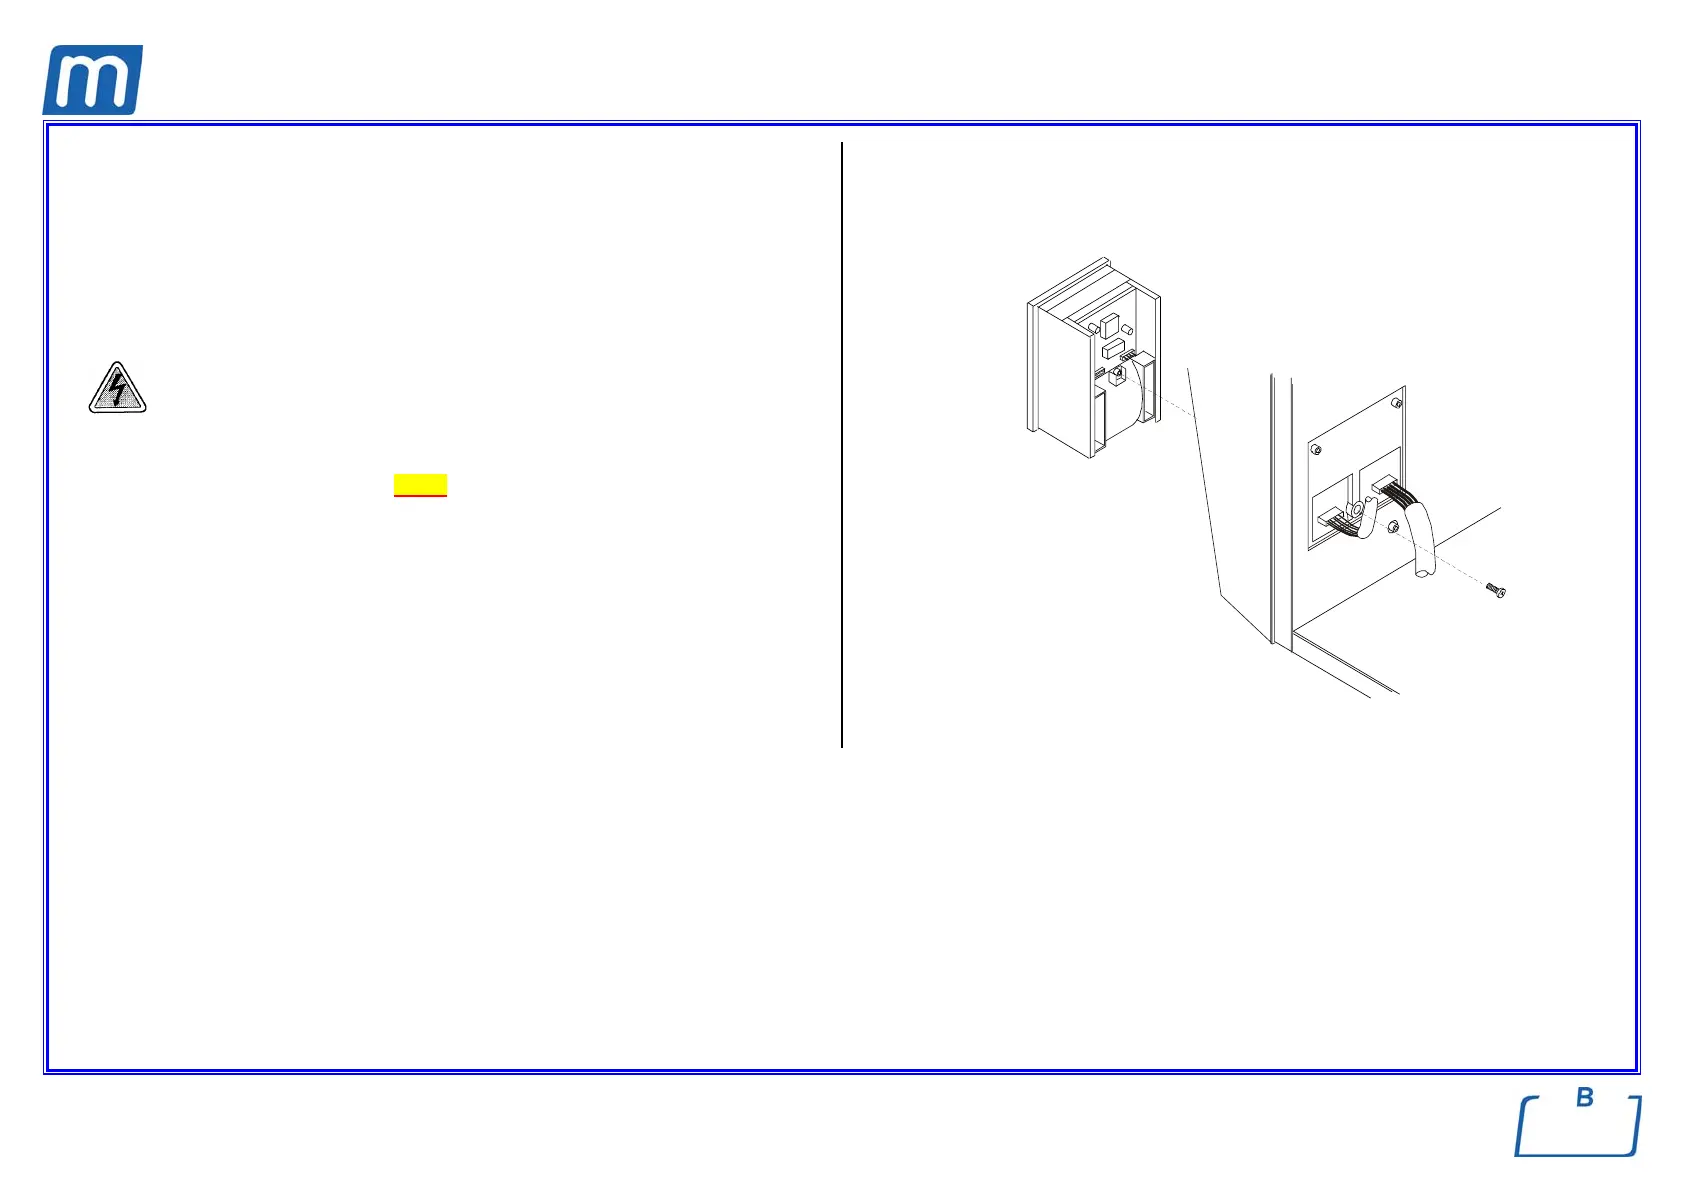
Before servicing, switch off the equipment and unplug the power
supply cable from the mains socket
1. Remove the covers (see card Gr7-1 );
2. Remove the power (1) and interface (2) wiring from the printer unit;
3. Unscrew the rear fixing screw (3) and remove the printer (4);
4. Mount the new printer unit, restore connections and assembly all items
proceeding in reverse order as above;
5. Perform a printout of the last cycle;
6. Run a sterilization cycle.
1
2
3
4