Rev. 1
Attach.
5
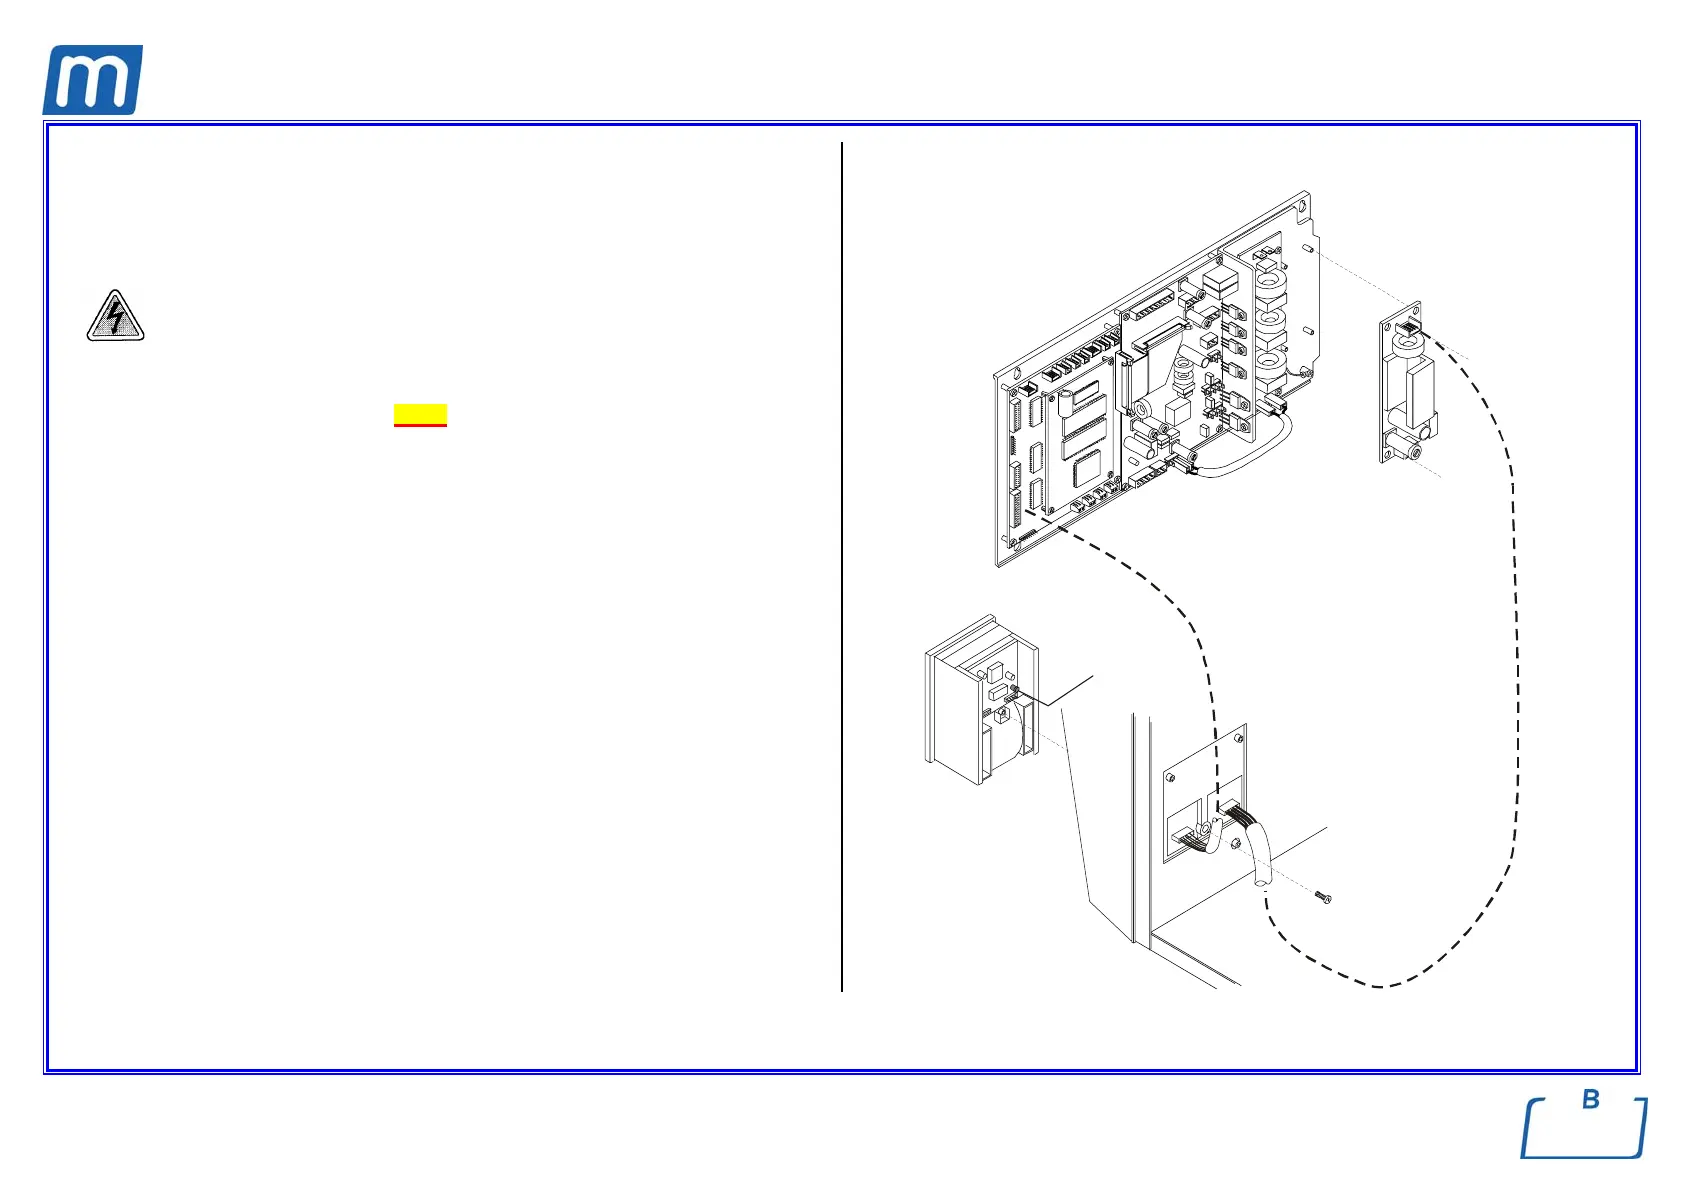
ATTACHMENT D -
INSTALL PRINTER KIT
Before servicing, switch off the equipment and unplug the power
supply cable from the mains socket
1. Remove the covers (see card Gr7-1);
2. Use the printer power supply board (1) of the printer kit and mount it on the
support of the electronic boards;
3. Cut the clamp on the transformer wiring and connect the free wiring on the
AC voltage input connector;
4. Open the service box cover and mount printer unit (2) on the plastic front
cover by means of the screw (3);
5. Connect the printer cable (4) between the ps output connector of the power
supply board and the ps connector of the printer unit; arrange the cable path
on the top of the support of the electronic boards and lock it by nylon clamps;
6. Connect the signal cable (5) between CPU and printer unit interface
connectors;
7. Switch on the sterilizer, and push the red button (6) located on the rear of the
printer unit; the paper moves forward from the slot;
8. Enter the SETUP mode, ADVANCED menu, PRINT OPTIONS, PRINTER,
and select the option INTERNAL;
9. Exit the SETUP mode;
10. Perform a sterilization cycle; at the end of the cycle check the correct
printout.
PRINTER POWER
SUPPLY BOARD
oltage output
C voltage input
1
1
2
6
3
4
5