Rev. 1
Card Gr1-
3
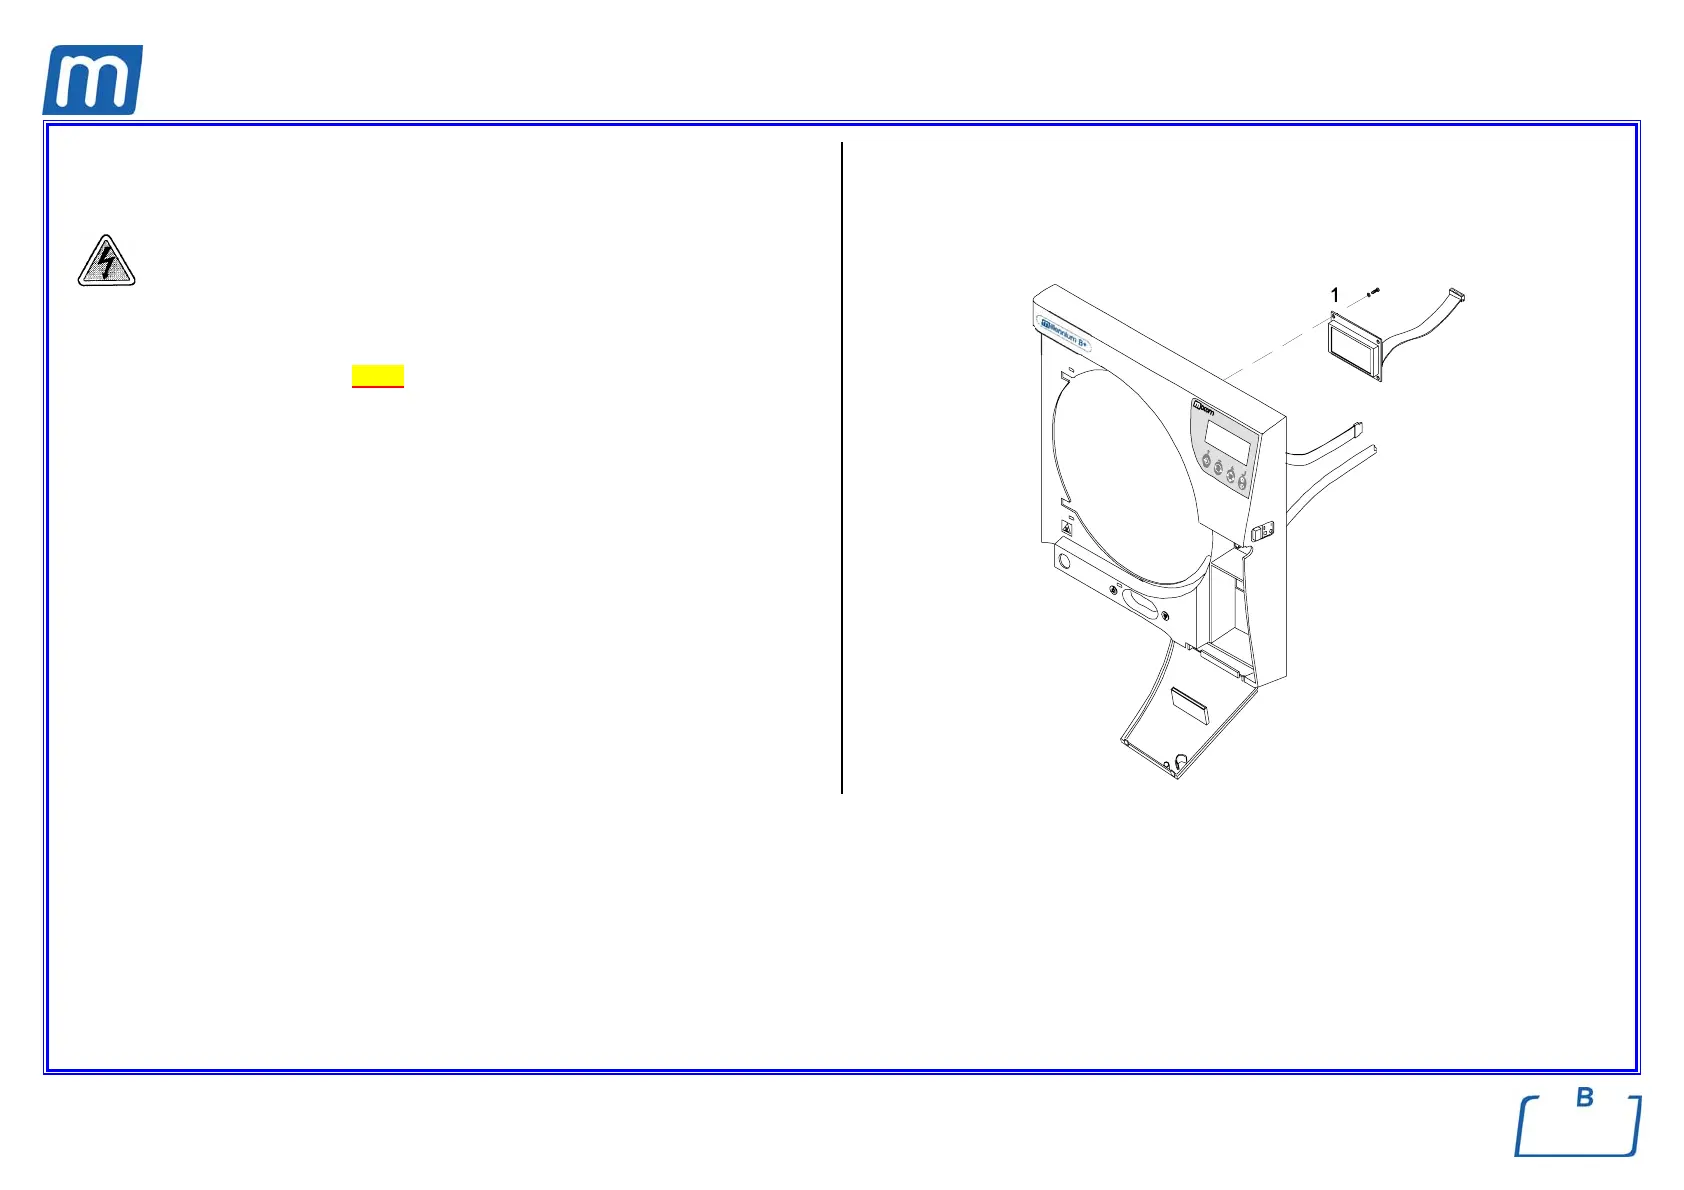
LCD BOARD
C#5BP1230000
Before servicing, switch off the equipment and unplug the power
supply cable from the mains socket.
1. Unlock the fixing pins of the front cover and move it as much as possibile
from the frame (see card Gr7-3);
2. Remove the interface connector from CPU board;
3. Access the fixing screws and remove the LCD display (1);
4. Remove the protective film from the new LCD;
5. Mount the new LCD, assembly all items and restore connections proceeding
in reverse order as above;
6. Run a sterilization cycle.