Rev. 1
Attach.
10
ATTACHMENT I -
RELEASE DOOR LOCKING MECHANISM MANUALLY
Before servicing, switch off the equipment and unplug the power
supply cable from the mains socket
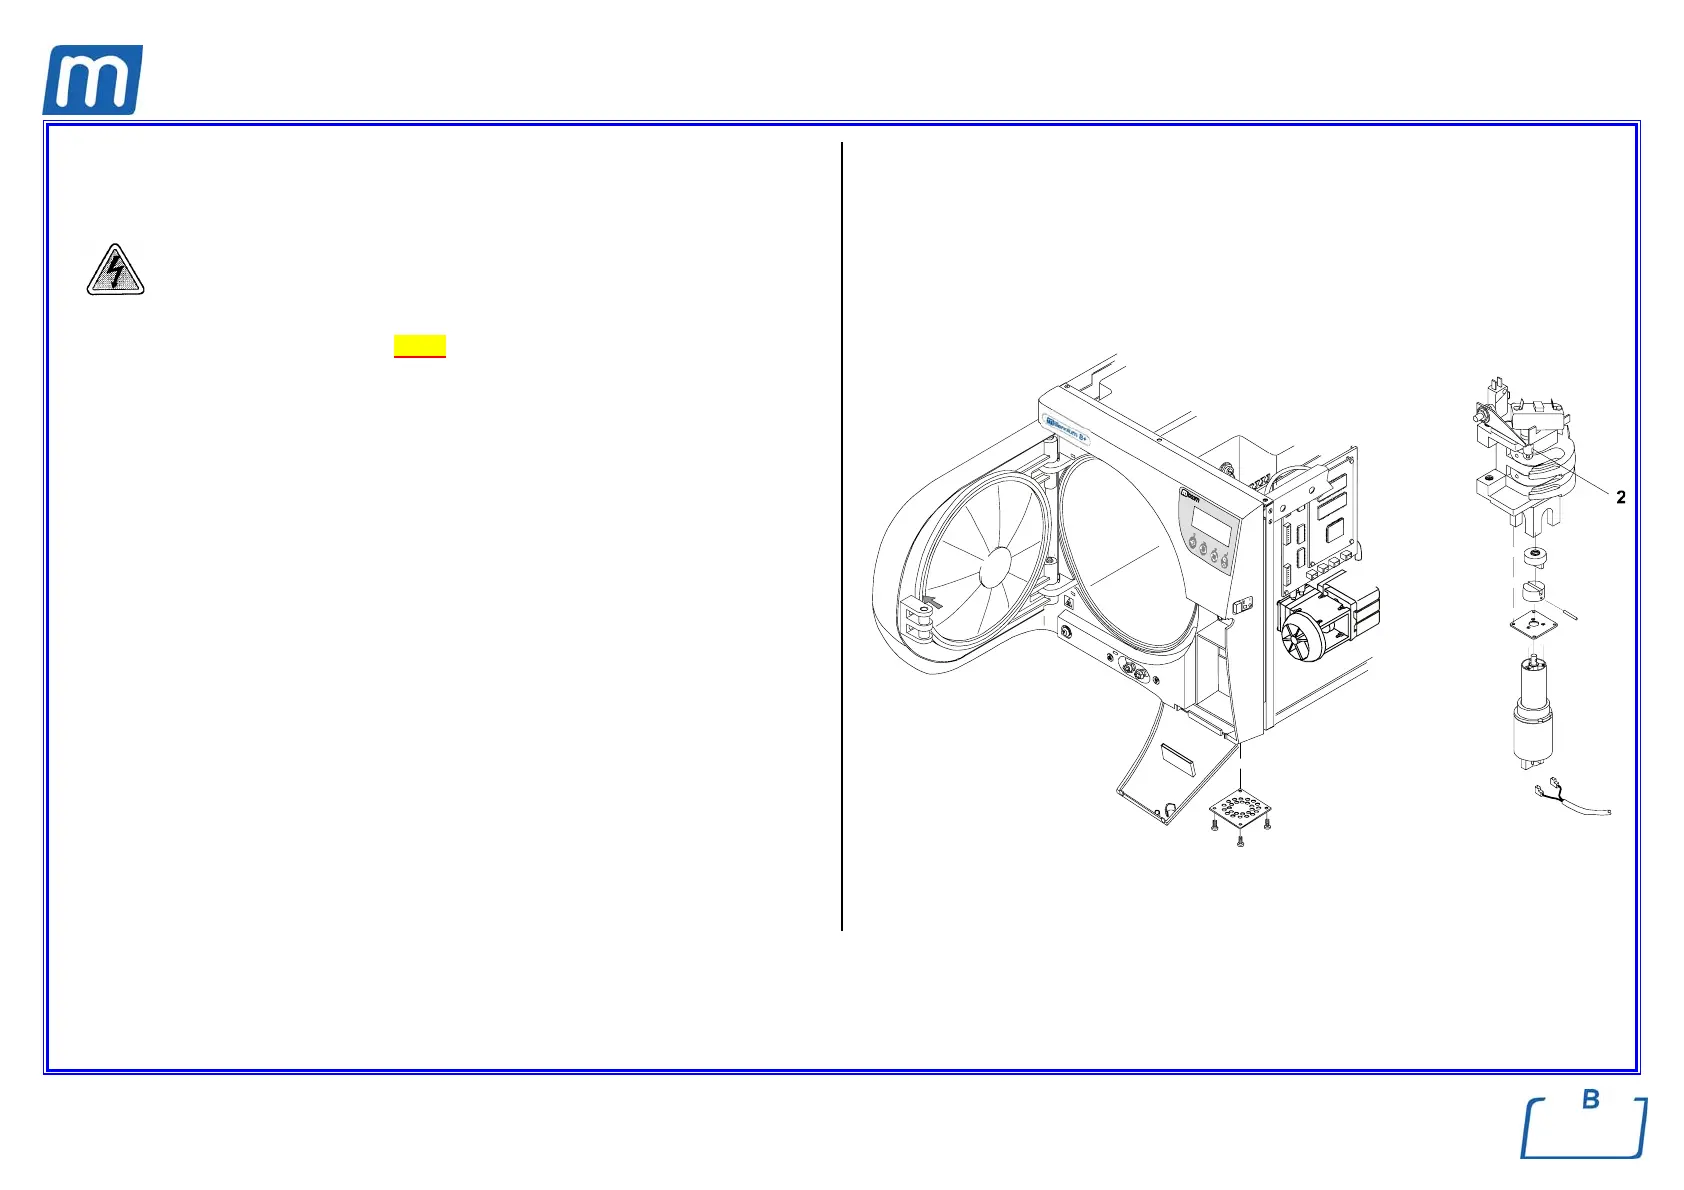
1. Remove the covers (see card Gr7-1);
2. Empty both reservoirs, and turn left side the unit
3. Remove the ratio-motor access plate (1) from the bottom frame;
4. Remove the motor wiring and the motor itself;
5. Now open the door causing the locking mechanism opening;
6. Arrange the motor on its seat, taking care to couple the bushes;
7. Connect the wiring (white = + / black = -) and mount the small plate (1) on the
bottom frame, proceeding in reverse order as above ;
8. By means of a large screwdriver, push on the pin (2) of the door-unlocked
switch (do not release it until explicitly indicated) and turn on the unit;
9. Wait for the end of the Self test, then enter the SETUP mode, option
SERVICE, enter the code “++--++--“, then select DEVICE TEST, MANUAL
and the option LOCKING DEVICE;
10. As enabled the locking mechanism, release the pin (2) of the door-
unlocked switch;
11. Push the Start key to release completely the locking mechanism;
12. Exit the Setup mode and switch off/on the unit;
13. Perform a sterilization cycle.
1