SV-EMS-220 Engine Monitoring System Installation and Configuration
10-18 SkyView HDX System Installation Manual - Revision E
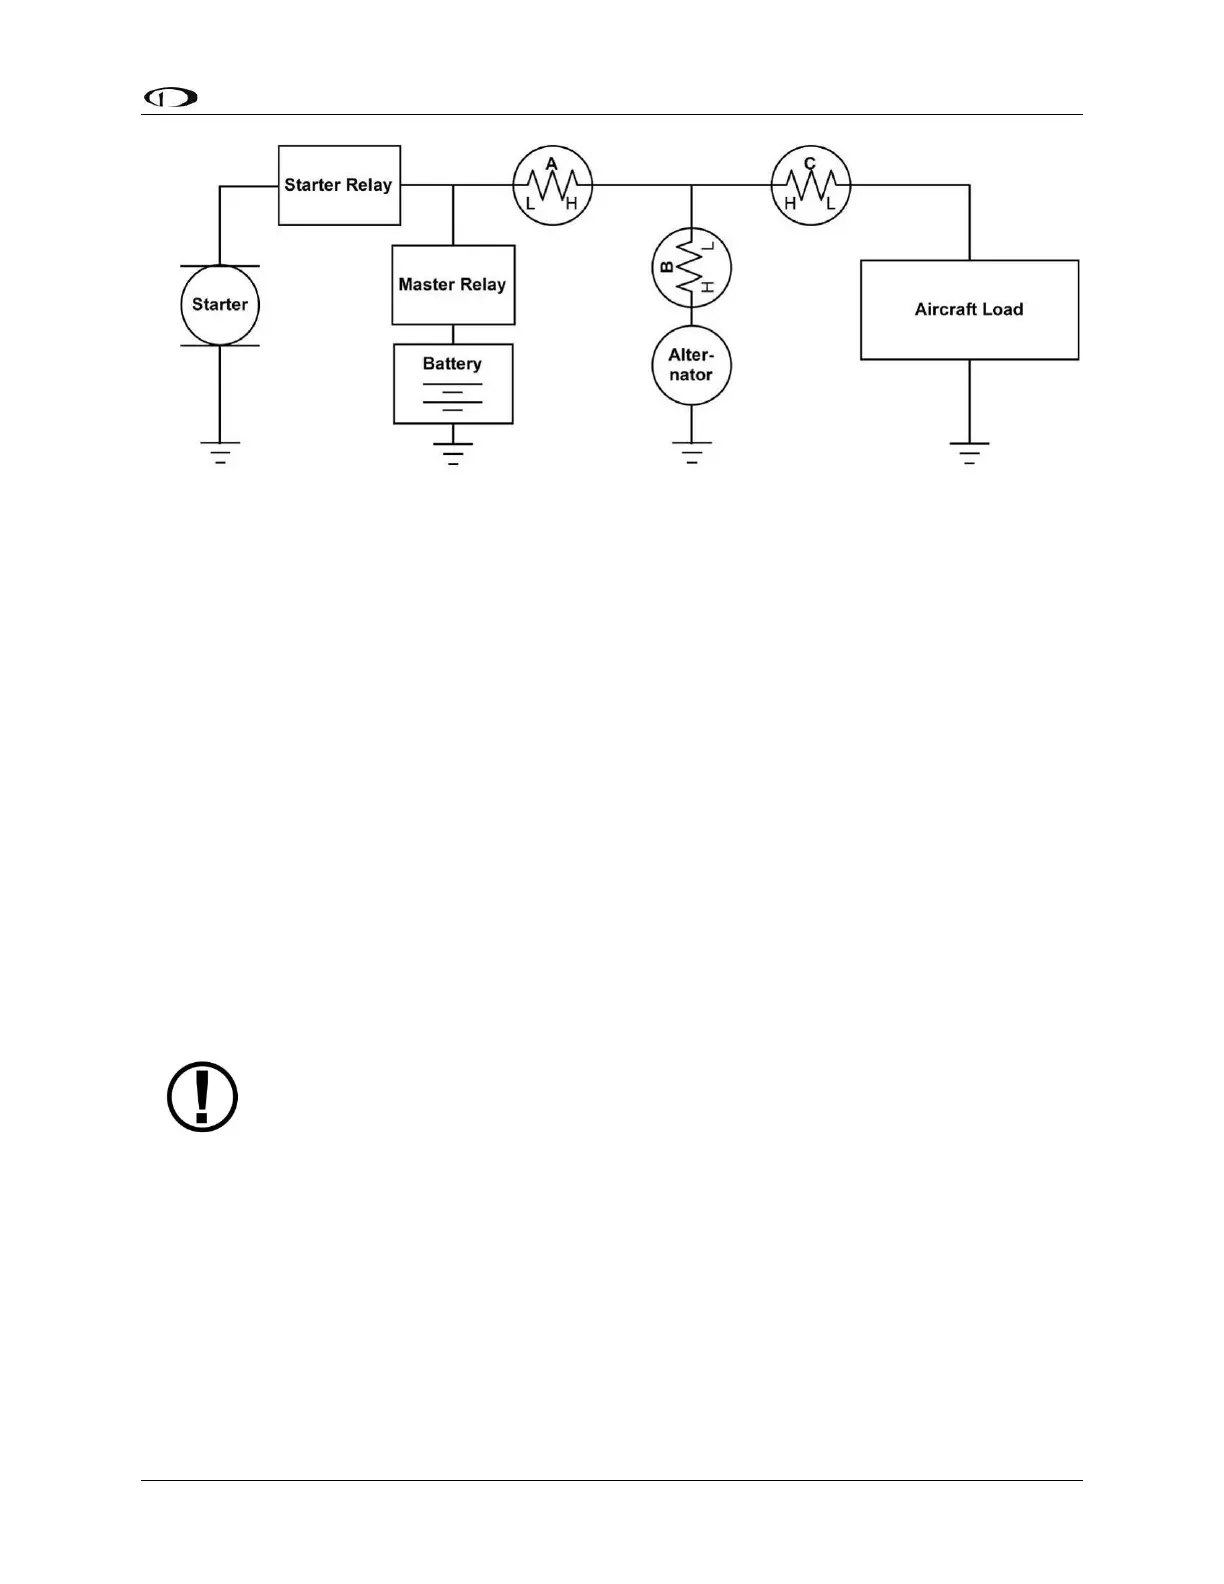
Figure 58: Recommended Amps Shunt Locations (simplified electrical diagram)
Use two (2) ¼” (6.35 mm)ring terminals sized appropriately for the high-current wire
gauge you will be routing to and from the ammeter shunt. Cut the wire where you would
like to install the ammeter shunt. Strip the wire and crimp on the ring terminals. Using a
Phillips screwdriver, remove the two (2) large screws (one (1) on either end of the shunt),
slip the ring terminals on, and screw them back into the base.
We highly recommend that you fuse both the connections between the shunt and the SV-
EMS-220 by connecting a 1 amp fuse in-line between the shunt and the SV-EMS-220 on
each Amps High and Amps Low signal wire.
Crimp the two (2) supplied #8 ring terminals onto the Amps High and Amps Low leads
(pins 24 and 25) on the EMS 37-pin Main Sensor Harness. Unscrew the two (2) smaller
screws on the ammeter shunt. Slide the ring terminals onto them and screw them back
into the base. Connect the “Amps High” lead to the side of the shunt marked by “H”;
connect the “Amps Low” lead to the side marked by “L.”
If you find that the current reading displayed on the EMS page is the opposite polarity of
what you want, swap the two (2) signal inputs (Amps High and Amps Low) to obtain the
desired result.
It is extremely important that you secure all loose wires and ensure that
exposed terminals cannot touch or short out to other objects in the plane.
All metal on the shunt is at the same voltage as–and carries the same risks
as–the positive terminal on the battery. Improperly installing the ammeter
shunt can result in high current flow, electrical system failure, or fire.
10.2.17 Carburetor Temperature Sensor
The carburetor temperature sensor may be connected to any general purpose input pin
on the SV-EMS-220’s D37, however, we recommend that it be connected to pin 23 on
this connector.
Install the carburetor temperature sensor in the venturi area at the point where ice first
begins to form. This is located after the main nozzle, before the throttle valve. You must
remove the plug in the carburetor housing below the throttle valve. On four (4)-cylinder