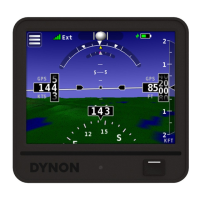
2.12 Quick Start
This section contains information that can be used to check out your SkyView system on
the bench, or immediately after SkyView has been installed in the plane. This section is
not a substitute for reading this entire manual, which provides instructions for wiring and
configuring SkyView to the unique requirements of your particular airplane.
1. A SkyView display requires 10-30 VDC. You must connect BOTH of the (long) red
wires to POWER and BOTH of the (long) black wires to Ground. Current for each
display can be up to 3.5A @ 12V (add 1.5A if the SV-BAT-320 battery is connected
and being charged); so, use a big battery or power supply.
2. To power on or power off a SkyView display manually, push and hold Button #1
(the leftmost button).
3. Any devices connected to SkyView that do not receive their power from the
SkyView Network (such as SV-XPNDR-261 and Dynon Avionics Autopilot servos)
must also be powered ON to communicate with SkyView.
4. To finish the installation of the SV-NET-10CP (10 foot) and longer cables, the
diagram you need to insert the pins is of the SkyView Network found in Section 25:
Appendix C: Wiring and Electrical Connections.
5. The EMS 37-pin Main Sensor Harness includes a 9-pin connector that is wired to
pins 11 (Orange wire), 12 (Yellow wire), and 30 (Black wire). This connector is
used for other Dynon Avionics products, but is not used in SkyView installations.
Thus, the 9-pin connector should be removed to use these wires for connecting
sensors to the SV-EMS-220. Remove the connector by cutting the three (3) wires
close to the 9-pin connector.
6. The SkyView SETUP MENU is accessed by pushing and holding Buttons 7+8
together for 2-3 seconds.