4-60 Service Manual
7462
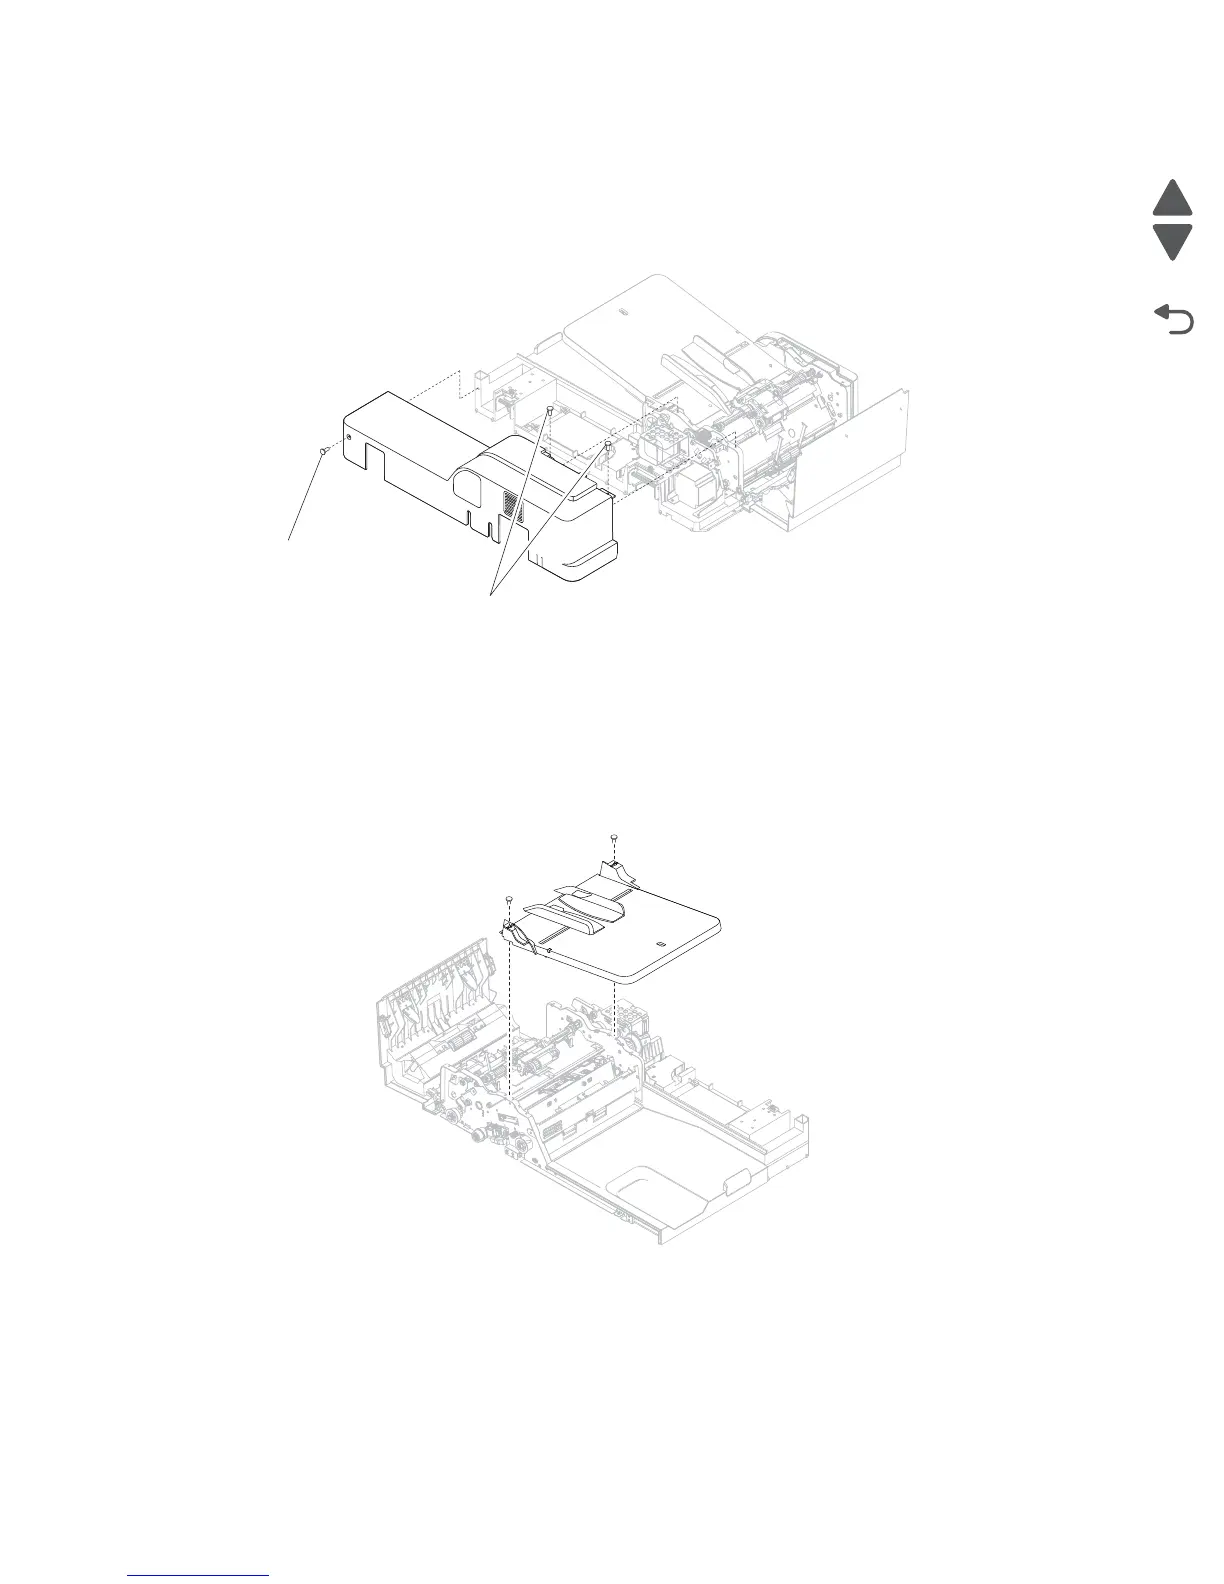
ADF cover, rear removal
1. Lift the ADF left door cover.
2. Remove two metal screws (A).
3. Remove the plastic screw (B) from the right side of the ADF cover, rear.
4. Remove the ADF cover, rear.
ADF document tray assembly removal
1. Remove the ADF cover, front. See “ADF cover, front removal” on page 4-59.
2. Remove the ADF cover, rear. See “ADF cover, rear removal” on page 4-60.
3. Remove the two metal screws (A) from the top of the ADF document tray assembly.
4. Slide the ADF document tray assembly to the right.
5. Disconnect the ADF paper length/width sensors cable.
6. Remove the ADF document tray assembly.
Replacement note: You must adjust skew after reinstalling the document tray assembly. Go to “Adjusting
skew” on page 3-93.
 Loading...