4-20 Service Manual
7462
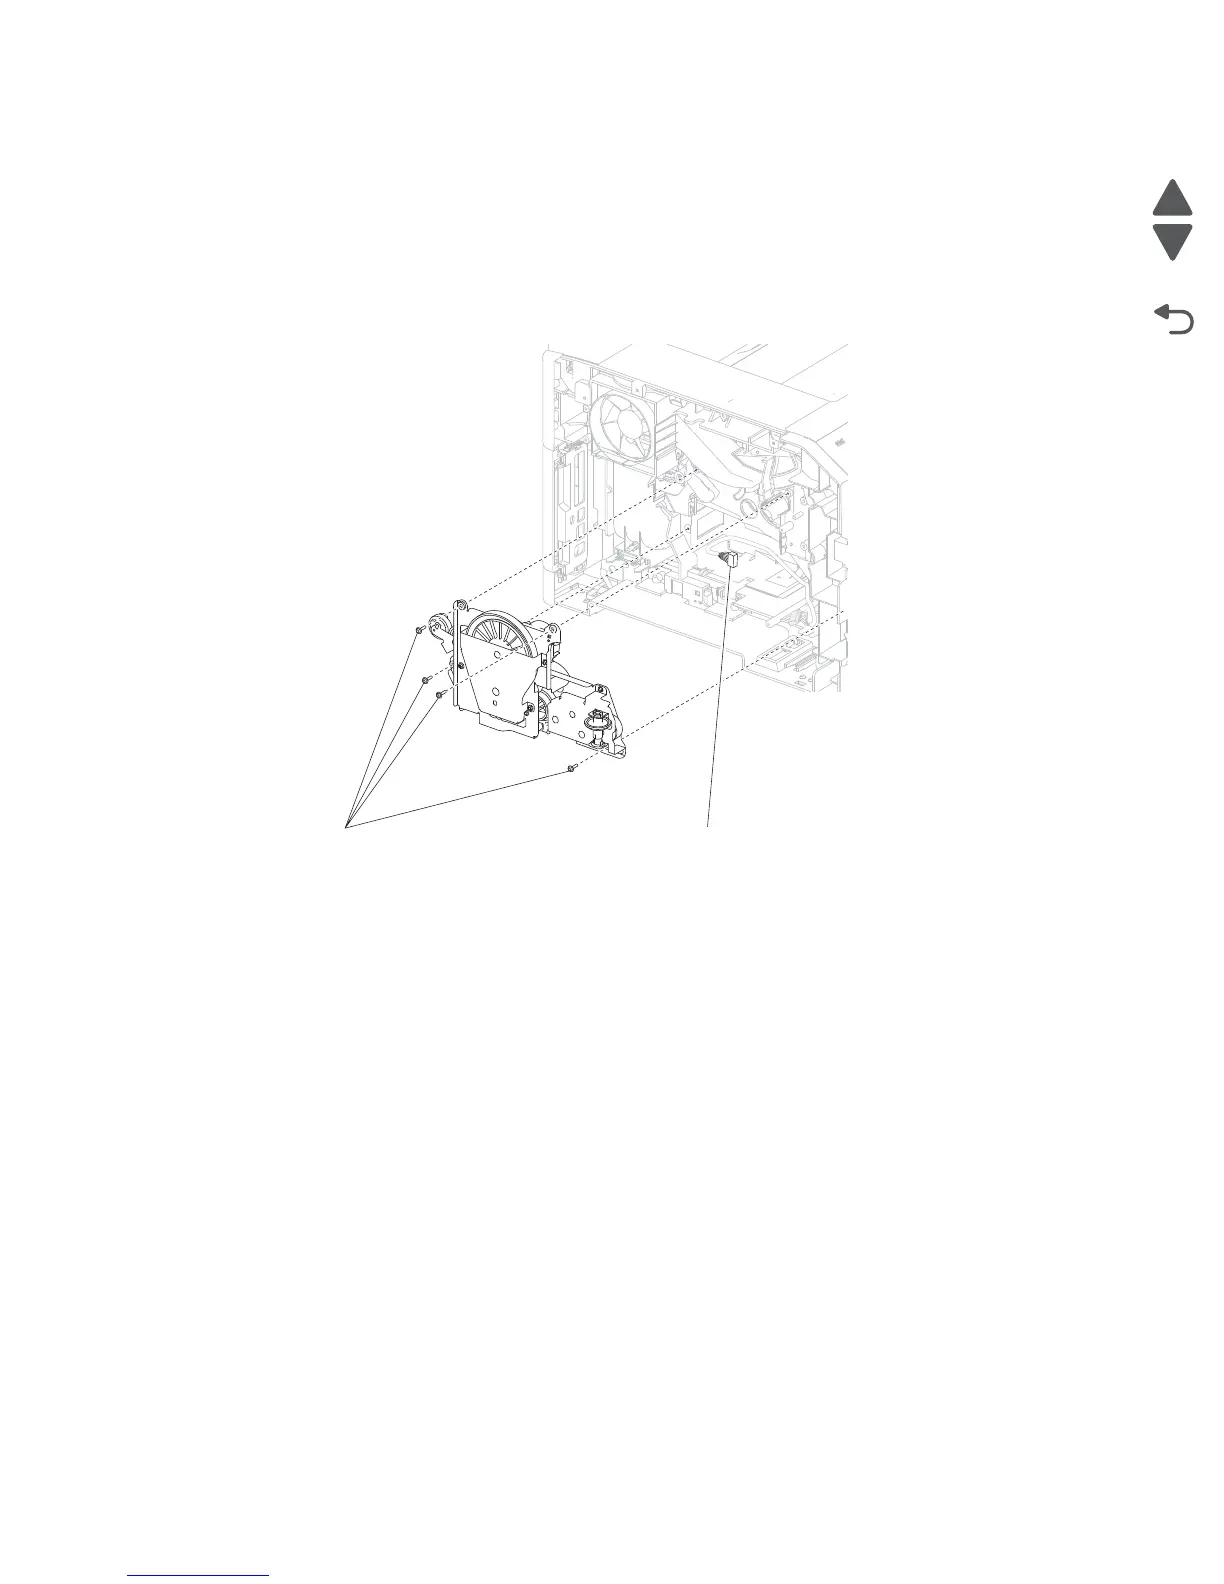
Main drive motor assembly removal
1. Remove the system card assembly. See “System card assembly removal” on page 4-47.
2. Remove the fuser drive release linkage. See “Fuser drive release linkage removal” on page 4-15.
3. Close the operator panel door assembly.
4. Remove the four screws (A) securing the main drive motor assembly to the machine.
5. Gently remove the main drive motor assembly.
6. Disconnect the connection (B) from the main drive motor assembly.
Replacement Warning: Ensure that all electrical connections are properly replaced.
Replacement Warning: When replacing the main drive motor assembly, ensure that the operator panel door
assembly is in the closed position or the main drive motor assembly will not align properly and damage will
occur.
Replacement Warning: When replacing the main drive motor assembly, ensure that all gears and drive
shafts are properly aligned, or damage will occur.
 Loading...