Repair information 4-75
7462
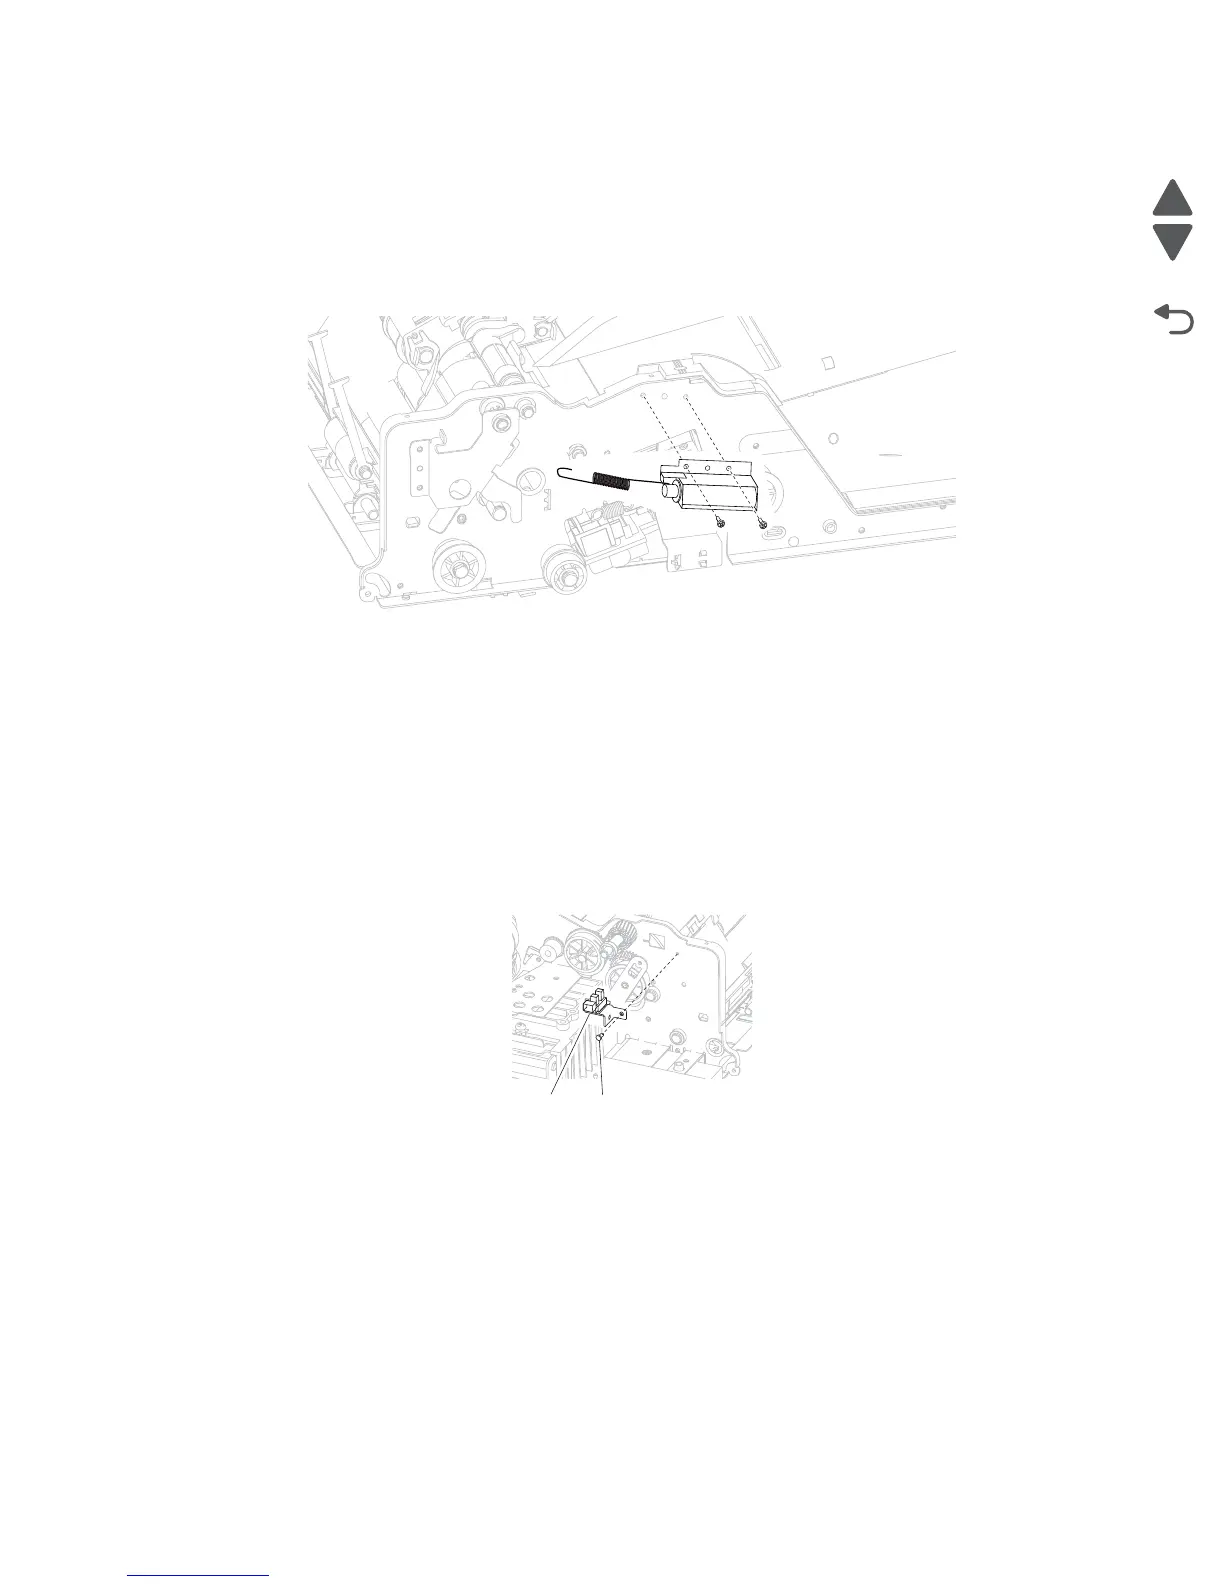
ADF solenoid assembly removal
1. Remove the ADF cover, front. See “ADF cover, front removal” on page 4-59.
2. Remove the pick roll position cam assembly spring from the cam shaft lever.
3. Disconnect the solenoid wire harness.
4. Remove the two screws (A) securing the solenoid bracket assembly to the frame of the ADF unit
assembly.
5. Remove the ADF solenoid assembly.
Sensor (ADF top door interlock) removal
1. Remove the ADF cover, rear assembly. See “ADF cover, rear removal” on page 4-60.
2. Remove the feed motor bracket assembly. See “ADF feed drive motor assembly removal” on
page 4-73.
3. Disconnect the sensor harness from sensor.
4. Remove the sensor (ADF top door interlock) bracket screw (A).
5. Remove the bracket with the sensor (ADF top door interlock).
6. Detach the sensor (ADF top door interlock) from the bracket by squeezing the clip (B) and removing the
sensor.
Sensor (ADF lower door interlock) removal
1. Remove the ADF cover, front. See “ADF cover, front removal” on page 4-59.
2. Remove the ADF platen cushion. See “ADF platen cushion removal” on page 4-62.
3. Open the bottom door assembly.
 Loading...