4-16 Service Manual
7462
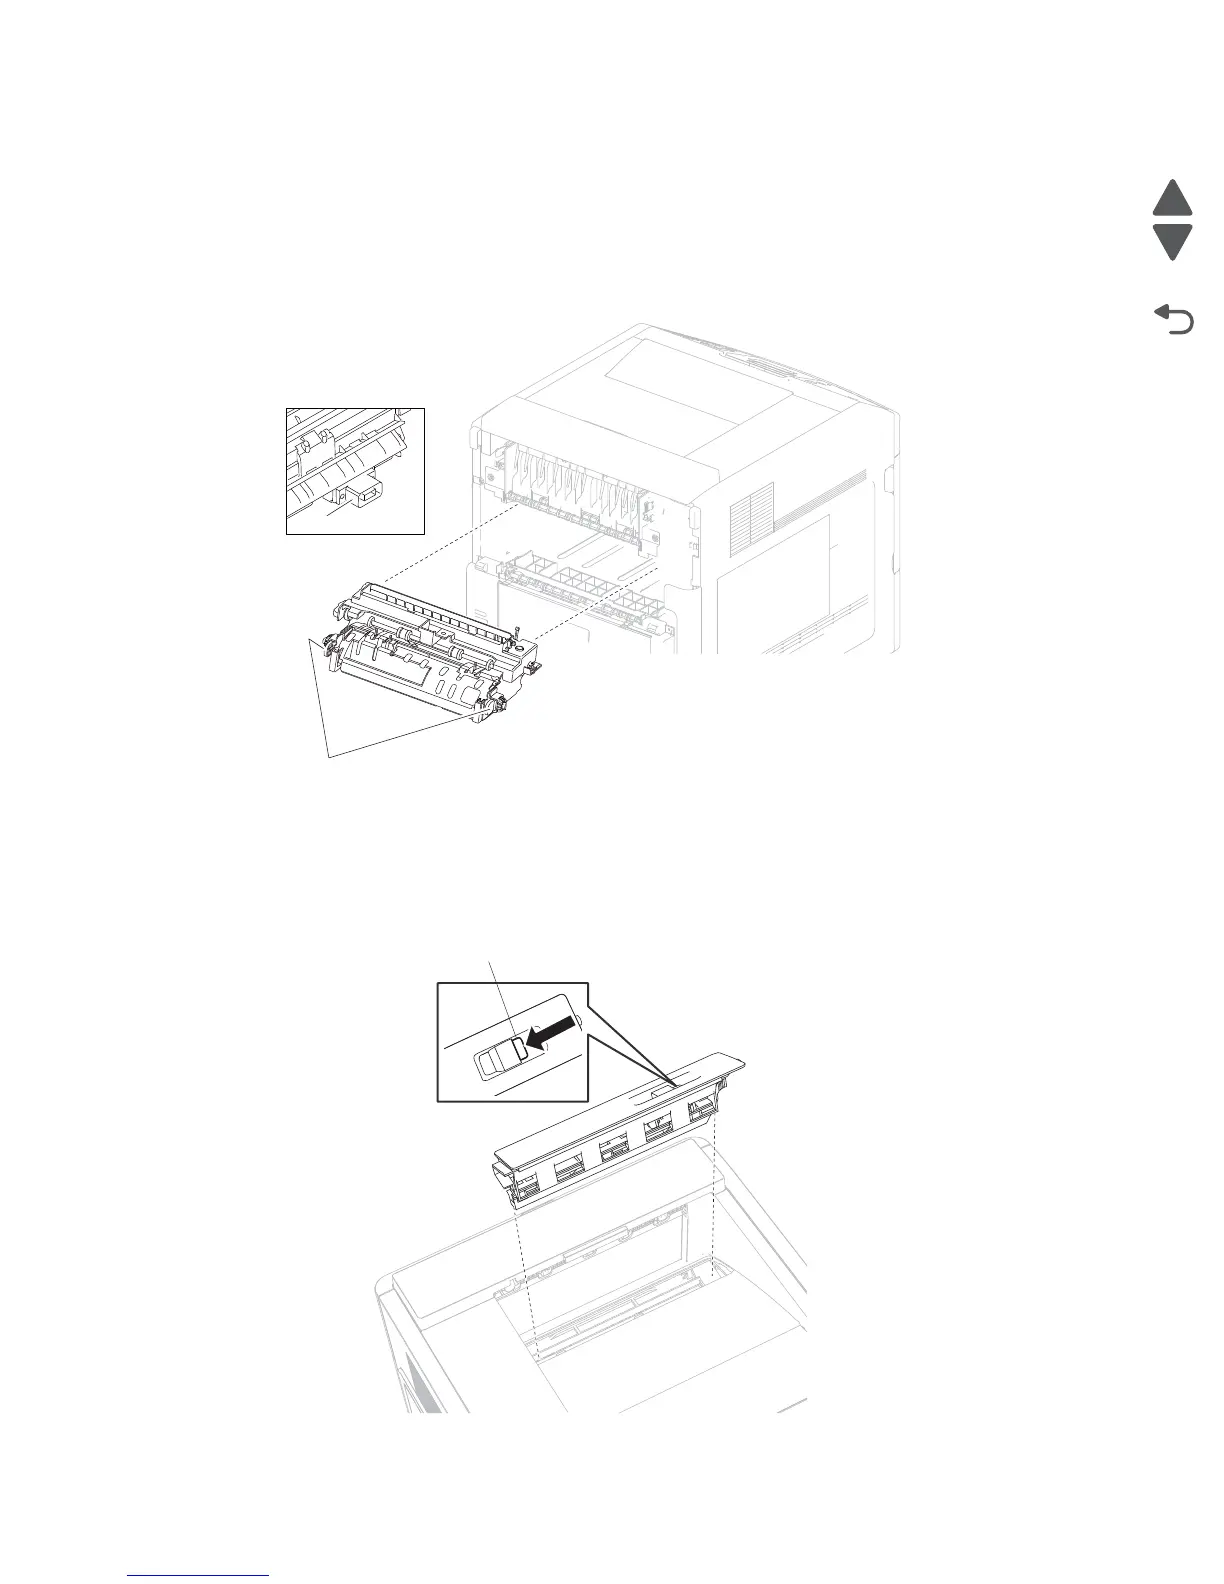
Fuser unit assembly removal
1. Remove the fuser wiper cover assembly. See “Fuser wiper cover assembly removal” on page 4-16.
2. Remove the door assembly, rear. See “Door assembly, rear removal” on page 4-35.
3. Open the fuser access door.
4. Press the two buttons (A) on the fuser unit assembly to release it from the machine.
5. While pressing the two buttons (A), pull the fuser unit assembly from the machine.
Replacement Warning: When replacing the fuser unit assembly, ensure that the electrical connection (B) and
the two buttons (A) are properly secured.
Fuser wiper cover assembly removal
1. Press the button (A) securing the fuser wiper cover assembly to the machine.
2. Remove the fuser wiper cover assembly.
 Loading...