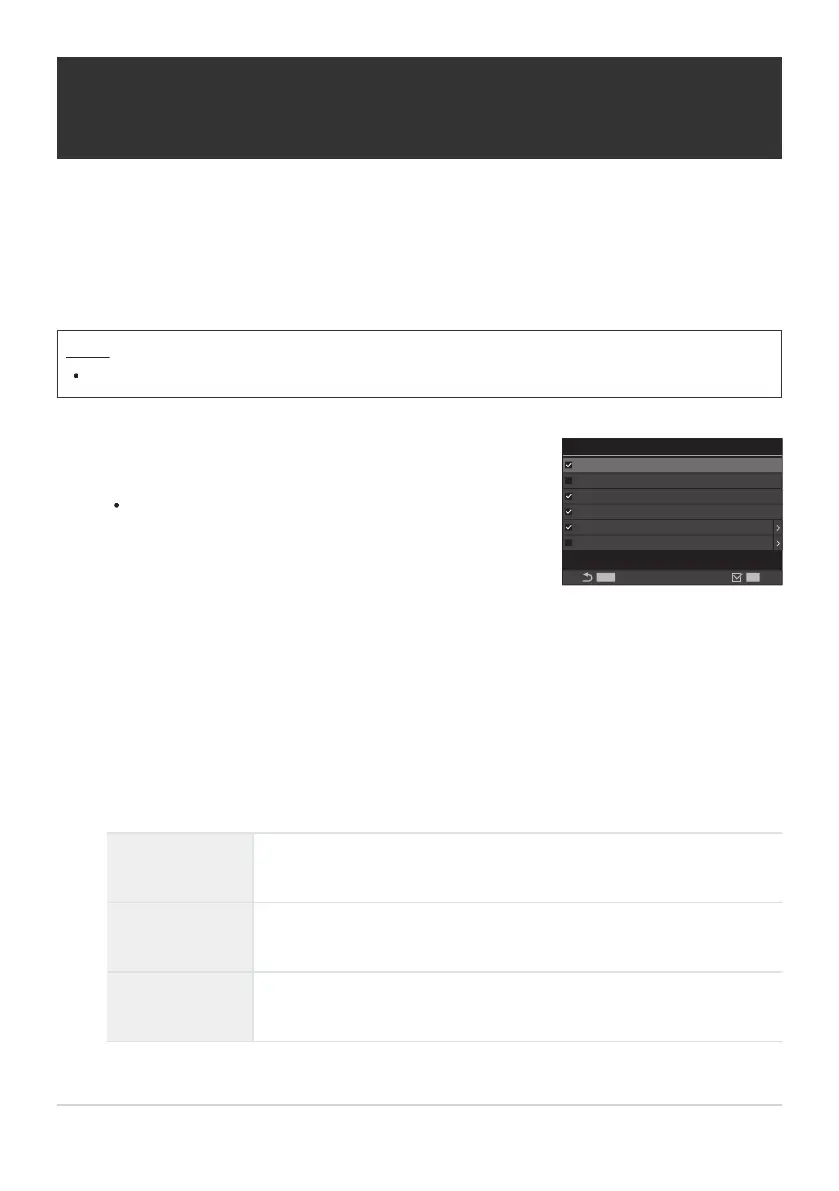
Select a self-timer mode that you want to have displayed, and
put a check (P) next to it.
Select an option using FG and press the OK button to
put a check (P) next to it.
To remove the check, press the OK button again.
Self-timer Settings
MENU
q
12s
Y
2s
q
2s
Y
C
q
C
Y
12s
OK
Configuring the self-timer functions (Self-
timer Settings)
You can choose which types of self-timer modes are displayed when you press the gYA button,
and change the self-timer settings such as the time the camera waits before taking a picture, and the
number of frames it captures.
Menu
MENU U a U 7. Drive Mode U Self-timer Settings
[r12s], [r2s], and [rC] is displayed when [Anti-Shock H] is set to [On] in [Anti-
Shock H Settings] (P.197).
When setting Custom Self-timer, select [YC] / [rC] / [qC] (Custom Self-timer) and press
I.
Configure options.
Number of
Frames
Choose the number of shots taken when the timer expires.
Y Timer
Choose how long the camera waits to begin shooting after the shutter
button is pressed all the way down.
Interval Length
If the number of shots is 2 or more, choose the interval between the
shots taken when the timer expires.
195
Configuring the self-timer functions (Self-timer
Settings)
1.
B
2.
3.
 Loading...