Service Parts Disassembly
Phaser 6600 and WorkCentre 6605Xerox Internal Use Only
Service Manual
4-26
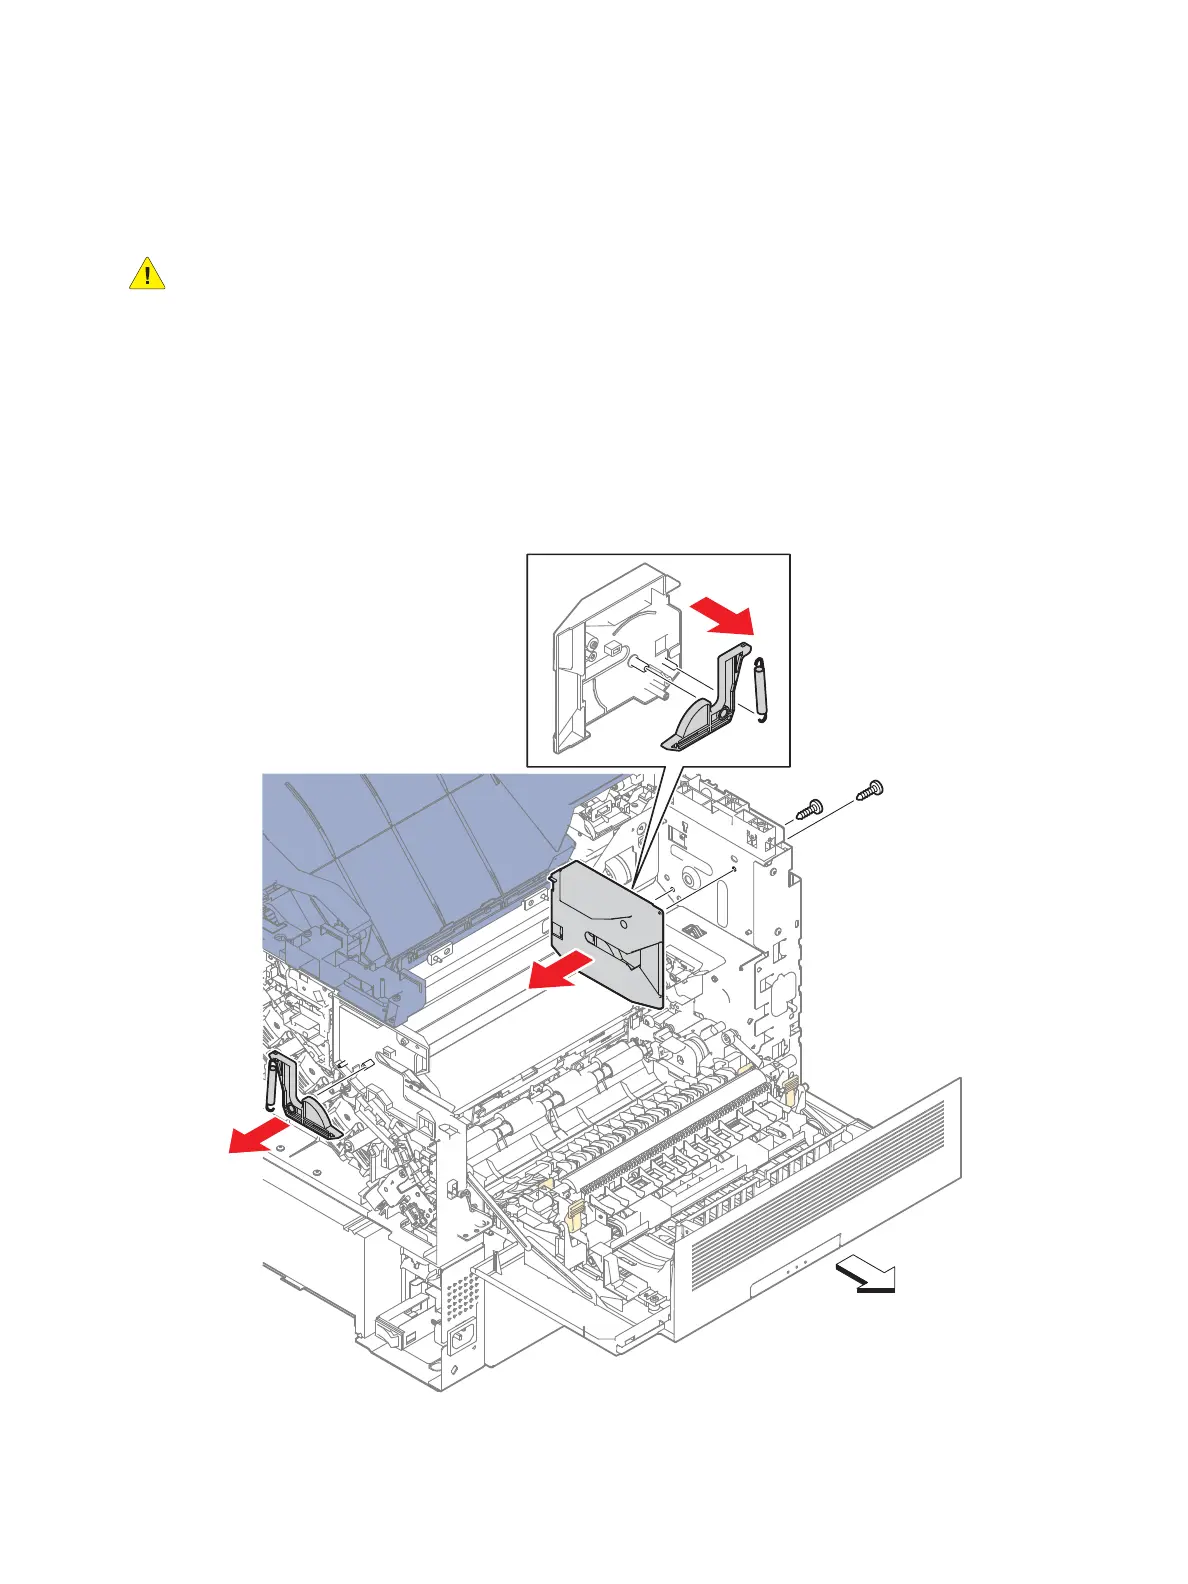
Left Rear Latch / Right Rear Latch
PL4.1.97 / PL4.1.99
WARNING: The Fuser is very hot. Take added care when handling the fuser to avoid being burned.
1. Remove the Exit Assembly. (page 4-93)
2. Remove the IP Board. (SFP page 4-102; MFP page 4-104)
3. Remove the two screws (silver, tapping, 8mm) that attach the Left Latch Bracket (PL4.1.5) to the
printer and remove the Left Latch Bracket.
4. Remove the Latch Spring (PL4.1.3) on the left side of the printer from the Left Latch Bracket and
remove the Left Rear Latch (PL4.1.18).
5. Remove the Latch Spring (PL4.1.3) on the right side of the printer and remove the Right Rear Latch
(PL4.1.4).
 Loading...


