Service Parts Disassembly
Phaser 6600 and WorkCentre 6605Xerox Internal Use Only
Service Manual
4-98
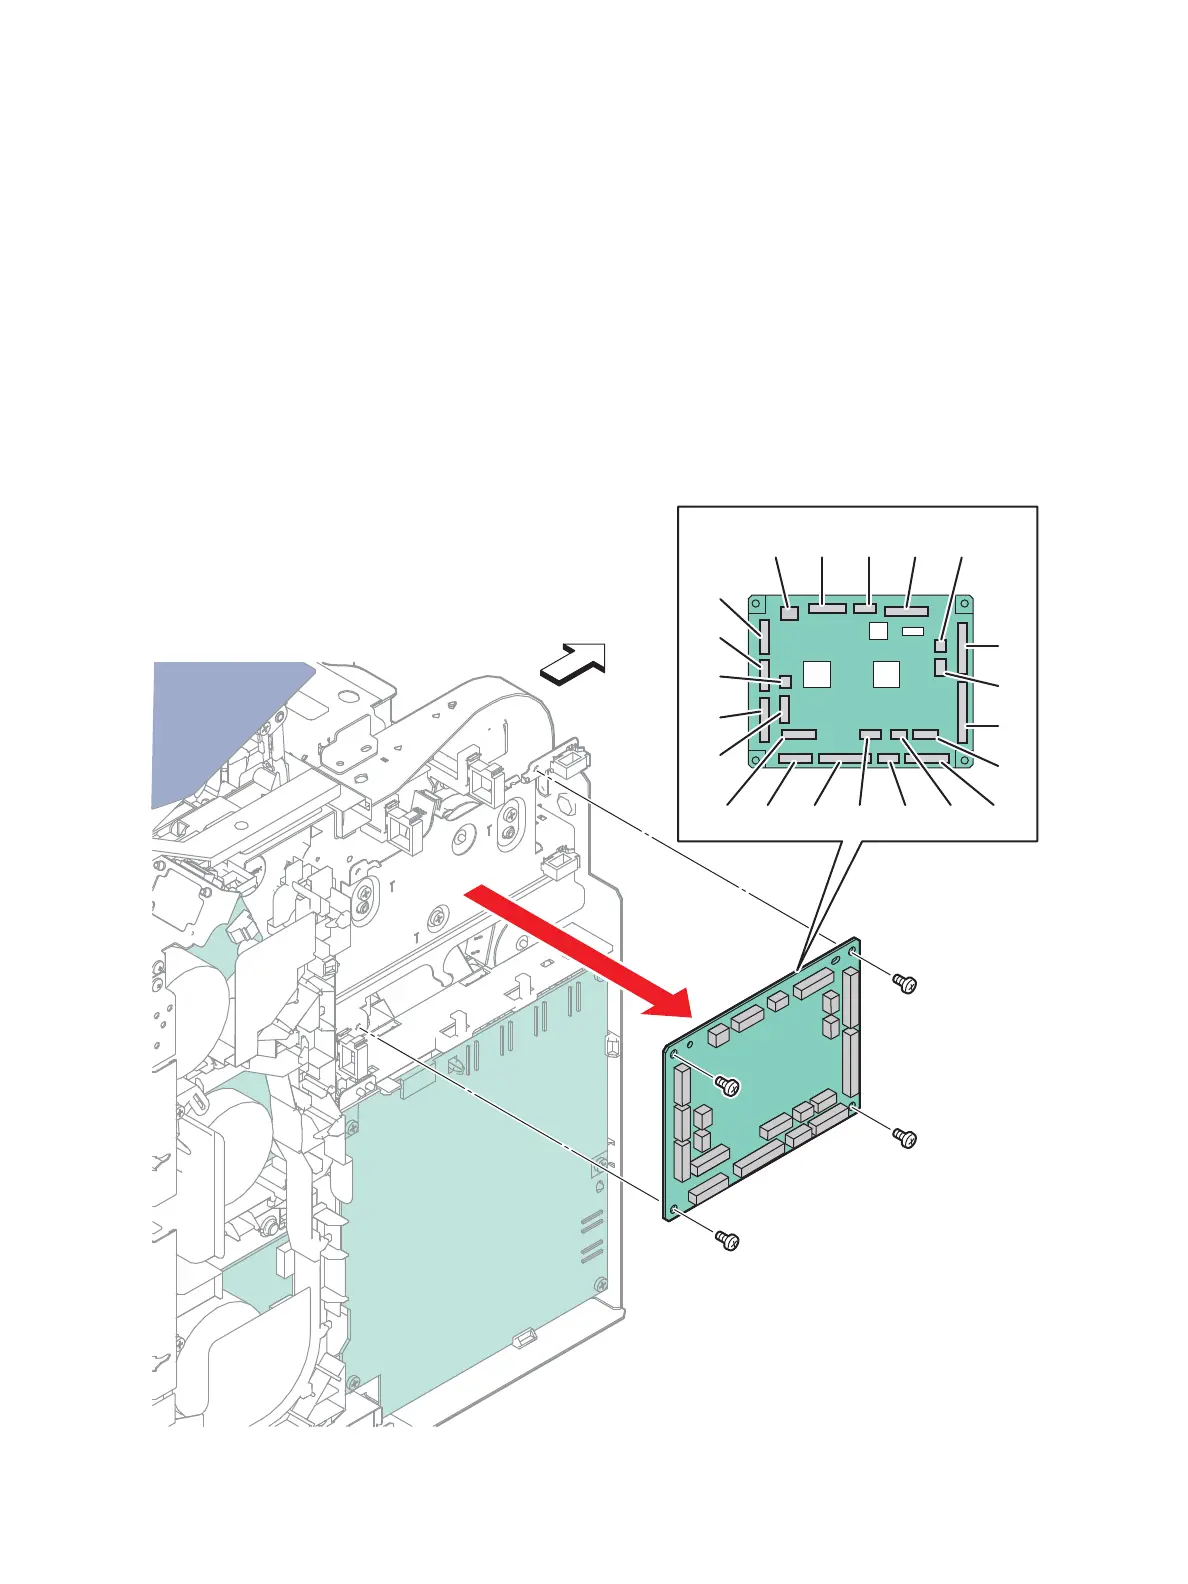
MCU Board
PL18.1.13
1. Enter Service Mode and perform “NVM Saving (SaveNVM to ESS)” on page 2-30.
2. Remove the Front Door Assembly. (page 4-128)
3. Remove the Left Cover Assembly. (SFP page 4-134; MFP page 4-136)
Tip: Release the harnesses from the clamps to ease unplugging the connectors on the MCU Board.
4. Unplug all connectors from the MCU Board (PL18.1.13).
5. Remove the four screws (silver, 6mm) that attach the MCU Board to the printer and remove the
board.
6. After replacing the board, enter Service Mode and perform “Initialize Slave” on page 2-31.
s6600-069
Front
30
P/J No.
14 15 12 38
19
40
29
28
17
33
22
10
23
21 18 11 13 36 39 27

 Loading...


