Utility Stitches
106
With the twin needle, you can sew two parallel
lines of the same stitch with two different threads.
Both upper threads should have the same
thickness and quality.
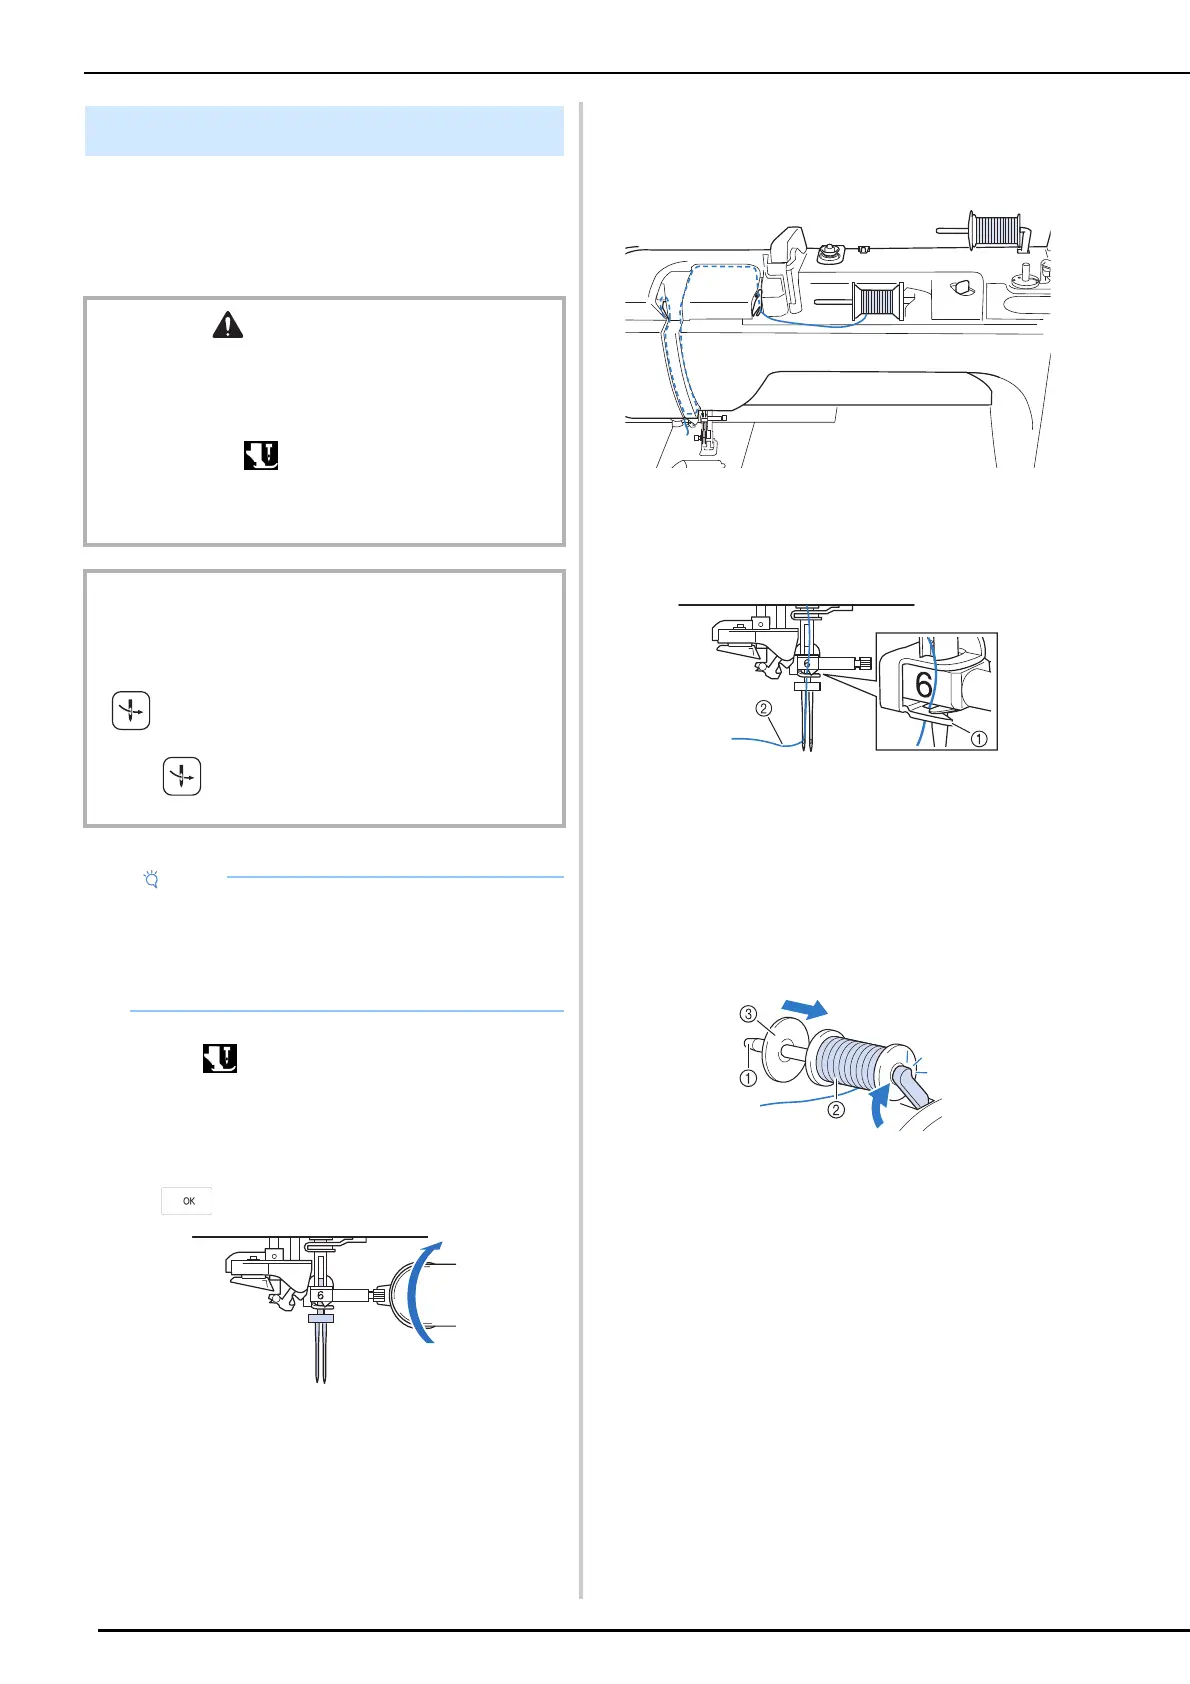
1 Touch and then install the twin
needle (“Changing the Needle” on
page 36).
* If the message [OK to automatically lower the
presser foot?] appears on the LCD screen, touch
to continue.
2 Pass the first upper thread according to
steps
1 through 8 of “Upper Threading”
on page 42.
3 Pass the thread through the needle bar
thread guide, then thread the needle on
the left side manually.
a Needle bar thread guide
b First upper thread
4 Set the supplemental spool pin in the
“up” position and then place the
additional spool of thread, so that the
thread unwinds to the front from the
bottom.
a Supplemental spool pin
b Thread spool
c Spool cap
Sewing with a Twin Needle
CAUTION
• When using the twin needle, it is recommended to use
zigzag foot “J”. Otherwise, the needle may break and
cause injury.
• Before changing the needle or threading the machine,
be sure to touch
on the LCD Screen to lock all keys
and buttons, otherwise injuries may occur if the “Start/
Stop” button or any other button is pressed and the
machine starts sewing.
IMPORTANT
• Twin needle (size 2/11) is recommended for this
machine. Contact your authorized Brother dealer for
replacement needles.
• (Automatic threading button) cannot be used.
Manually thread the twin needle from front to back.
Using (Automatic threading button) may result in
damage to the machine.
• When the twin needle is used, bunched
stitches may occur depending on the types of
fabric and thread that are used.
Use advanced monogramming foot “N+” or
attach stabilizer material.



 To Next Page