Utility Stitches
Various Stitches
101
3
5 Start sewing.
The machine stops automatically when sewing is
finished.
6 Peel off the end point sticker.
Saving Settings
Specified angles for start and end, finish tapering
method, and stitch settings can be saved in
machine’s memory.
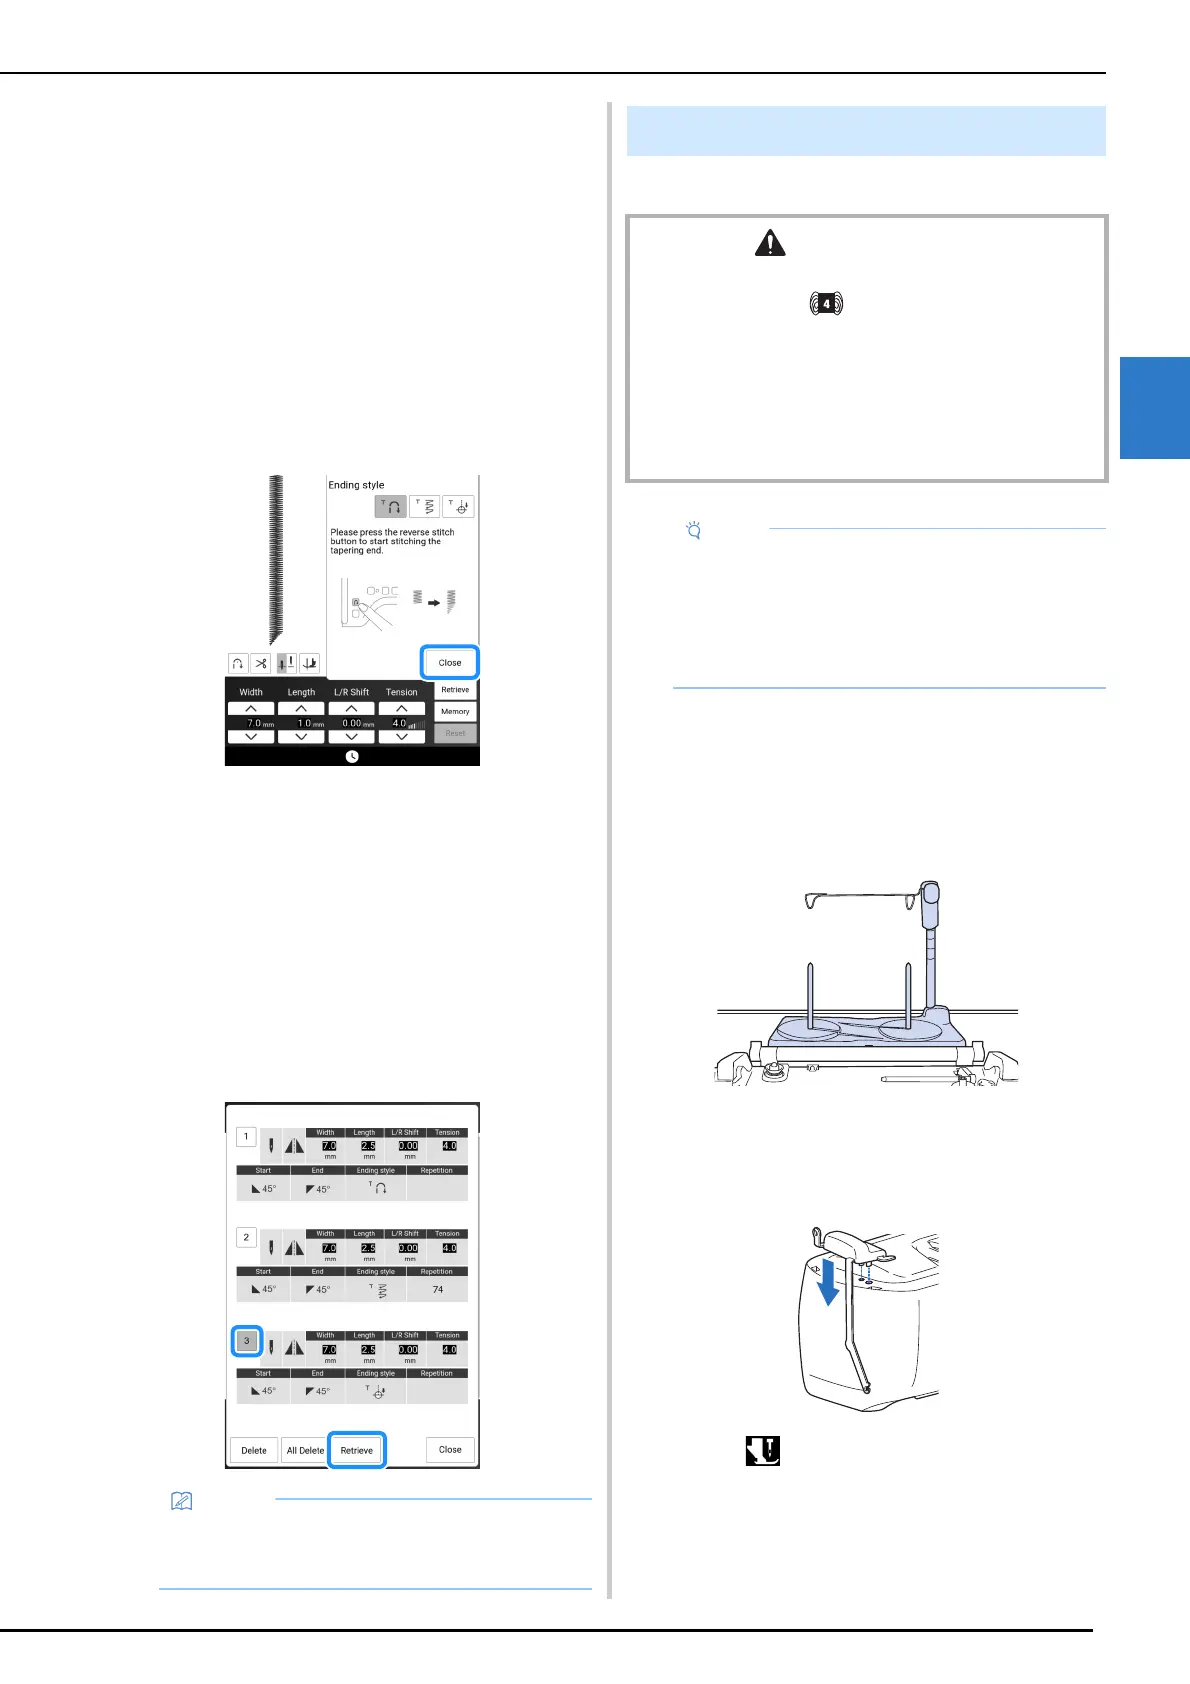
1 After setting the tapering function, touch
[Close].
2 Touch [Memory].
Retrieving Saved Settings
1
Touch [Retrieve] to retrieve the saved
setting after selecting pattern.
2 Touch the numbered key of the settings
to be retrieved and then touch [Retrieve].
* The settings cannot be retrieved if stitch tapering
function is set to on.
You can easily sew decorative effects using yarn.
Prepare for Couching
1
Attach the spool stand to the machine.
At this time, do not raise the telescopic thread guide
shaft.
* Refer to “Assembling the Spool Stand” on page 45.
2 Insert the yarn guide into the slot on the
top left of the machine.
3 Touch to lock all keys and buttons,
and then raise the presser foot lever.
• For more information on saving and recalling
settings, refer to “Saving the Utility Stitch
Settings” on page 63.
Couching
CAUTION
• When using yarn, we recommend selecting yarn of
weight 4 (MEDIUM ). Medium yarn is often referred
to as worsted weight, 20 knitted stitches per 10 cm, or 9-
11 wraps per inch. The diameter of the yarn is
approximately 2-3 mm (approx. 1/12-1/8 inch). If the
yarn is extremely thin or thick, has an unusual shape
(flat or furry), or more than 2 yarns, the best finishing
results may not be achieved, or injuries or damage may
result.
• Sew test stitches on the fabric before sewing
on your project.
• We recommend using a stabilizer material
when sewing stretch fabrics, lightweight
fabrics, fabrics with a coarse weave, or fabrics
which are prone to fabric shrinkage.