Sewing
Sewing Basics
55
2
Adjusting the Length of the Cord
for the Main Foot Controller
1
Unwind the cord for the main foot
controller.
2 Guide the cord between the tabs and
then wind the cord until it is the desired
length.
* The cord can be wound either clockwise or
counterclockwise.
3 Pass the cord between the tabs.
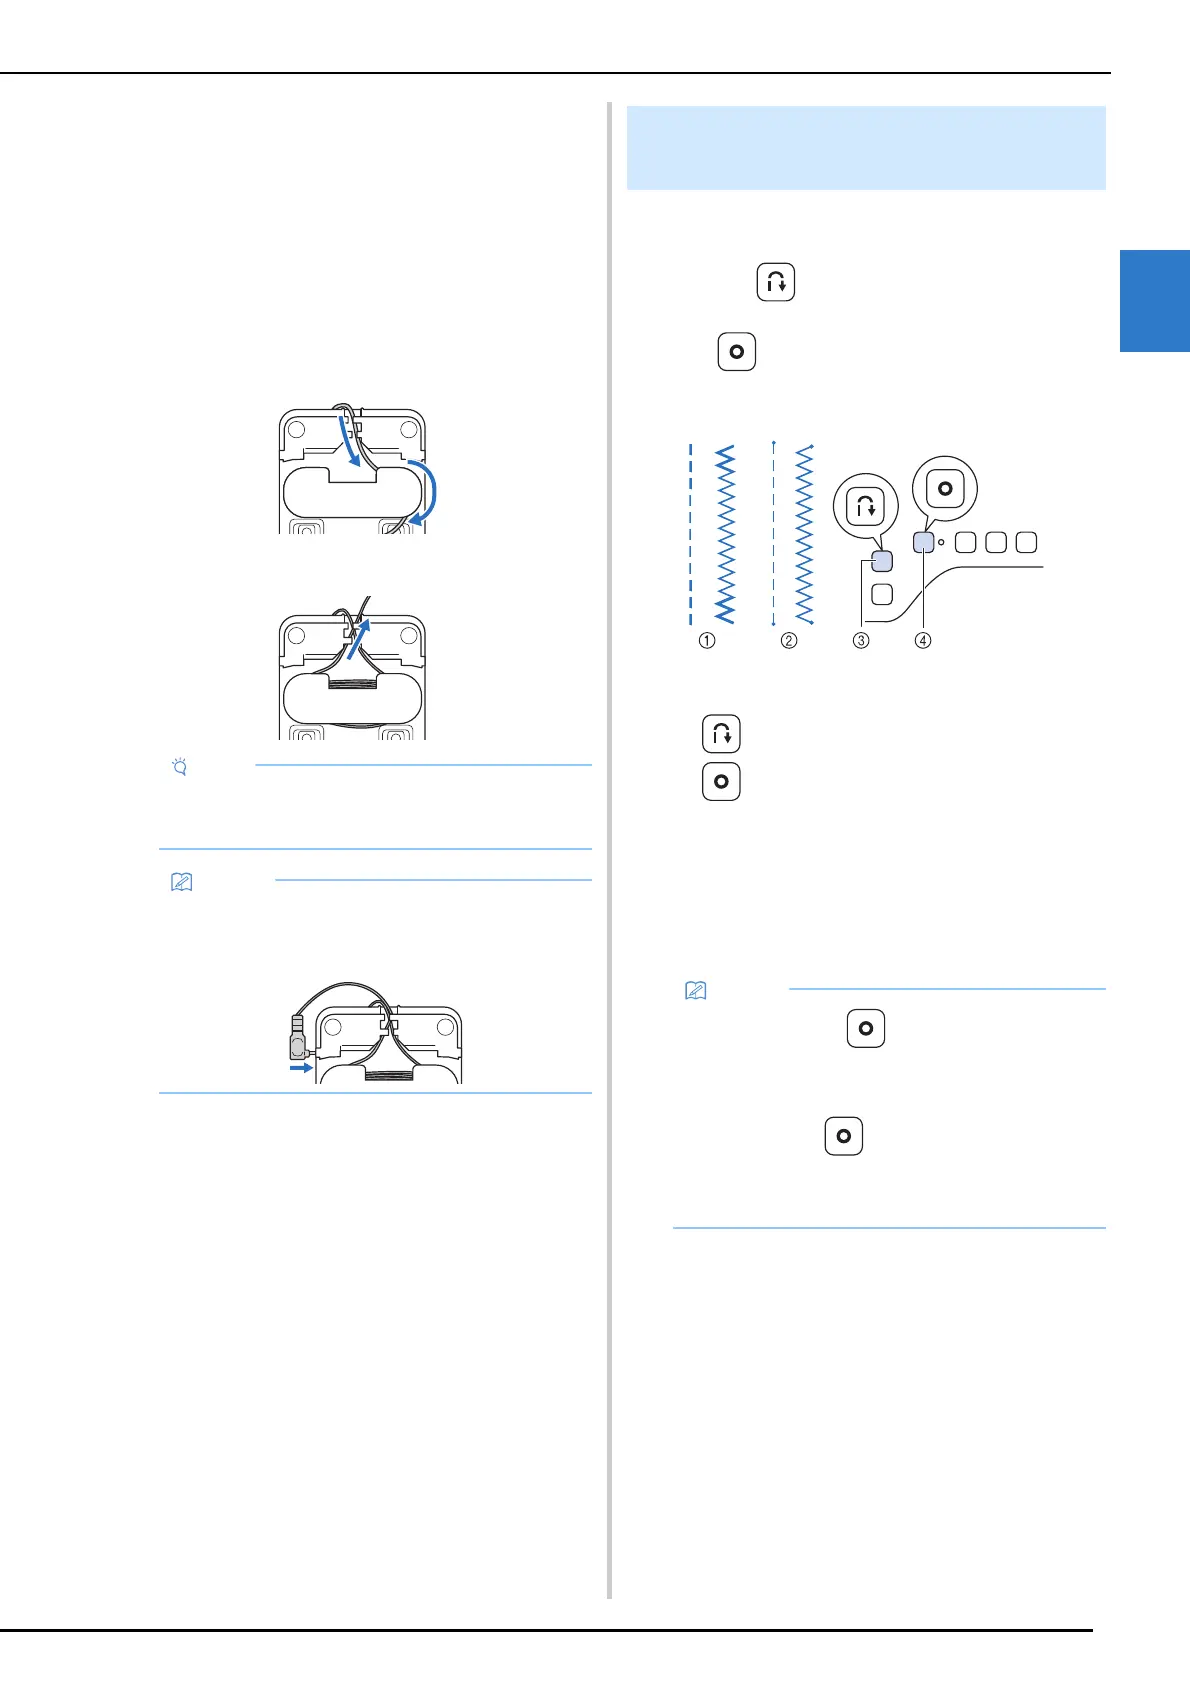
Reverse/reinforcement stitches are generally
necessary at the beginning and end of sewing.
You can use (Reverse stitch button) to sew
reverse/reinforcement stitches. When you keep
pressing (Reinforcement stitch button), the
machine will sew reinforcement stitch at that
point 3 to 5 stitches, and then stop. (page 14)
a Reverse stitch
b Reinforcement stitch
c (Reverse stitch button)
d (Reinforcement stitch button)
The operation performed when the button is
pressed differs depending on the selected stitch
pattern. (Refer to the table of “The Operation
Performed When the “Reverse Stitch” or
“Reinforcement Stitch” is Pressed” on page 57.)
• In order to avoid stepping on the cord with the
main foot controller, pass the cord between
the tabs.
• When storing the cord, pass it between the
tabs, and then insert the plug into the jack on
the main foot controller.
Sewing Reverse/Reinforcement
Stitches
• When you press (Reinforcement stitch
button) while sewing character/decorative
stitch pattern, you can end sewing with a full
stitch instead of at a mid-point. The green light
on the right of (Reinforcement stitch
button) lights up while the machine is sewing a
full motif, and it automatically turns off when
the sewing is stopped.