Sewing
Sewing Basics
53
2
10 When the needle has stopped moving,
raise the presser foot and remove the
fabric.
With the advanced multi-function foot controller,
various sewing machine operations in addition to
starting/stopping sewing, such as thread cutting
and reverse stitching, can be specified to be
performed.
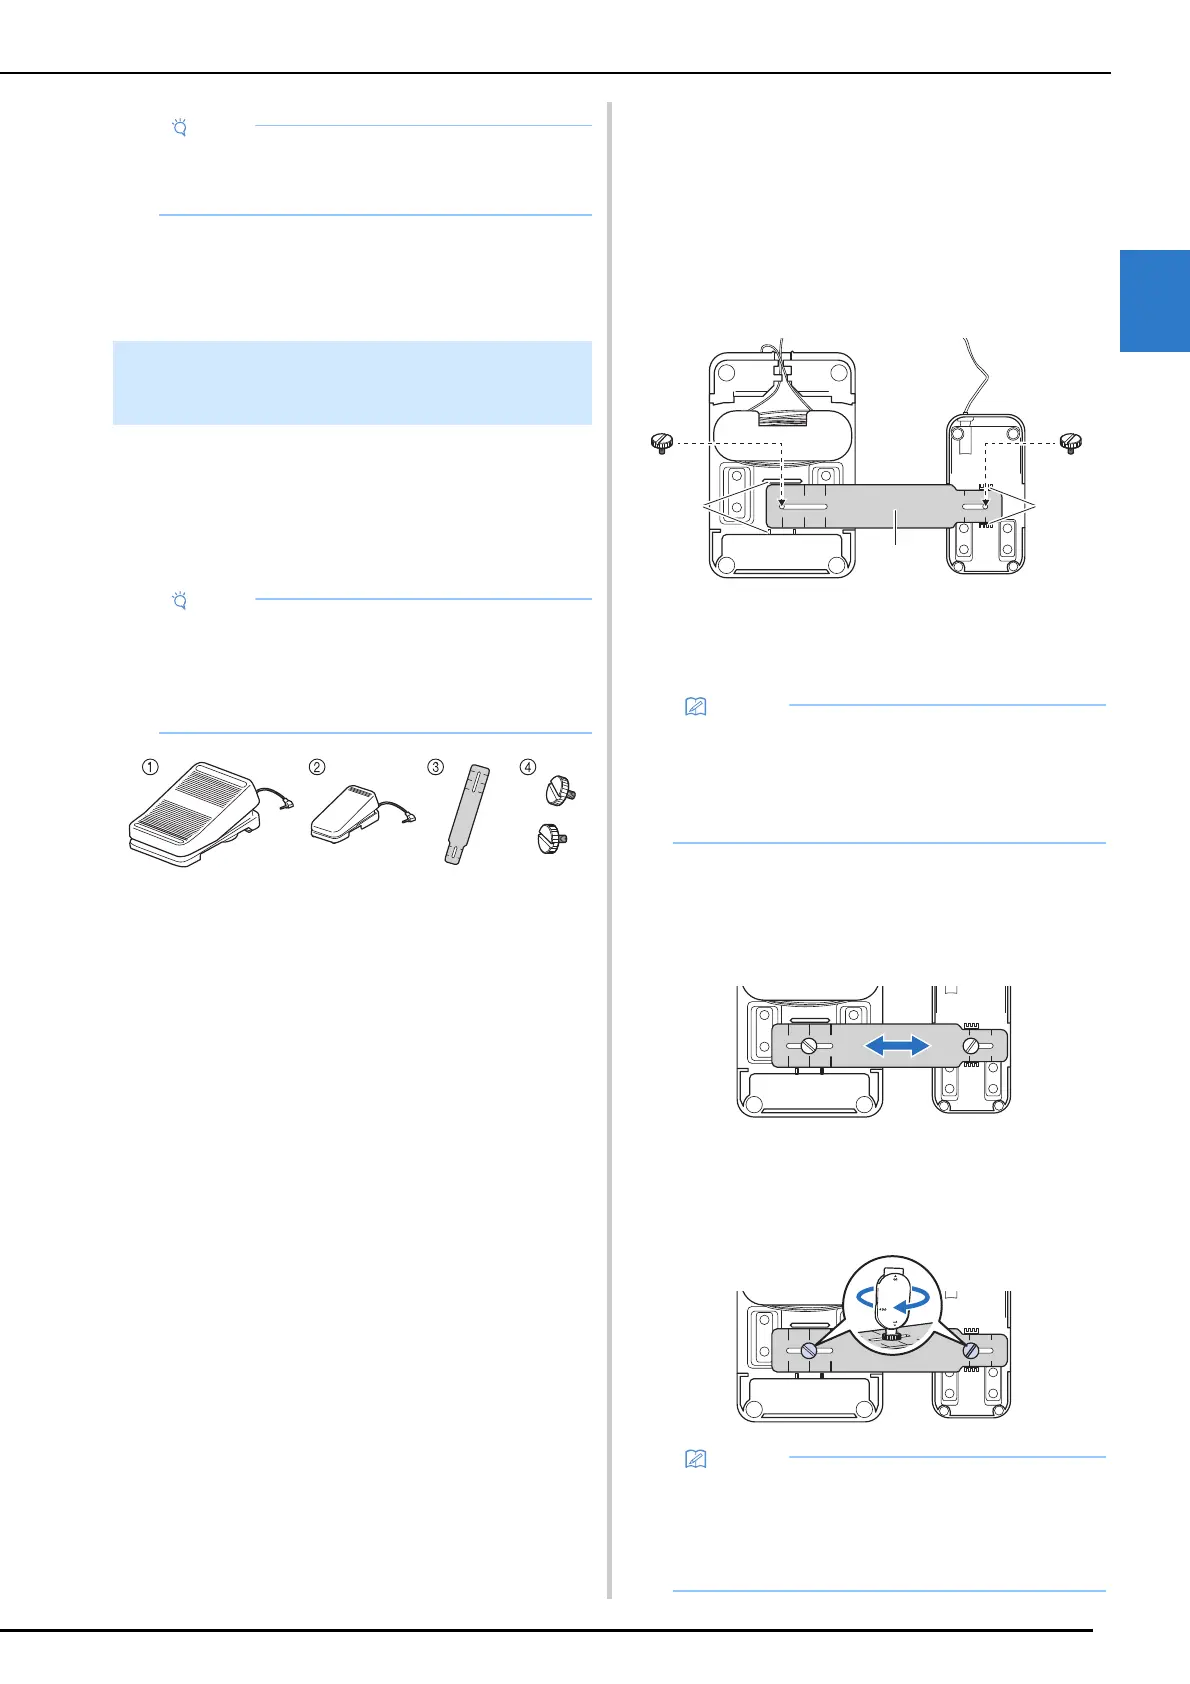
a Main foot controller
b Side pedal
c Mounting plate
d Mounting screw × 2
1 Align the smaller end of the mounting
plate with the guide on the bottom of the
side pedal, and then gently fasten them
together with the mounting screw.
Align the larger end of the mounting plate
with the guide on the bottom of the main
foot controller, and then gently fasten
them together with the mounting screw.
a Guide on side pedal
b Mounting plate
c Guide on main foot controller
2 Adjust the spacing between the main foot
controller and side pedal.
* Use the markings on the mounting plate as a
convenient guide to adjust the spacing.
3 Firmly tighten the mounting screws to
secure the main foot controller and side
pedal.
• When cutting thread such as nylon
monofilament thread, or other decorative
threads, use scissors.
Using Advanced Multi-Function
Foot Controller
• (For U.S.A. only) Foot controller: Model X
This foot controller can be used on the
machine with product code 882-W40/W42.
The product code is mentioned on the
machine rating plate.
• The side pedal can be mounted on either the
left or right side of the main foot controller.
• The main foot controller and side pedal can
also be used without installing the mounting
plate.
• To readjust the spacing between the main foot
controller and side pedal, slightly loosen the
mounting screws, and then adjust the
positions of the main foot controller and side
pedal.