Embroidering Quilting
195
Advanced Embroidery
5
Connect quilting patterns to embroider from edge
to edge of a specified area. By rehooping a large
piece of fabric, you can continue embroidering
the quilting pattern across the entire fabric.
Creating Edge-to-Edge Quilt Data
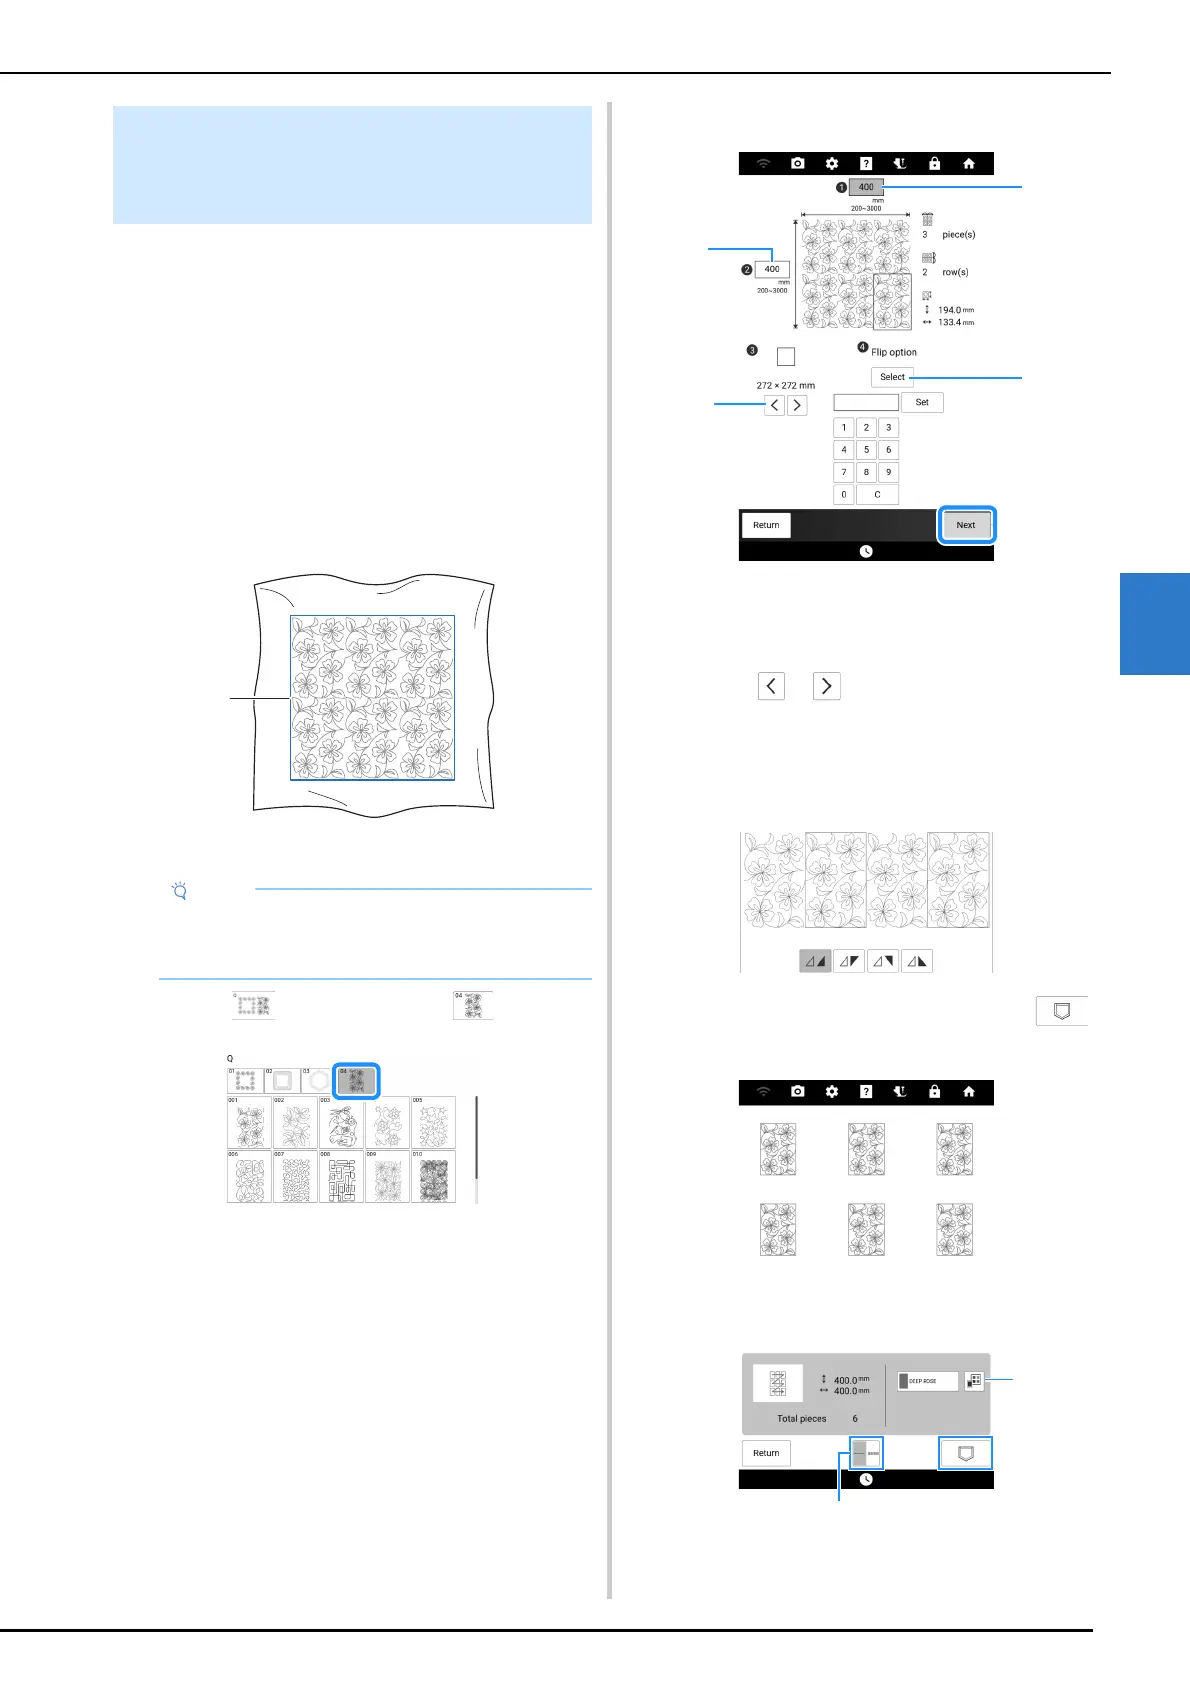
1
Determine the area of the fabric to be
embroidered, and then draw a line
around it with a chalk pencil. Measure the
width and height.
a Embroidering area
2 Touch , and then touch .
3 Select the pattern that you want to
embroider, and then touch [Set].
4 Specify 1 to 4, and then touch [Next].
a Width
b Height
* After entering a value, touch [Set] to apply the
value. To clear the entered value, touch [C].
c Touch or to select the embroidery frame
size.
d Touch [Select] to flip every other pattern. Select
the desired flip arrangement (no flipping, left/right
flipping, up/down flipping, left/right and up/down
flipping) from the flip keys, and then touch [OK].
5 Check the pattern, and then touch
to save it.
a The thread color can be changed.
b Select single stitching or triple stitching.
Embroidering a Quilting Pattern
Across the Entire Fabric (Edge-to-
Edge Quilt Function)
• Make sure that the chalk pencil line is within
the embroidering area when the fabric is
hooped.
 Loading...

