Create the Pattern Using Scanned Images or Image Data Files
244
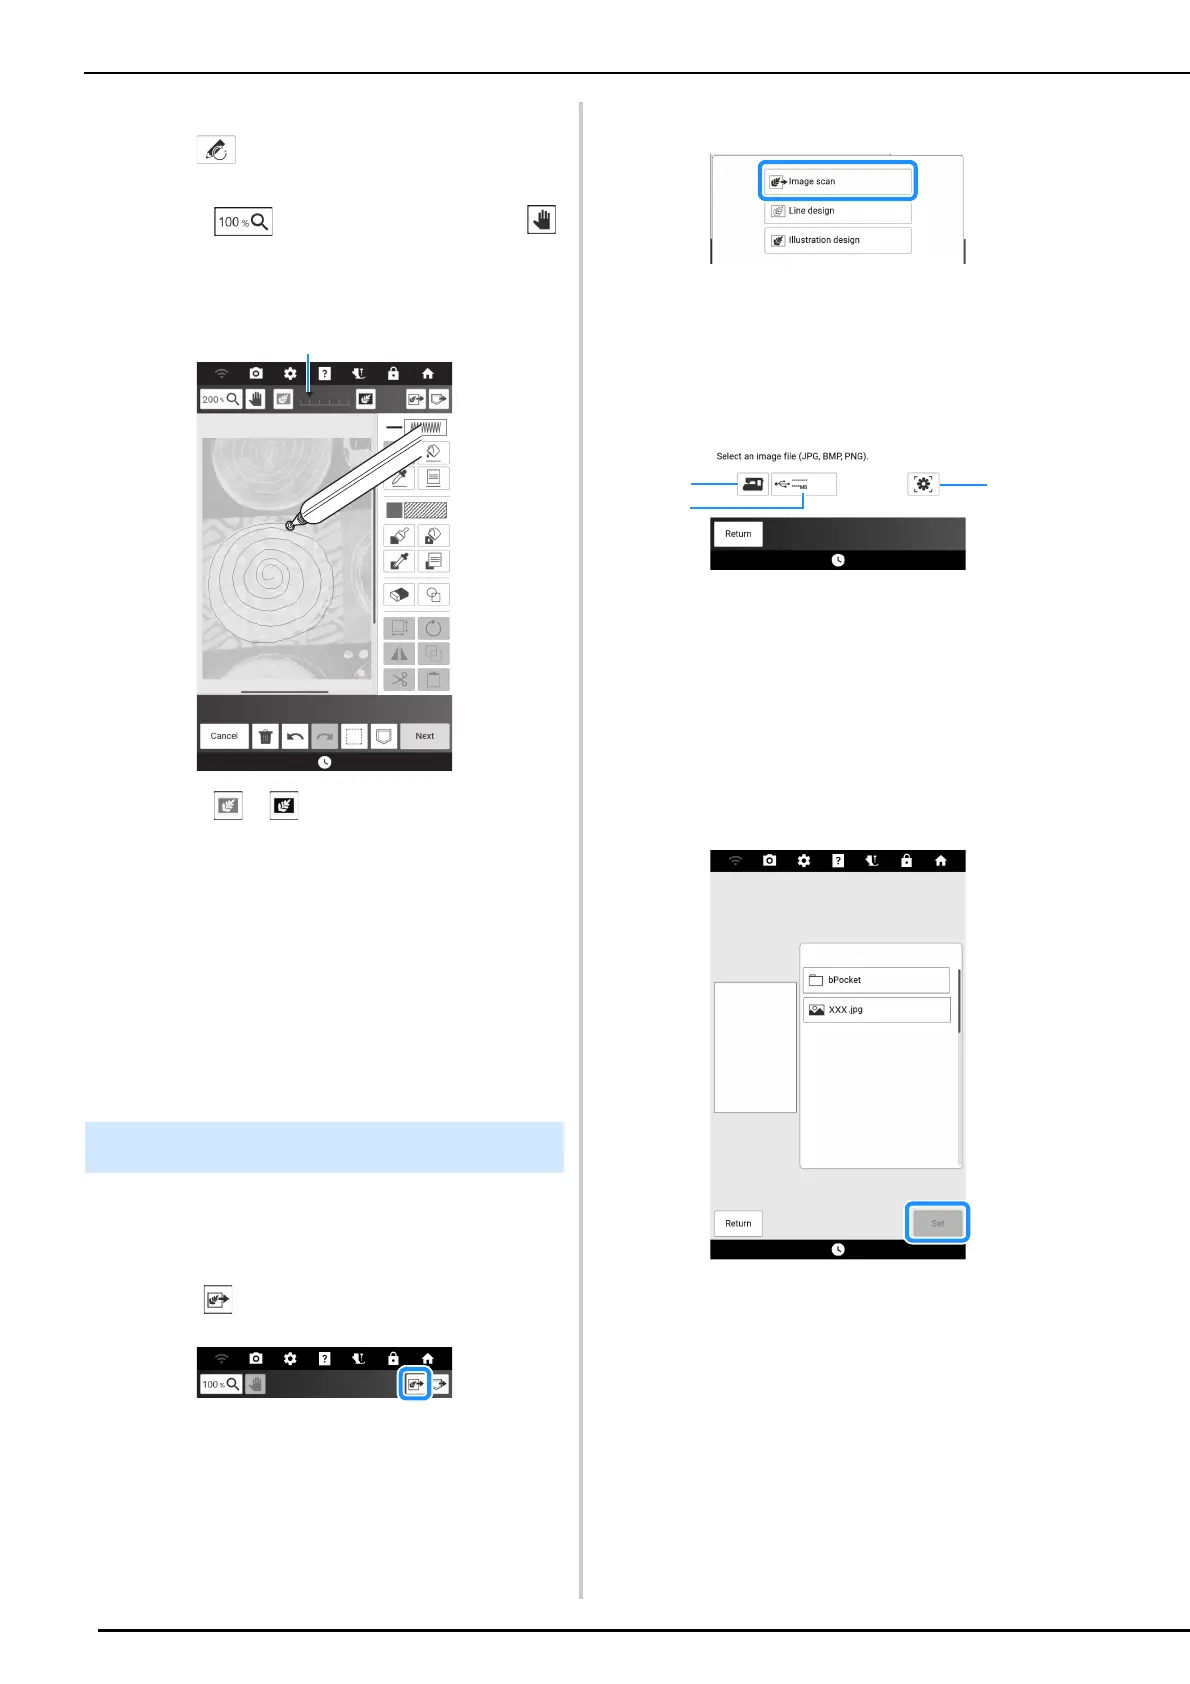
6 Using the included dual purpose stylus,
touch , and then draw lines to trace
the image.
* Touch to magnify the pattern and use
to move the canvas.
* For details on drawing lines, refer to “Drawing
Lines” on page 232.
a Touch or to adjust the transparency of the
background.
7 After editing the pattern, touch [Next] to
specify the settings for pattern.
* For details on editing patterns, refer to “Key
Functions (My Design Center)” on page 230.
8 Touch [Set] to display the embroidery
edit screen.
* Refer to “Specifying Individual Stitch Settings” on
page 238.
Create patterns by importing image data into the
machine, then displaying it as a background
image.
1 Touch .
2 Touch [Image scan].
3 Select the device you saved the data to.
* If two USB media are connected to the machine,
check the USB media names that are displayed,
and then touch the name of the USB media that
you wish to use.
a The most recently scanned image is automatically
stored in the machine’s memory. Touch this key to
import the scanned image.
b Touch to import the data file saved on a USB
media. Save data as a .jpg, .bmp, or .png file type,
on a USB media. For details on files that can be
imported, refer to “Specifications” on page 271.
c Touch to transfer an image that was saved on the
smart device then sent to the machine. (page 226)
4 Select the data, and then touch [Set].
The selected image is displayed transparently in
the pattern drawing area.
5 Create an embroidery pattern.
Refer to step
6 of “Scanning the
Background Image” on page 243.
Importing the Background Image