Utility Stitches
82
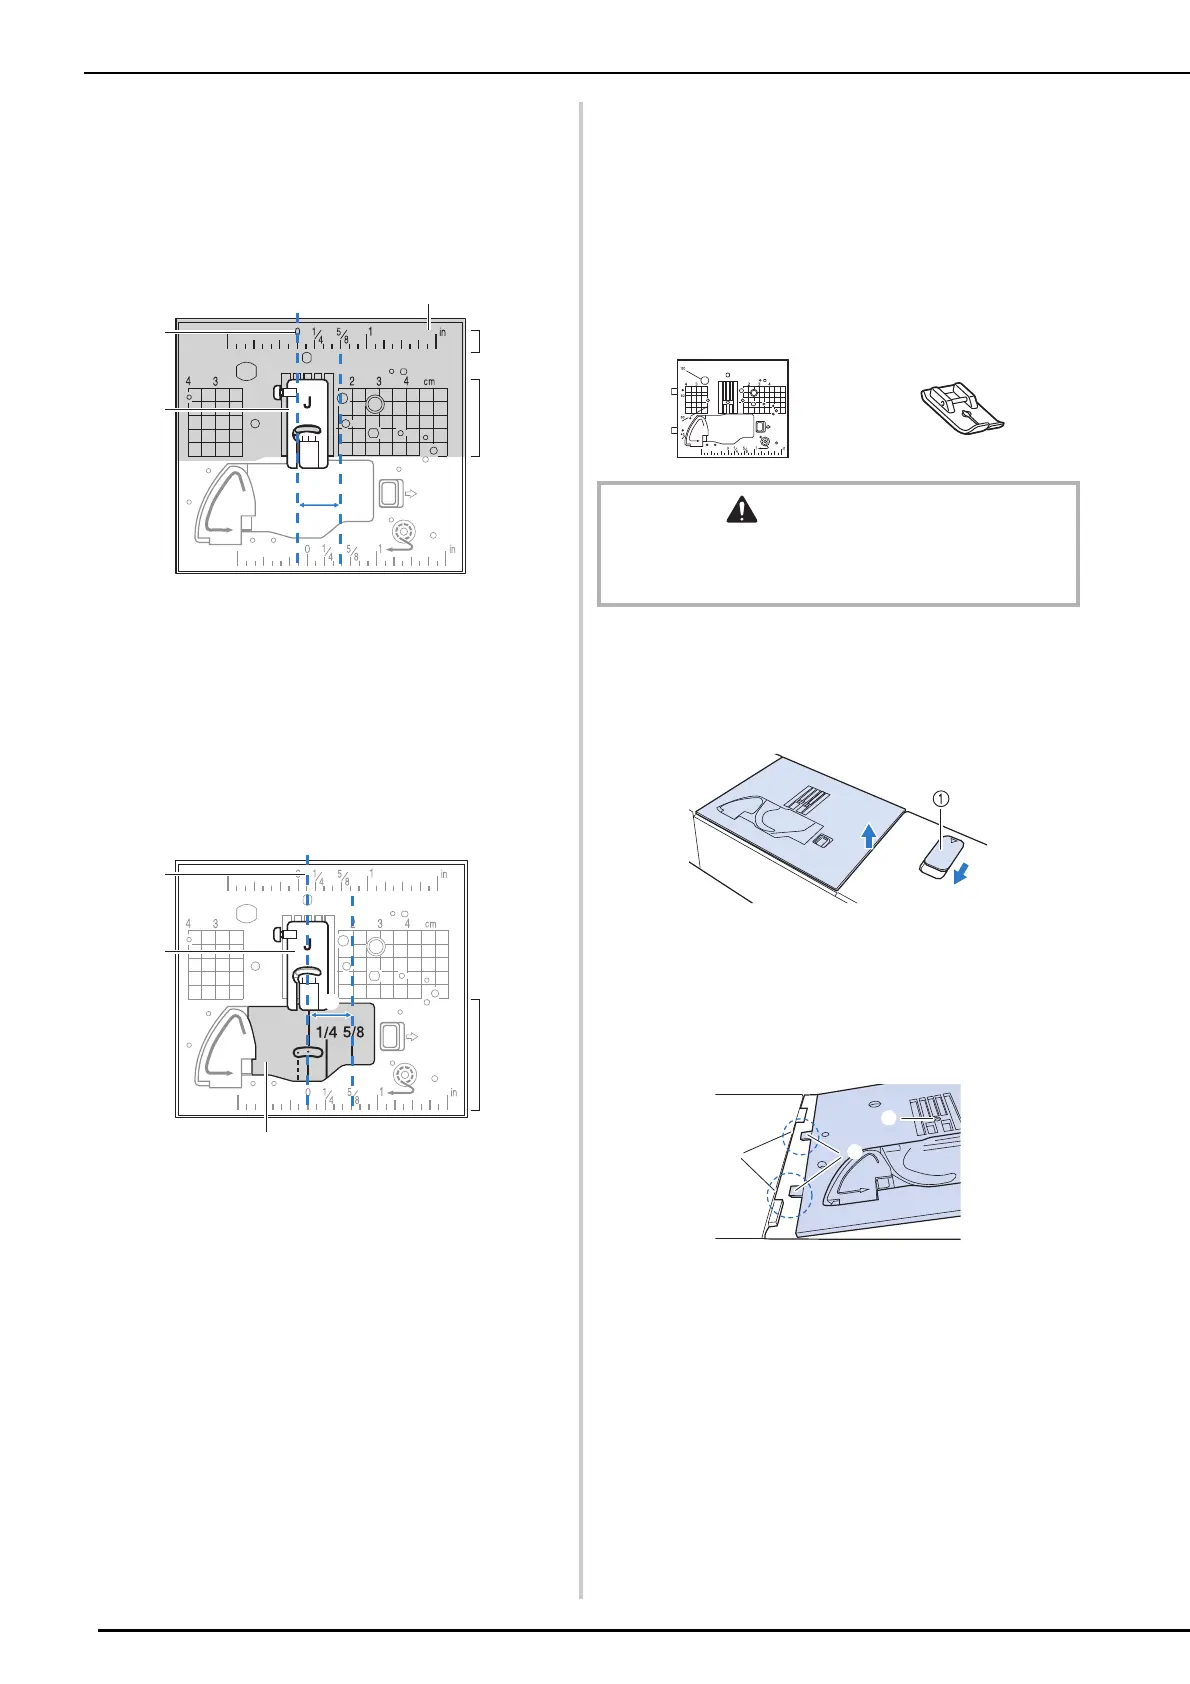
Aligning the Fabric with a Mark
on the Needle Plate or Bobbin
Cover (with Mark)
For stitches with a left needle position
(L/R Shift: 0.00 mm)
a Seam
b Presser foot
c Centimeters
d Inches
e Needle plate
f 5/8 inch (approx. 16 mm)
For stitches with a middle (center)
needle position
(L/R Shift: 3.50 mm)
a Seam
b Presser foot
c Inches
d Bobbin cover (with mark)
e 5/8 inch (approx. 16 mm)
Using the Straight Stitch Needle
Plate and the Straight Stitch Foot
The straight stitch needle plate and the straight
stitch foot can only be used for straight stitches
(middle needle position stitches). Use the straight
stitch needle plate and the straight stitch foot when
sewing thin fabrics or when sewing small pieces
which tend to sink into the hole of the regular
needle plate during sewing.
1 Turn off the machine and remove the
needle plate.
* For details, refer to steps 1 through 6 of “Cleaning
the Race” on page 255.
a Slide toward you.
The needle plate opens.
2 Insert the tabs on the straight stitch
needle plate into the notches in the
machine.
a Tabs
b Notches
c Round hole
CAUTION
• Always use the straight stitch foot in combination with
the straight stitch needle plate. Otherwise, the needle
may break and cause injury.
a
c
b