Winding/Installing the Bobbin
Getting Ready
37
1
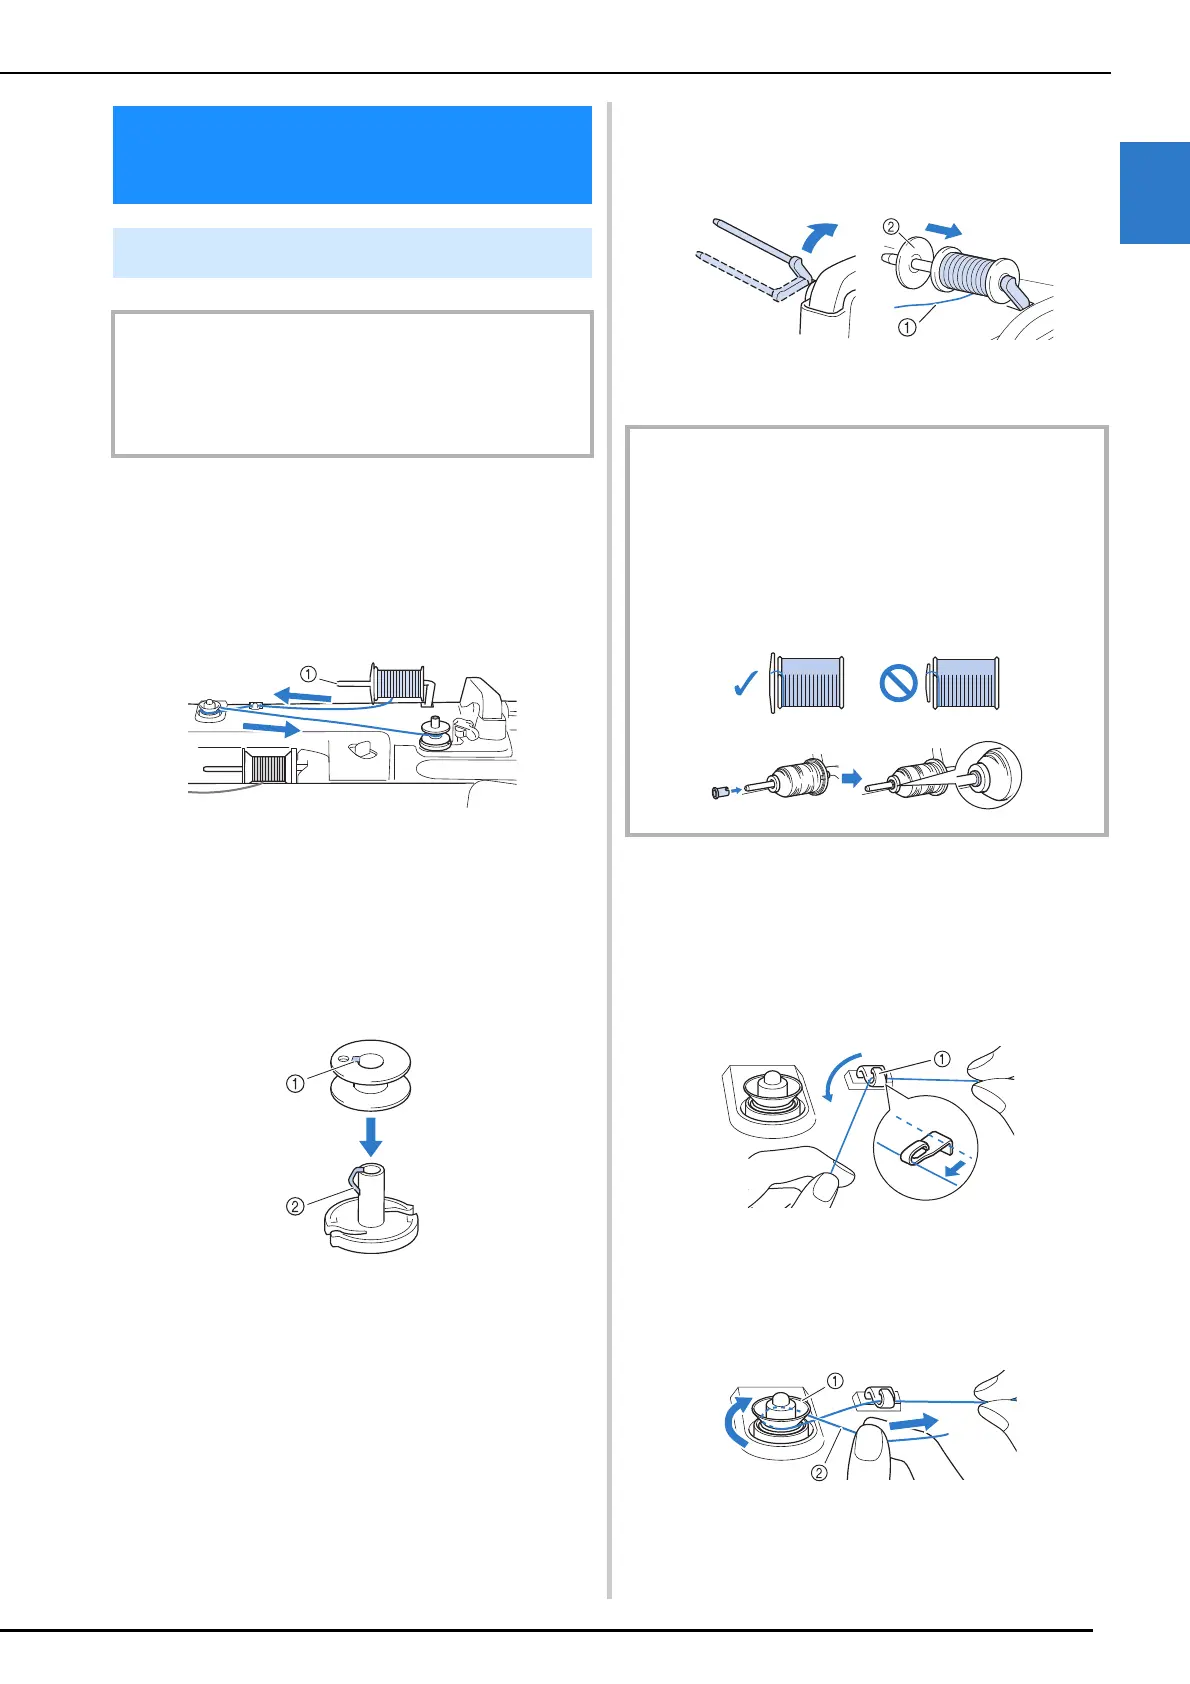
Using the Supplemental Spool
Pin
While the main spool pin is being used for sewing,
you can wind a bobbin by using the supplemental
spool pin.
a Supplemental spool pin
1 Turn the main power to ON and open the
top cover.
2 Align the groove in the bobbin with the
spring on the bobbin winder shaft, and
set the bobbin on the shaft.
a Groove in the bobbin
b Spring on the shaft
3 Place the spool of thread for the bobbin
and the spool cap onto the supplemental
spool pin.
a The thread unwinds to the front from the bottom.
b Spool cap
4 With your right hand, hold the thread
near the thread spool. With your left
hand, hold the end of the thread, and use
both hands to pass the thread through
the thread guide.
a Thread guide
5 Pass the thread around the pretension
disk making sure that the thread is under
the pretension disk.
a Pretension disk
b Check to make sure thread is securely set between
pretension disks.
Winding/Installing the
Bobbin
Winding the Bobbin
IMPORTANT
• Use the plastic bobbins that came with this machine or
bobbins of the same type: 11.5 mm (approx. 7/16 inch)
plastic Class 15 (A style) bobbins, which are available
from your Brother dealer.
IMPORTANT
• If the spool or the spool cap is not installed correctly, the
thread may become tangled around the spool pin and
the machine may be damaged.
• Choose a spool cap that best fits the size of spool being
used. For more information regarding the choice of
spool caps for your thread choice, refer to “How to Use
the Spool Cap and Spool Net” on page 35.