Utility Stitches
94
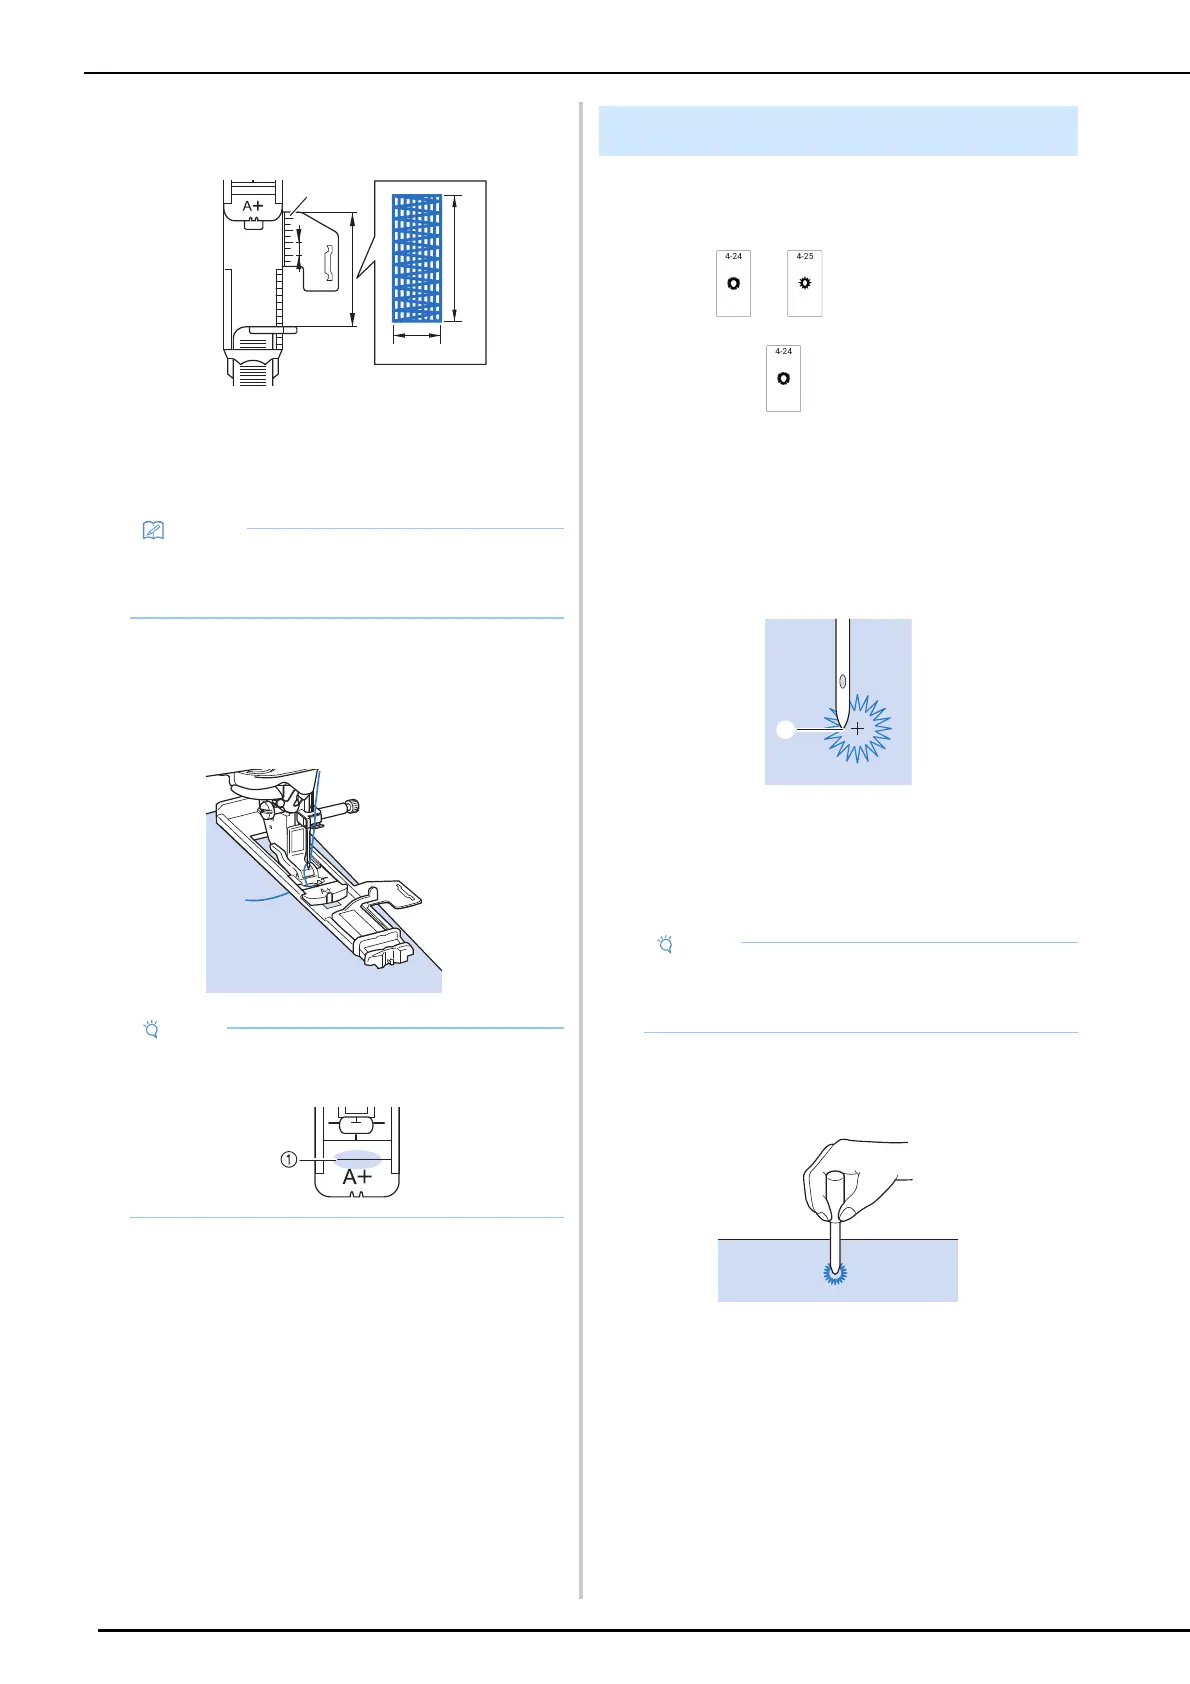
2 Set the scale to the desired length of the
darning.
a Presser foot scale
b Completed length measurement
c Width 7 mm (approx. 1/4 inch)
d 5 mm (approx. 3/16 inch)
3 Check that the needle drops at the
desired position and lower the presser
foot, making sure the upper thread
passes underneath the buttonhole foot.
4 Gently hold the end of the upper thread,
and then press the “Start/Stop” button to
start the machine.
Once sewing is completed, the machine
automatically sews reinforcement stitches, and
then stops.
Use this stitch for making belt holes and other
similar applications.
1 Select or .
2 If selecting , adjust either the stitch
width or the stitch length to choose the
size of the eyelet. (page 61)
3 Attach advanced monogramming foot
“N+”, then rotate the handwheel toward
you (counterclockwise) to check the
needle drop point.
a Needle drop point
4 Lower the presser foot and start sewing.
When sewing is finished, the machine sews
reinforcement stitches and stops automatically.
5 Use the eyelet punch to make a hole in
the center of the stitching.
• Instead of setting the darning length with the
buttonhole foot, it can be set on the screen.
(page 89)
• After lowering the presser foot, make sure that
there is no gap in 1.
Eyelet
• If the stitch pattern comes out poorly, make
adjustments by following “Making
Adjustments” on page 105.