Embroidering Preparation
Basic Embroidery
131
4
Using the Embroidery Sheet (Sold
Separately)
When you want to embroider the pattern in a
particular place, use the embroidery sheet (sold
separately) with the embroidery frame.
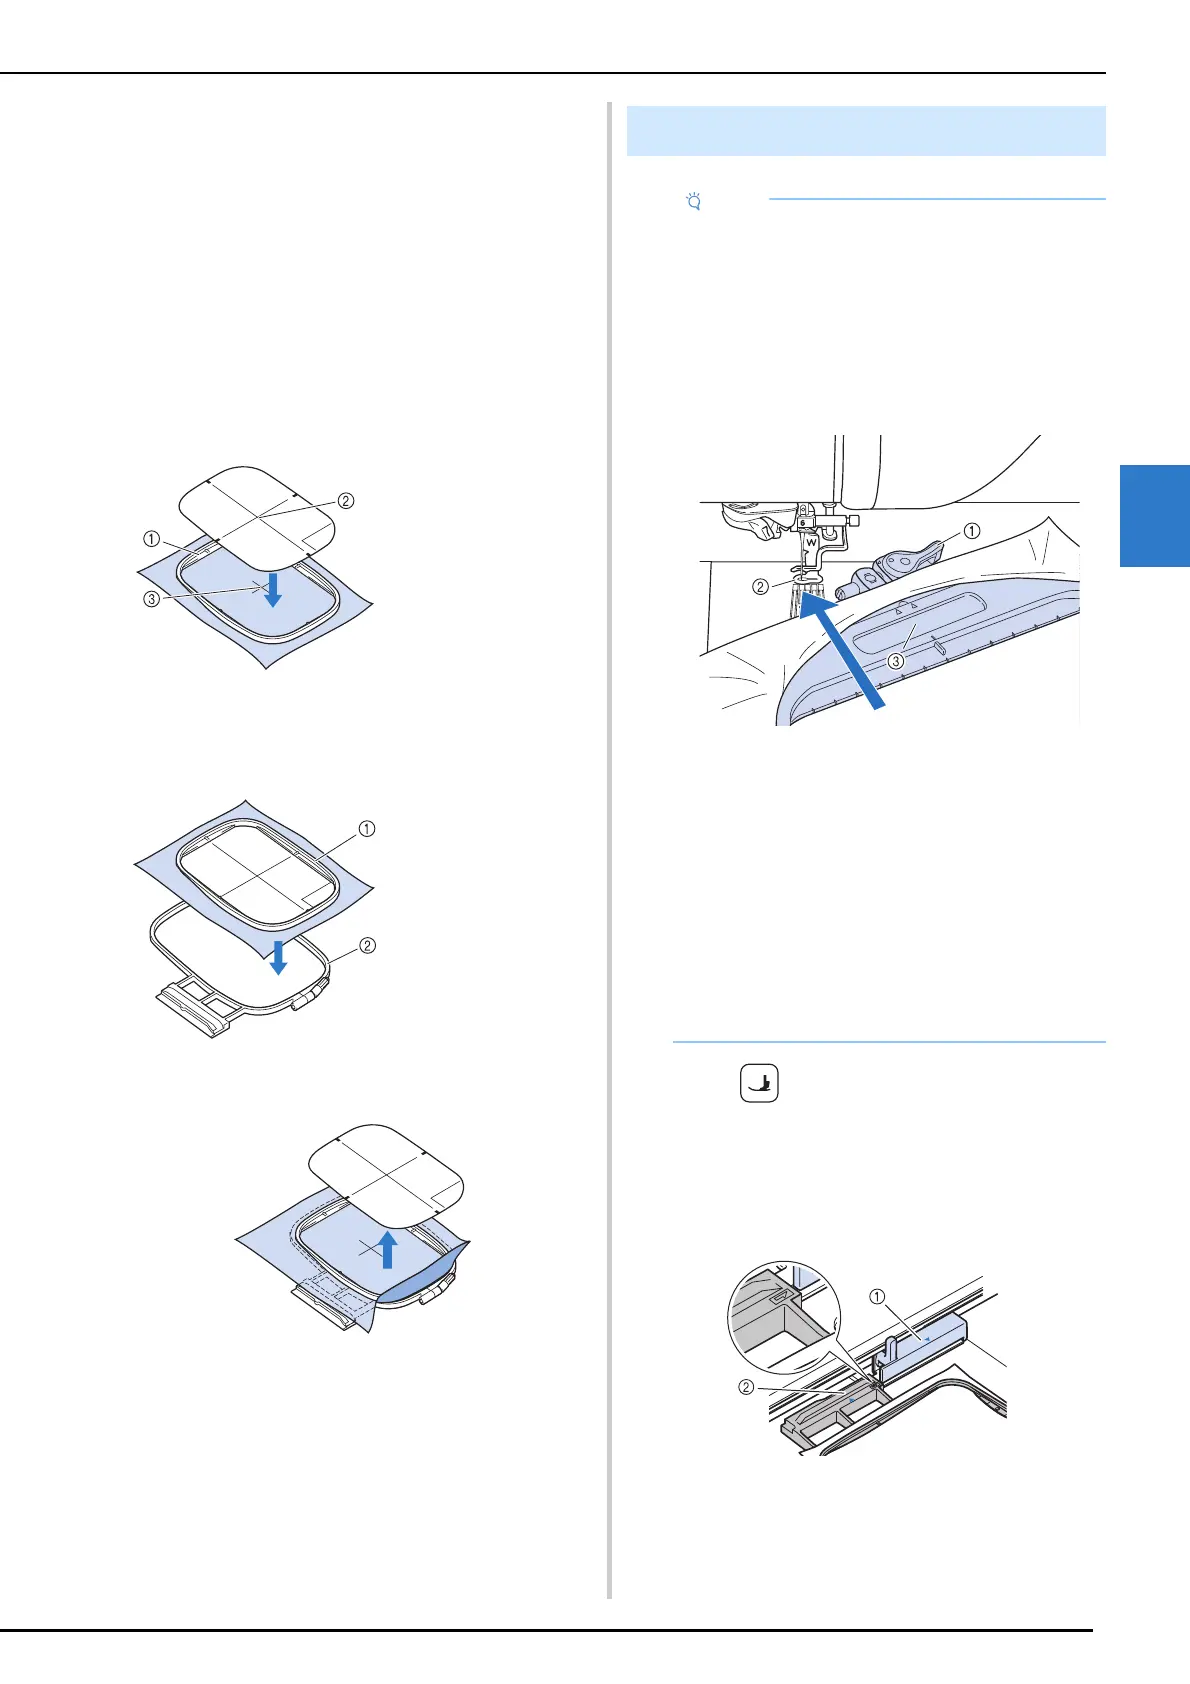
1 With a chalk pencil, mark the area of the
fabric you want to embroider.
2 Place the embroidery sheet on the inner
frame. Align the guide lines on the
embroidery sheet with the mark you
made on the fabric.
3 Gently stretch the fabric so there are no
folds or wrinkles, and press the inner
frame into the outer frame.
4 Remove the embroidery sheet.
1 Press (Presser foot lifter button) to
raise the embroidery foot.
2 Align the embroidery frame guide with
the right edge of the embroidery frame
holder.
a Embroidery frame holder
b Embroidery frame guide
a Inner frame
b Guide line
c Mark
a Inner frame
b Outer frame
Attaching the Embroidery Frame
• When attaching/removing the 465 mm × 297
mm (approx. 18-1/4 inches × 11-5/8 inches)
embroidery frame to/from the machine, angle
the embroidery frame so that the lever at the
top does not hit the embroidery foot, as shown
in the illustration. If the embroidery frame lever
is hidden by the fabric, attach/remove it so that
the rectangular area (indentation) of the inner
frame does not touch the presser foot.
a Embroidery frame lever
b Embroidery foot
c Rectangular area (indentation) (Make sure
that this area does not touch the embroidery
foot.)
• Wind embroidery bobbin thread and insert the
bobbin before attaching the embroidery frame.
Check that there is enough thread in the
bobbin.
• Make sure that the frame-securing lever is
correctly lowered after the embroidery frame
has been installed in the embroidery frame
holder.
 Loading...

