Utility Stitches
Various Stitches
89
3
5 Gently hold the end of the upper thread,
and then start sewing.
* Feed the fabric carefully by hand while the
buttonhole is sewn.
Once sewing is completed, the machine
automatically sews reinforcement stitches, and
then stops.
6 Press (Thread cutter button) once.
Raise the presser foot, and then remove
the fabric.
7 Insert a pin along the inside of one of the
bar tacks, and then insert the seam ripper
into the center of the buttonhole and cut
towards the pin.
a Seam ripper
Odd Shaped Buttons/Buttons that
Do Not Fit into the Button
Holder Plate
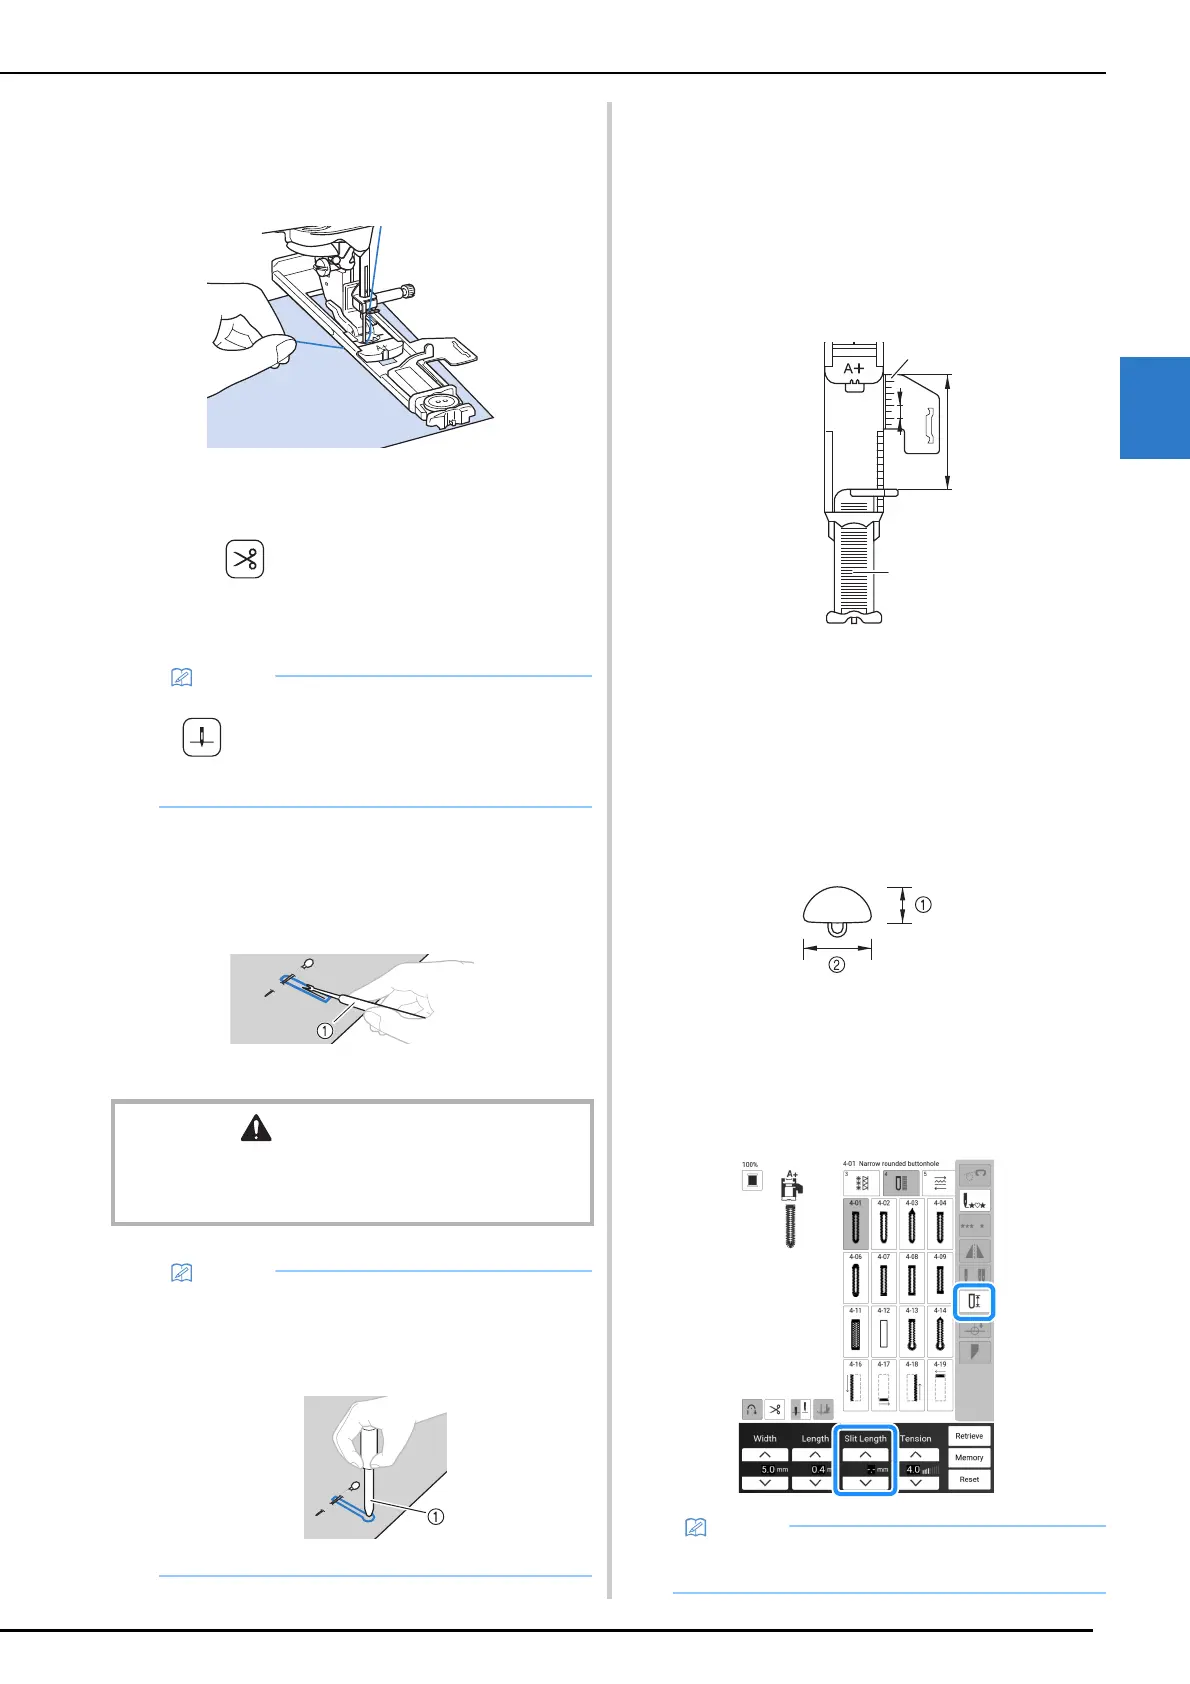
Add the button diameter and thickness together,
and then set the button holder plate at the
calculated value.
The distance between the long markings on the
presser foot scale is 5 mm (approx. 3/16 inch).
a Presser foot scale
b Button holder plate
c Completed measurement of diameter + thickness
d 5 mm (approx. 3/16 inch)
Example: For a button with a diameter of 15 mm
(approx. 9/16 inch) and thickness of 10 mm
(approx. 3/8 inch), align the scale with 25 mm
(approx. 1 inch)
a 10 mm (approx. 3/8 inch)
b 15 mm (approx. 9/16 inch)
Setting the Slit Length
The calculated value can also be set in the screen
instead of setting the button holder plate.
• When using scissors to cut the threads, press
(Needle position button) to raise the
needle, raise the presser foot, and then pull
out the fabric before cutting the threads.
CAUTION
• When using the seam ripper to open the buttonhole, do
not put your hand or finger in the path of the ripper. The
ripper may slip and cause injury.
• For keyhole buttonholes, use the eyelet punch
to make a hole in the rounded end of the
buttonhole, and then use the seam ripper to
cut open the buttonhole.
a Eyelet punch
• Option: turn on projector make adjustment
using dual purpose stylus. (page 70)
a
d
c
b