Embroidering Preparation
128
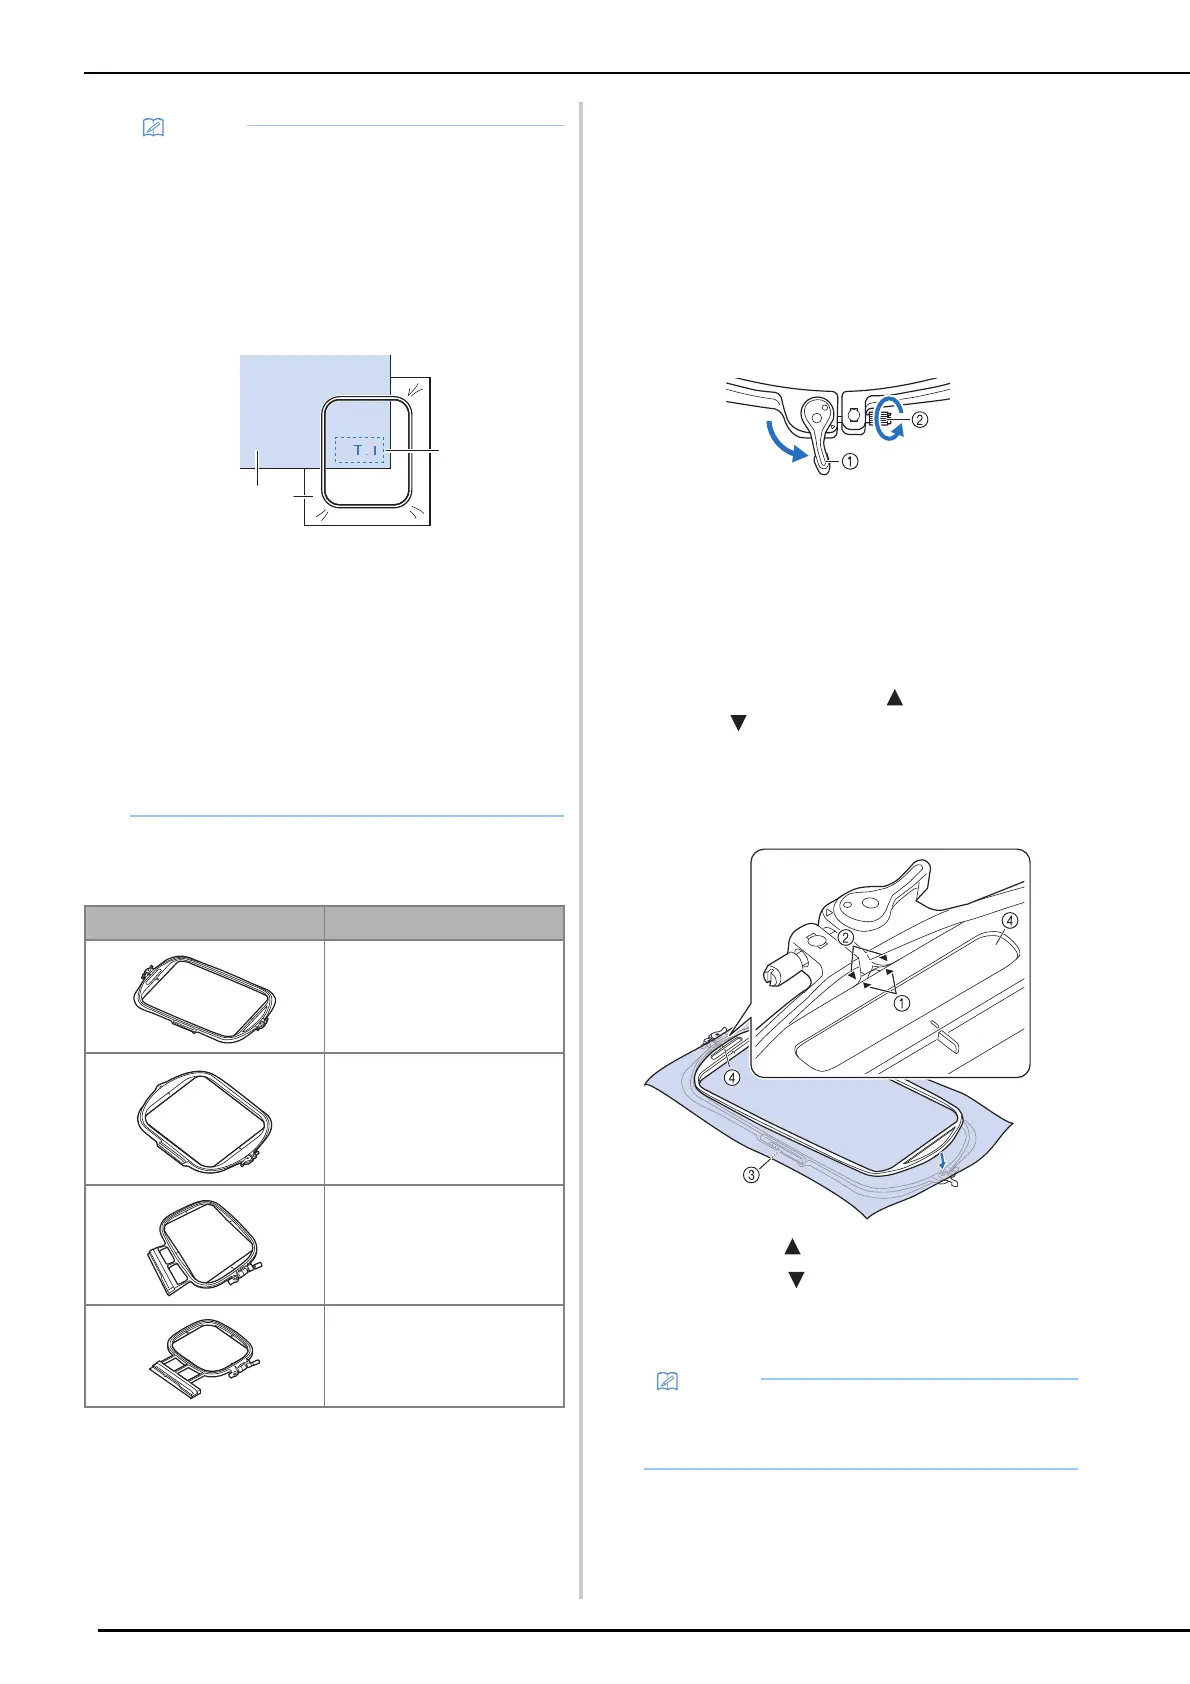
Types of Embroidery Frames
Inserting Fabric into Embroidery
Frame (465 mm × 297 mm
(approx. 18-1/4 inches × 11-5/8
inches))
1
Loosen the lever on the outer frame, and
then remove the inner frame.
* If the inner frame cannot be removed, loosen the
frame adjustment screw.
a Lever
b Frame adjustment screw
2 With the embroidery frame guide on the
left, place the fabric on top of the outer
frame. Check that the rectangular area
(4) of the inner frame faces up, and then
re-insert the inner frame, making sure to
align the inner frame’s with the outer
frame’s , to clamp the fabric.
The top of the inner frame must be
tucked under the flanges at the top of the
outer frame.
a Inner frame’s
b Outer frame’s
c Embroidery frame guide
d Rectangular area
• When embroidering small pieces of fabric that
cannot be hooped in an embroidery frame, use
stabilizer material as a base. After lightly
ironing the fabric to the stabilizer material,
hoop it in the embroidery frame. If stabilizer
material cannot be ironed onto the fabric,
attach it with a basting stitch. After completing
the embroidery, remove the stabilizer material
carefully.
a Fabric
b Stabilizer
c Basting
• When embroidering on thin fabrics such as
organdy or lawn, or on napped fabrics such as
towel or corduroy, use water soluble stabilizer
(sold separately) for best results. In the case
of thick terry cloth towels we recommend that
you place a piece of water soluble stabilizer on
the top surface of the towel. This will help to
reduce the nap of the toweling and result in
more attractive embroidery.
Embroidery frame Embroidering area
465 mm × 297 mm
(approx. 18-1/4 inches × 11-5/8
inches)
(page 128)
272 mm × 272 mm
(approx. 10-5/8 inches × 10-5/8
inches)
(page 129)
180 mm × 130 mm
(approx. 7 inches × 5 inches)
(page 130)
100 mm × 100 mm
(approx. 4 inches × 4 inches)
(page 130)
a
b
c
• If the inner frame for this hoop is installed
incorrectly, it may come apart and embroidery
will not be performed correctly.