Included Accessories
14
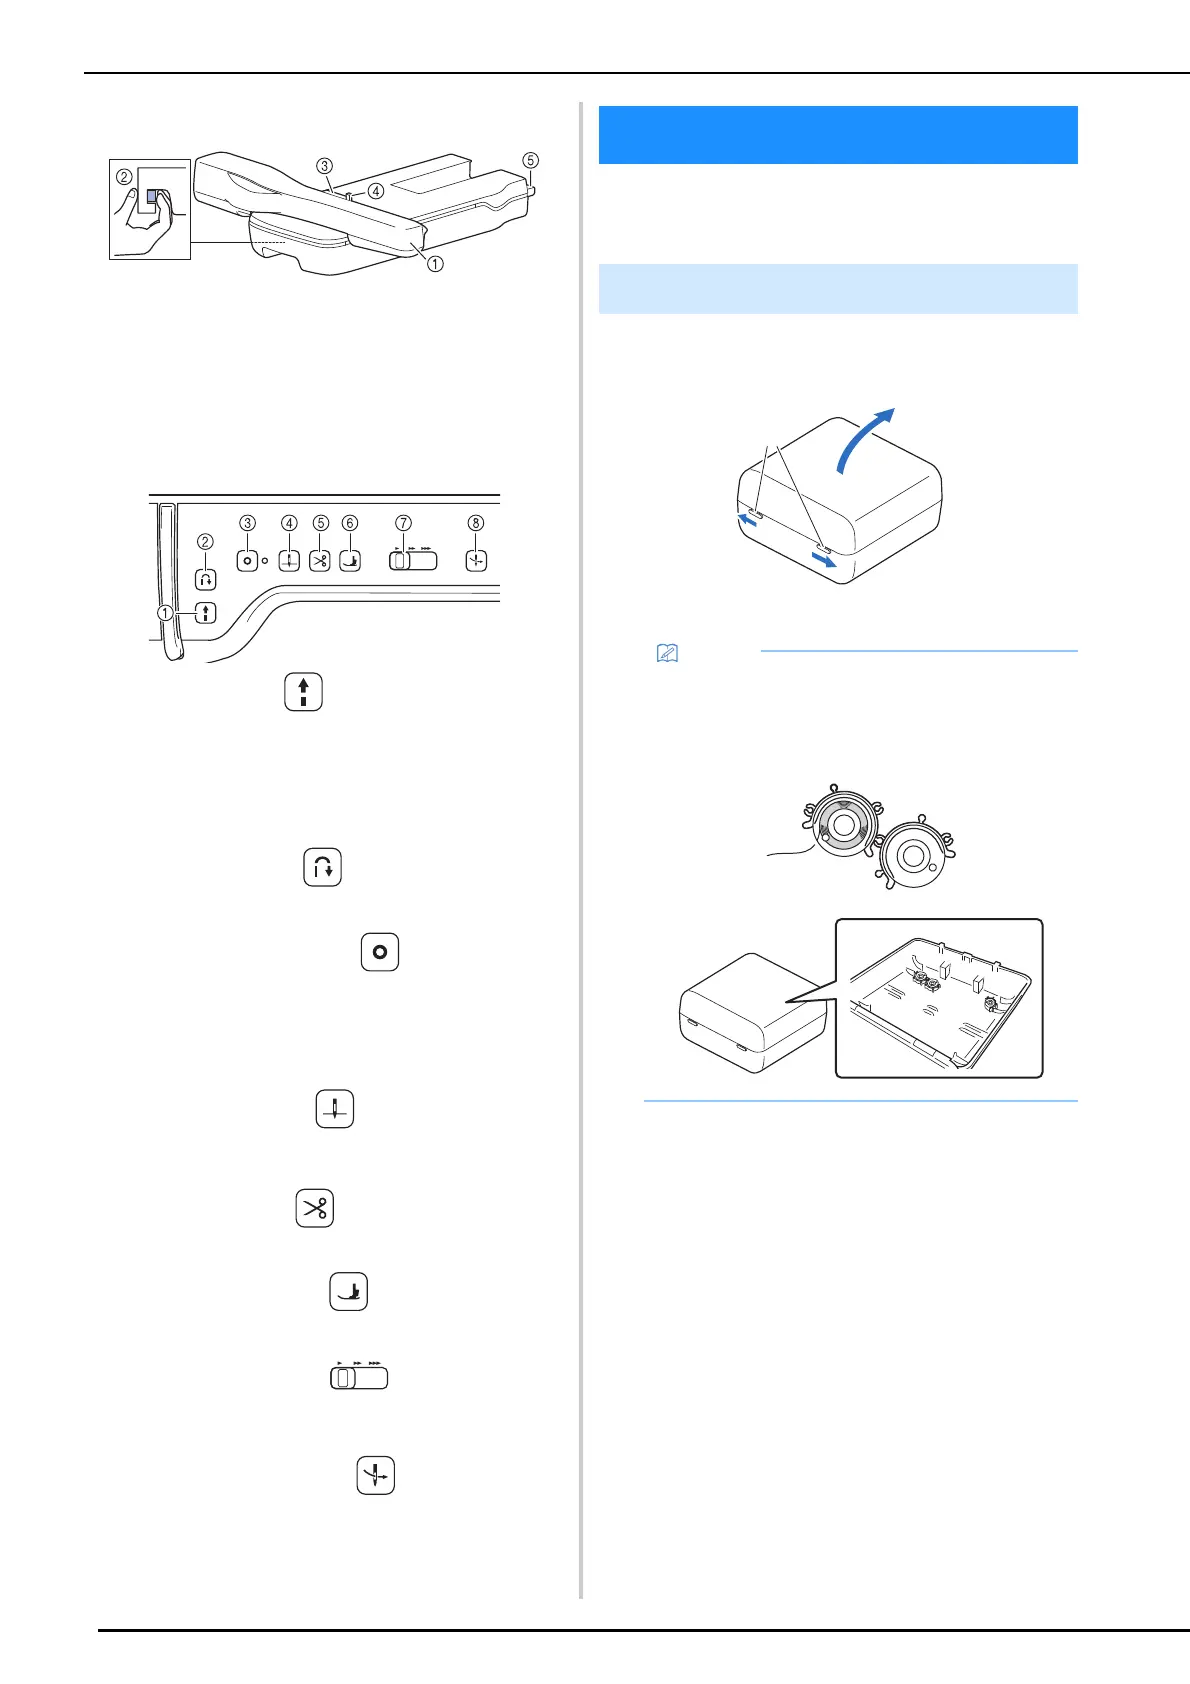
Embroidery Unit
a Carriage (page 126)
b Release lever (page 127)
c Embroidery frame holder (page 131)
d Frame-securing lever (page 131)
e Embroidery unit connection (page 126)
Operation Buttons
a “Start/Stop” button
Press this button to start or stop sewing. The button changes
color according to the machine’s operation mode.
b Reverse stitch button
Press this button to sew reverse or reinforcement stitches
depending on the selected stitch pattern. (page 56)
c Reinforcement stitch button
Press this button to sew a single stitch repeatedly and tie-off.
For character/decorative stitches, press this button to end with a
full stitch instead of at a mid-point. (page 55)
In addition, use this button to sew reinforcement stitches before
cutting the thread when changing the bobbin thread in
embroidery mode. (page 162)
d Needle position button
Press this button to raise or lower the needle position. Also with
this button, you can lower and raise the needle to sew a single
stitch.
e Thread cutter button
Press this button after sewing to automatically trim the excess
thread.
f Presser foot lifter button
Press this button to lower the presser foot and apply pressure to
the fabric. Press this button again to raise the presser foot.
g Sewing Speed controller
Use this controller to adjust the sewing speed. Move the slide to
the left to sew at slower speeds. Move the slide to the right to
sew at higher speeds.
h Automatic threading button
Press this button to automatically thread the needle.
For included accessories of your machine, refer
to the additional sheet “Included Accessories”.
Slide the latches on the front of the accessory
case outward to open it.
a Latches
Green: The machine is ready or is operating.
Red: The machine is not ready.
Included Accessories
Using the Accessory Case
• Placing bobbin clips on bobbins helps prevent
the thread from unwinding from the bobbin.
• Bobbin clips can be stored inside of the
accessory case cover.
a