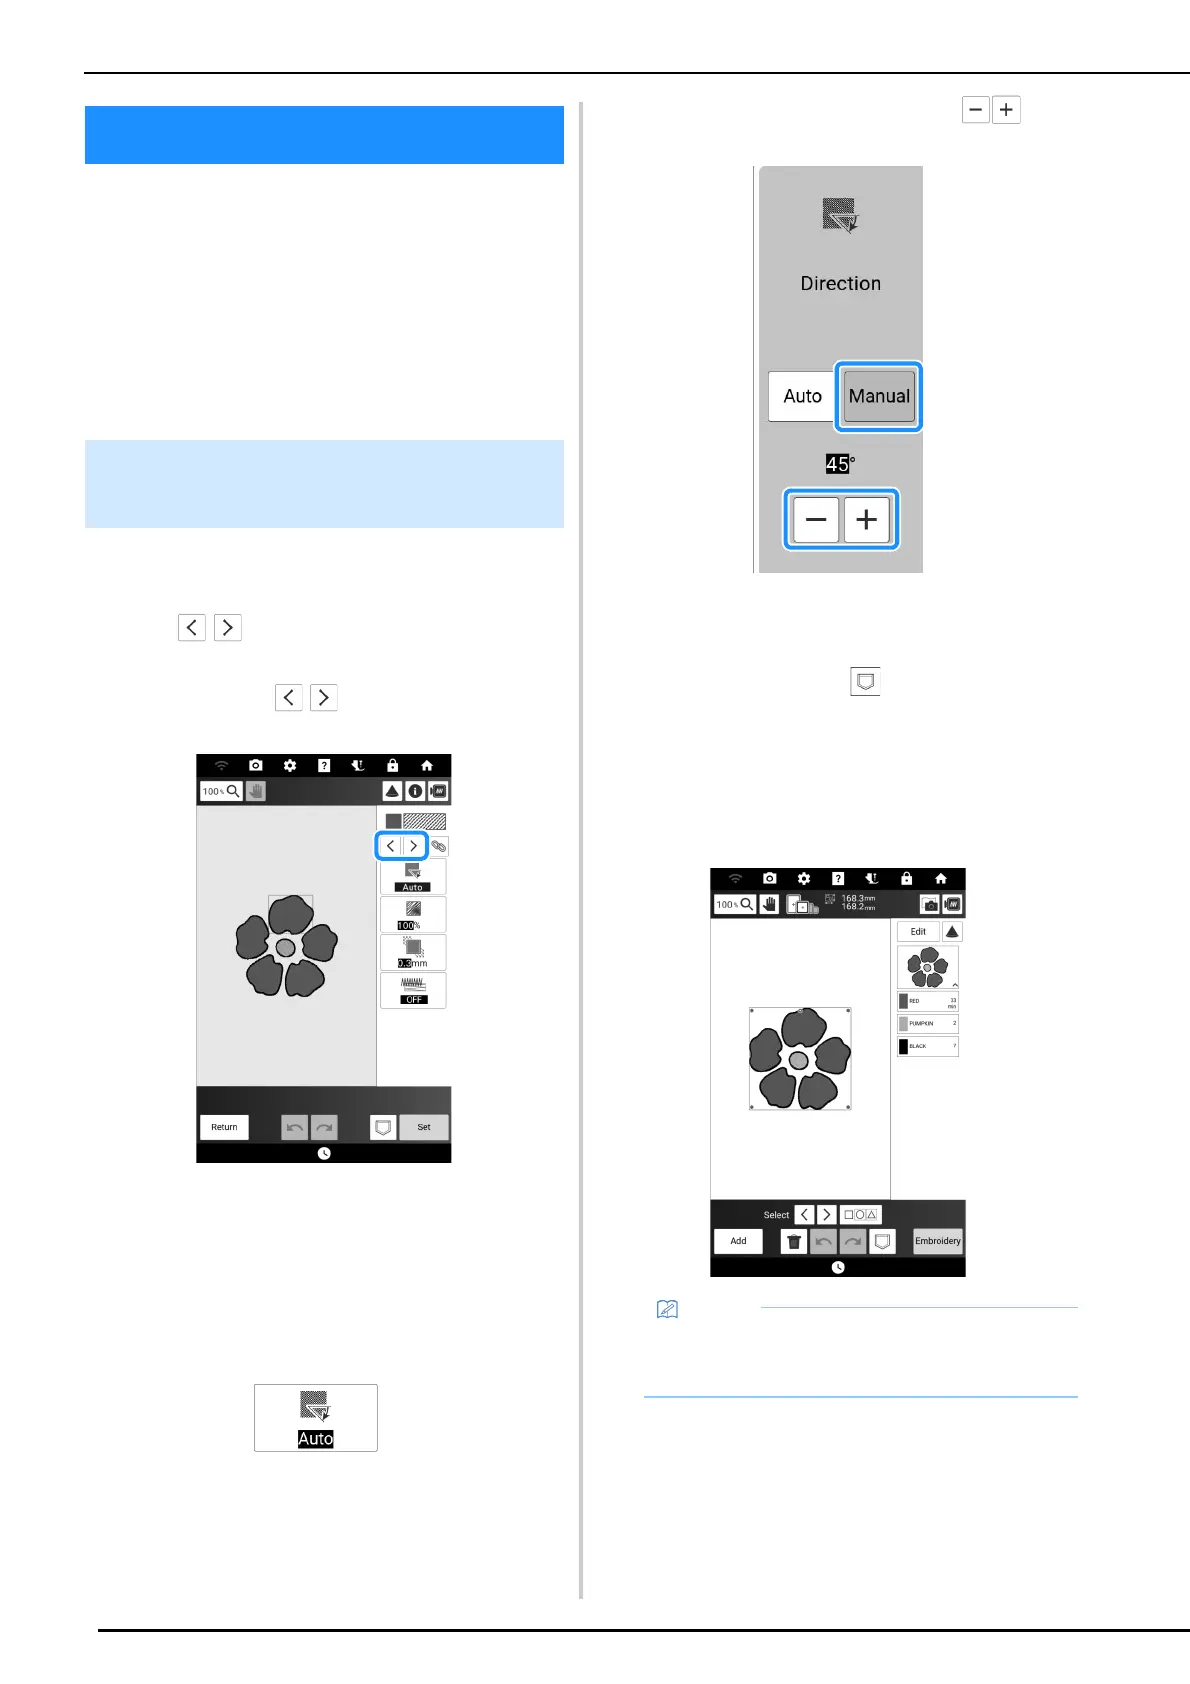
Stitch Settings Screen
238
After creating the pattern drawing data in the
pattern drawing screen (page 230), you will have
an opportunity to:
• Check and change the stitch settings for each
line and region.
• Save the pattern drawing data.
• Convert the data to an embroidery pattern,
proceed to the embroidery edit screen, and/or
save the embroidery pattern.
Select a pattern in the stitch settings screen to
specify its line and region stitch settings.
1 Use to select the line or region to
be changed.
Each touch of moves the highlighting of
the selected pattern in order.
2 Select the setting to be changed, and
then change the setting in the screen that
appears. (In this example, the
embroidering direction will be changed.)
* For details on each setting, refer to “Line and
Region Settings” on page 239.
3 Touch [Manual], and then use to
change the direction.
4 Touch [OK] to apply the setting.
* Change other settings in the same way.
5 If necessary, touch to save the
pattern.
6 Touch [Set] to convert work into an
embroidery pattern.
The embroidery edit screen appears after touching
[OK].
Stitch Settings Screen
Specifying Individual Stitch
Settings
• To combine the patterns created in [My Design
Center], touch [Add], and then touch [My
Design Center].