Utility Stitches
84
7 Start sewing to make a decorative finish.
Sew overcasting stitches along the edges of cut
fabric to prevent them from fraying.
For details on stitch patterns, refer to “Stitch
Chart” on page 273.
Using Overcasting Foot “G”
1
Select a stitch and attach the overcasting
foot “G”.
2 Lower the presser foot so that the
presser foot guide is set flush against the
edge of the fabric.
a Guide
3 Rotate the handwheel toward you
(counterclockwise). Check that the
needle does not touch the presser foot.
a The needle should not touch the center bar
4 Sew along the presser foot guide.
a Guide
b Needle drop point
5 Press the “Start/Stop” button to stop
sewing when you are finished, and raise
the presser foot and needle to remove
the fabric by pulling it back.
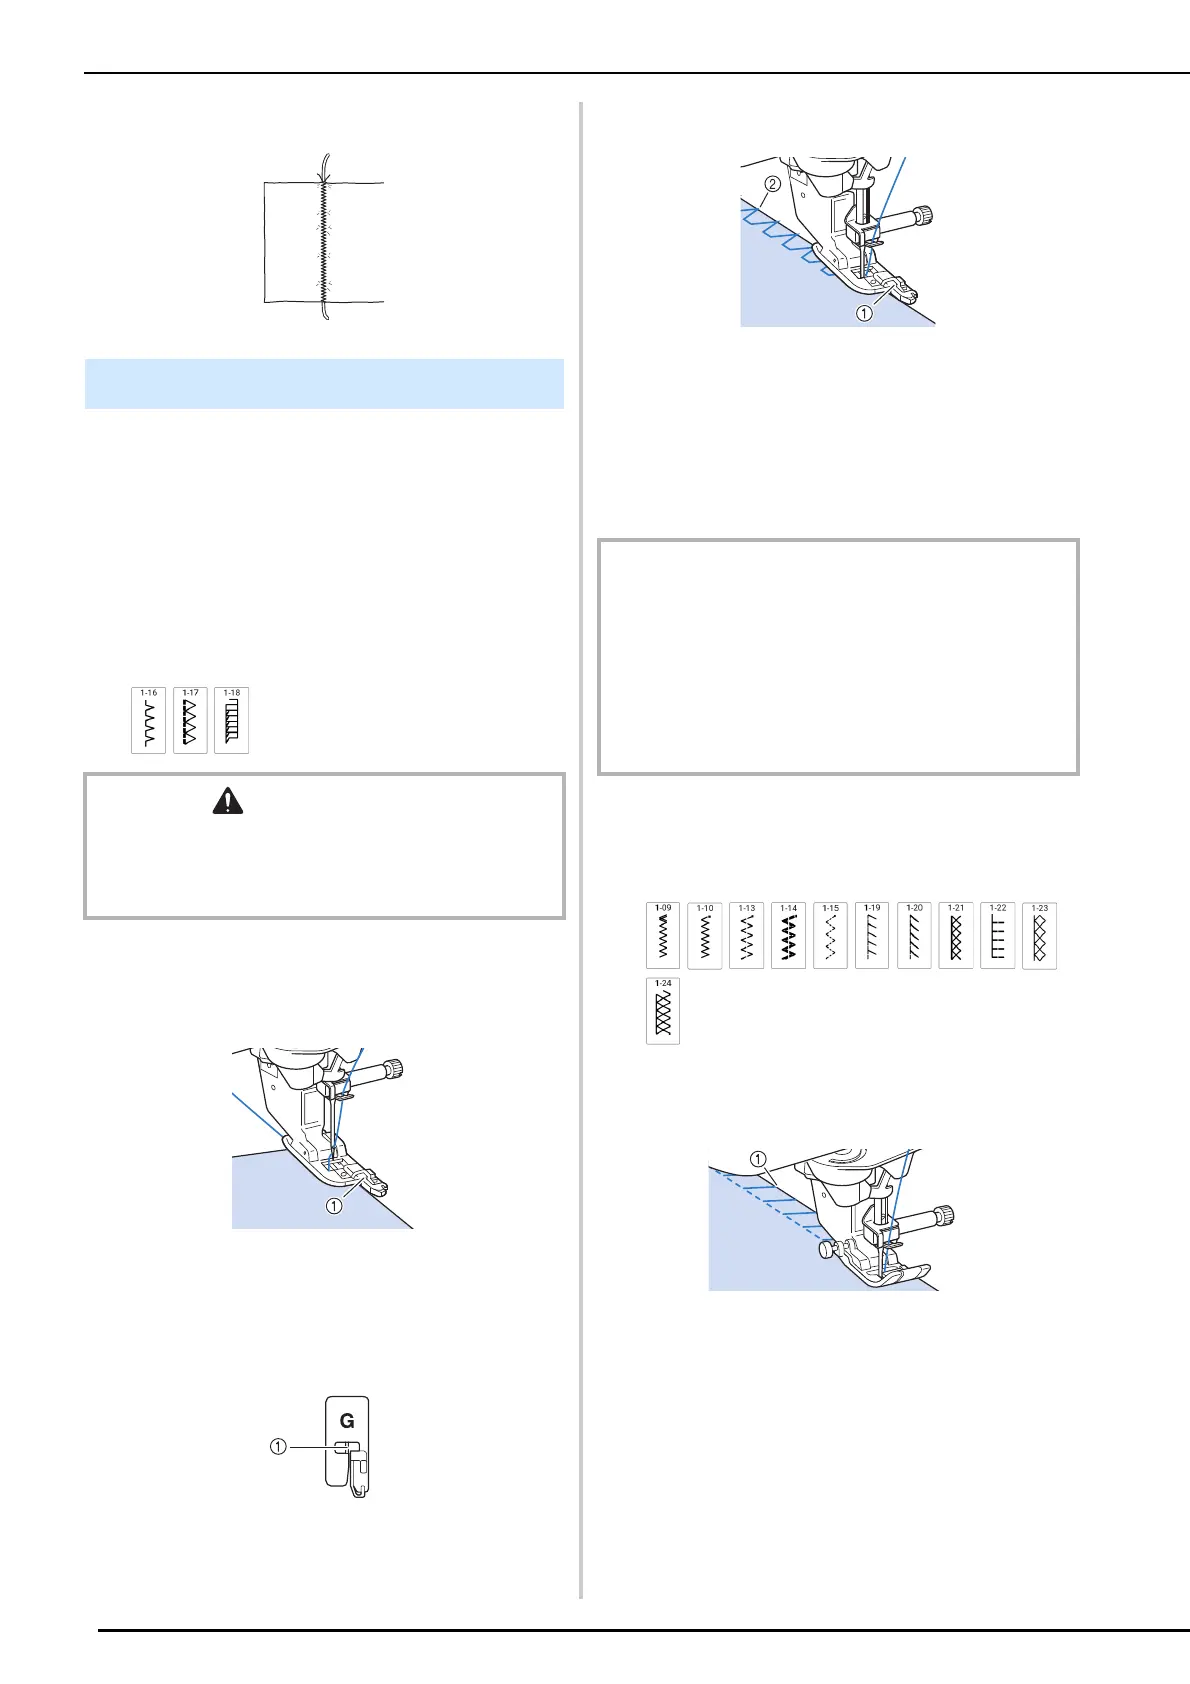
Using Zigzag Foot “J”
1
Select a stitch and attach zigzag foot “J”.
2 Sew with the needle dropping slightly off
the edge of the fabric.
a Needle drop point
Overcasting
CAUTION
• When using overcasting foot “G”, be sure to select a
stitch that can be used with overcasting foot “G”. If you
sew with the incorrect stitch, the needle may strike the
presser foot and break, and may cause injury.
IMPORTANT
• Be sure to pull the fabric backward after finished sewing.
If you pull the fabric toward side or forward, the presser
foot pin may be damaged.
• If thread is tangled on the presser foot, remove the
entangled thread, and then raise the presser foot lever
to remove the presser foot. If the presser foot is raised
while entangled with thread, the presser foot may be
damaged.