Align the Embroidering Position
Basic Embroidery
159
4
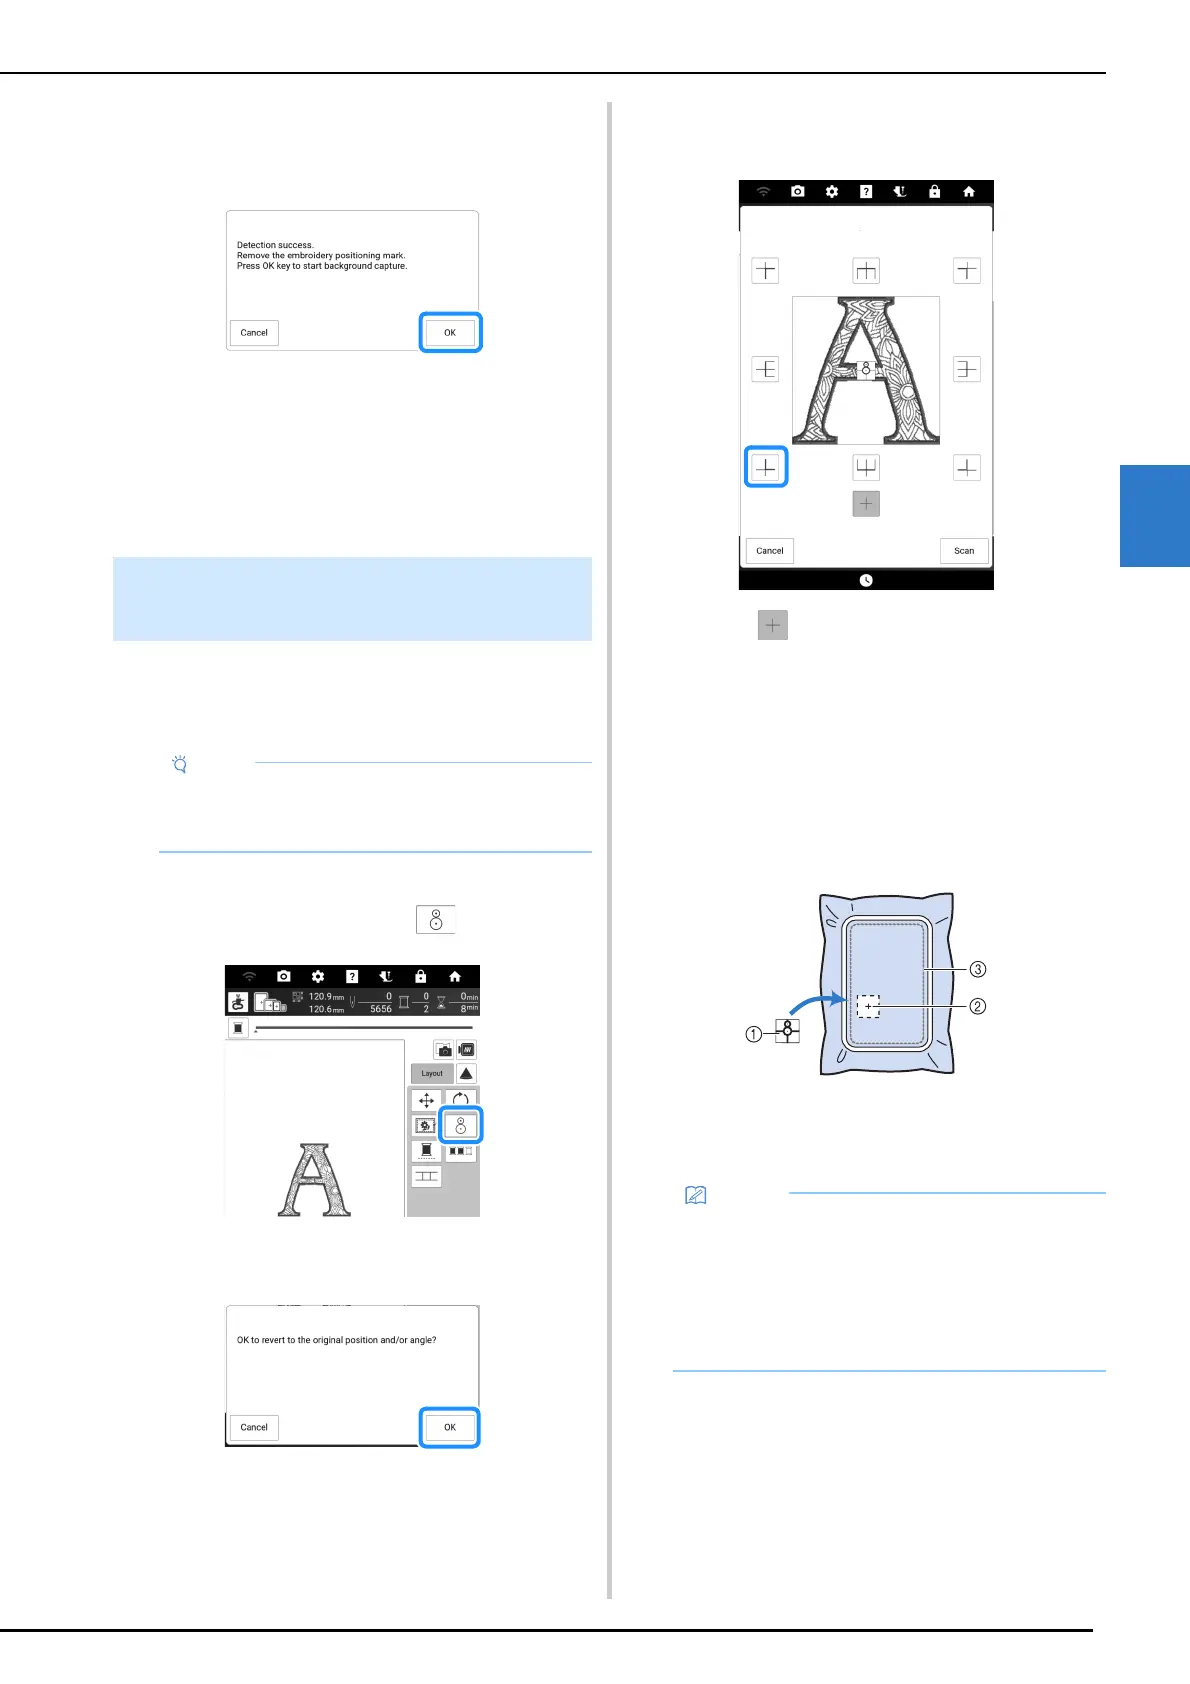
8 When the following message appears,
remove the embroidery positioning
sticker, and then touch [OK].
The carriage is moved, and the embroidery
positioning sticker affixed to the fabric is detected.
9 Continue with step 6 of “Display the Fabric
on the Screen” on page 157 to align the
pattern with the desired embroidery
position.
The embroidering position can easily be aligned
using the machine’s built-in camera and the
included embroidery positioning sticker.
1 Touch [Layout] to display the editing
window, and then touch .
2 Following message appears. Touch [OK].
3 Select the position you want to set as the
reference point.
* Select if you want to embroider referring the
embroidery positioning sticker as the center of the
pattern.
4 Affix the embroidery positioning sticker
to the location in the fabric to be
embroidered. Place the embroidery
positioning sticker so that the center of
the larger circle is at the center or edge of
the embroidery pattern.
a Embroidery positioning sticker
b Center or edge of the embroidery pattern
c Embroidery field
Using the Embroidery Positioning
Sticker
• Before using the embroidery positioning
sticker, check that it can be cleanly removed
from a scrap piece of the fabric to be used.
• Affix the embroidery positioning sticker so that
the smaller circle is on top. The angle of the
pattern depends on the angle at which the
embroidery positioning sticker is affixed. In
order to change the angle at which the pattern
will be embroidered, affix the embroidery
positioning sticker at the desired angle.