Embroidering Quilting
201
Advanced Embroidery
5
Quilting border patterns up to 890 mm × 550 mm
(approx. 35-3/64 inches × 21-21/32 inches) can
be split into four sections to be stitched in the
selected embroidery frame. The built-in camera
will assist with placement.
It is recommended to measure the size of quilting
border you want to embroider in the beginning.
1 Touch .
2 Select one of the rectangular quilting
border categories. For this example,
select single-color rectangular quilting
border patterns.
a Single-color rectangular quilting border patterns
b Two-color rectangular quilting border patterns
c Hexagonal quilt border patterns
d Edge-to-Edge quilt patterns
3 Select the quilt border pattern, and then
touch [Set].
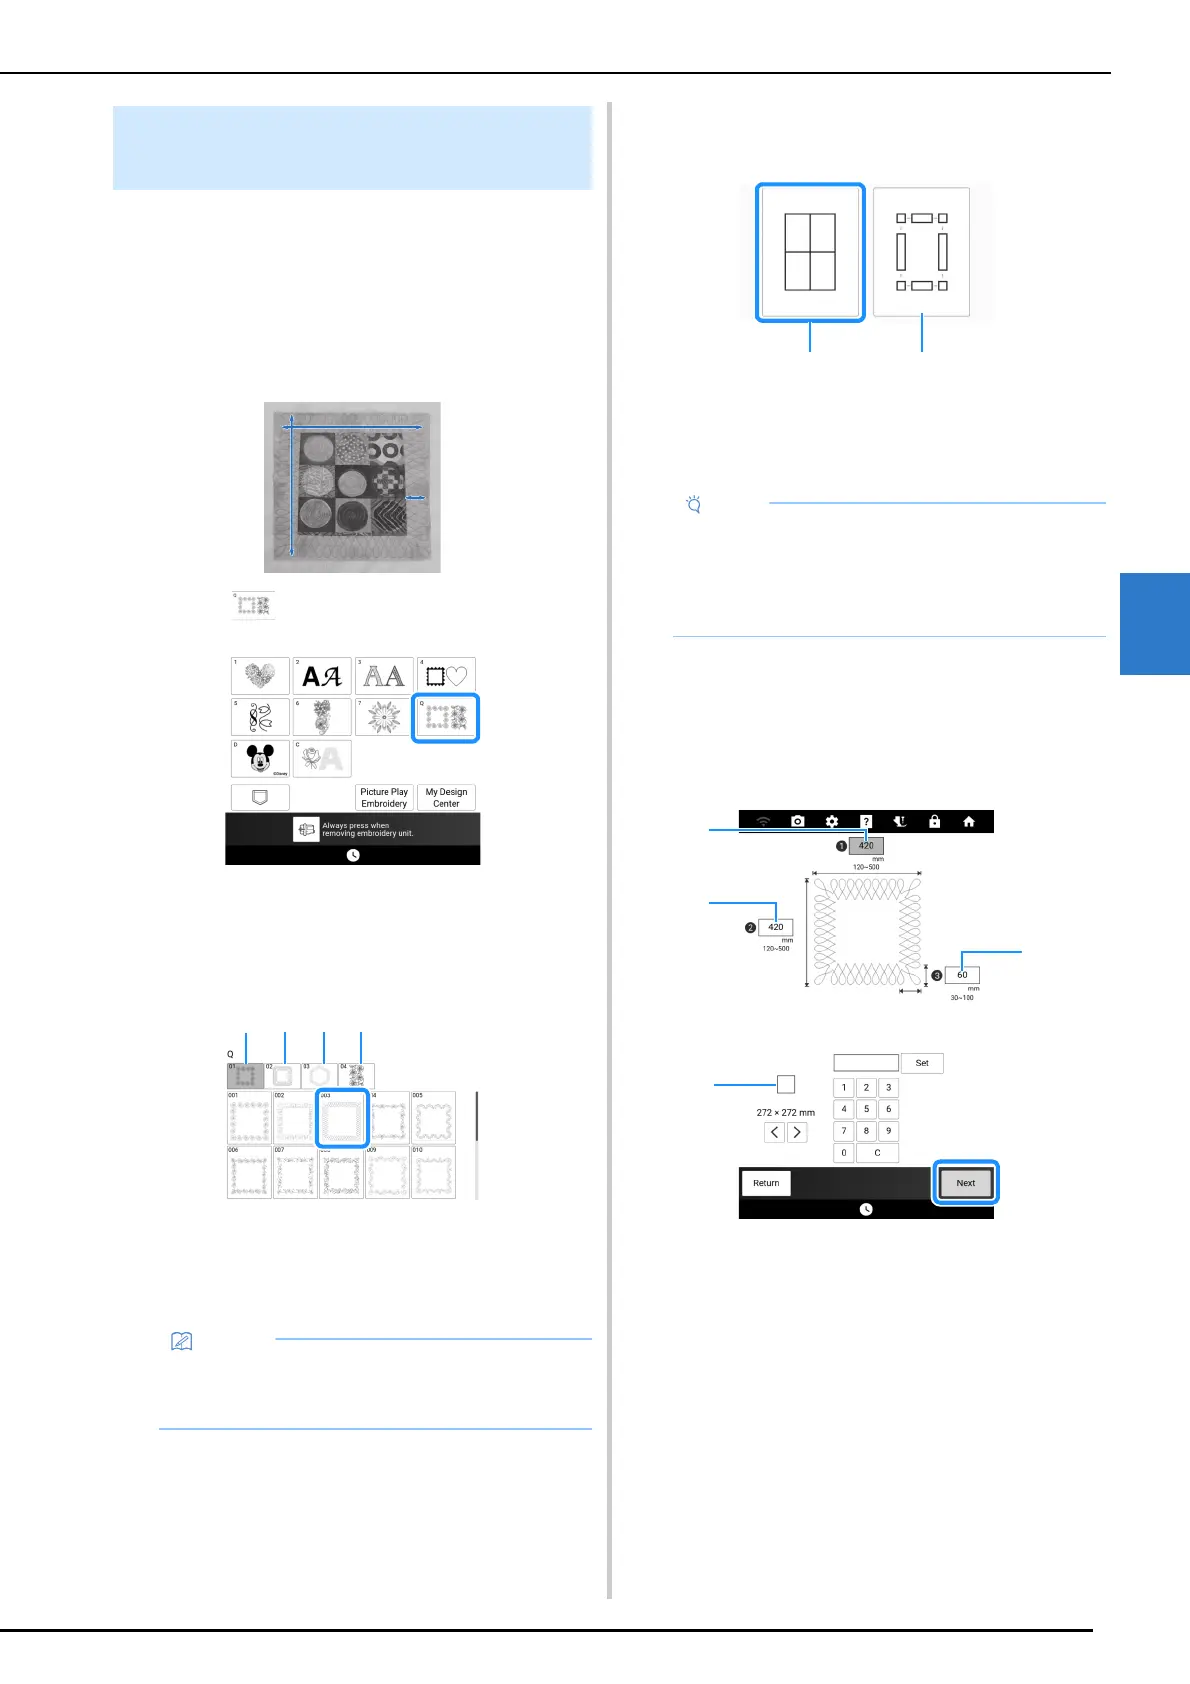
4 Select how to divide the pattern. For this
example, select “Auto split quilt sash”.
a Auto split quilt sash
b Semi-Auto split quilt sash
For details, refer to “Embroidering Quilting Border
Patterns (Semi-Auto Split Quilt Sash)” on page 203
5 Specify the size of embroidery frame to
be used. Enter values for the width and
height of the sash and quilting border,
and then touch [Set]. After entering all
three values, touch [Next].
a Embroidery frame size
b Width
c Height
d Quilting border width
* To clear the value, touch [C].
The pattern appears with the specified settings
applied.
Embroidering Quilting Border
Patterns (Auto Split Quilt Sash)
• The hexagonal quilt borders patterns and
edge-to-edge quilt patterns are not available
for this function.
• The size of item that can be created differs
depending on the type of split that was
selected. Check the layout of “Auto split quilt
sash”, and then select “Semi-Auto split quilt
sash” if the layout did not appear as desired.