LCD Screen
Getting Ready
23
1
c Change the height of the presser foot when the
machine is set to free motion sewing mode.
(page 111)
d Adjust the amount of fabric feeding of the compact
dual feed foot. (page 50)
e Pressing the “Start/Stop” button or depressing the
foot controller automatically lowers the presser foot
(if it is raised) before starting sewing.
f Pressing (Thread cutter button) automatically
lowers the presser foot before cutting the thread.
The presser foot will be raised after the thread is
cut.
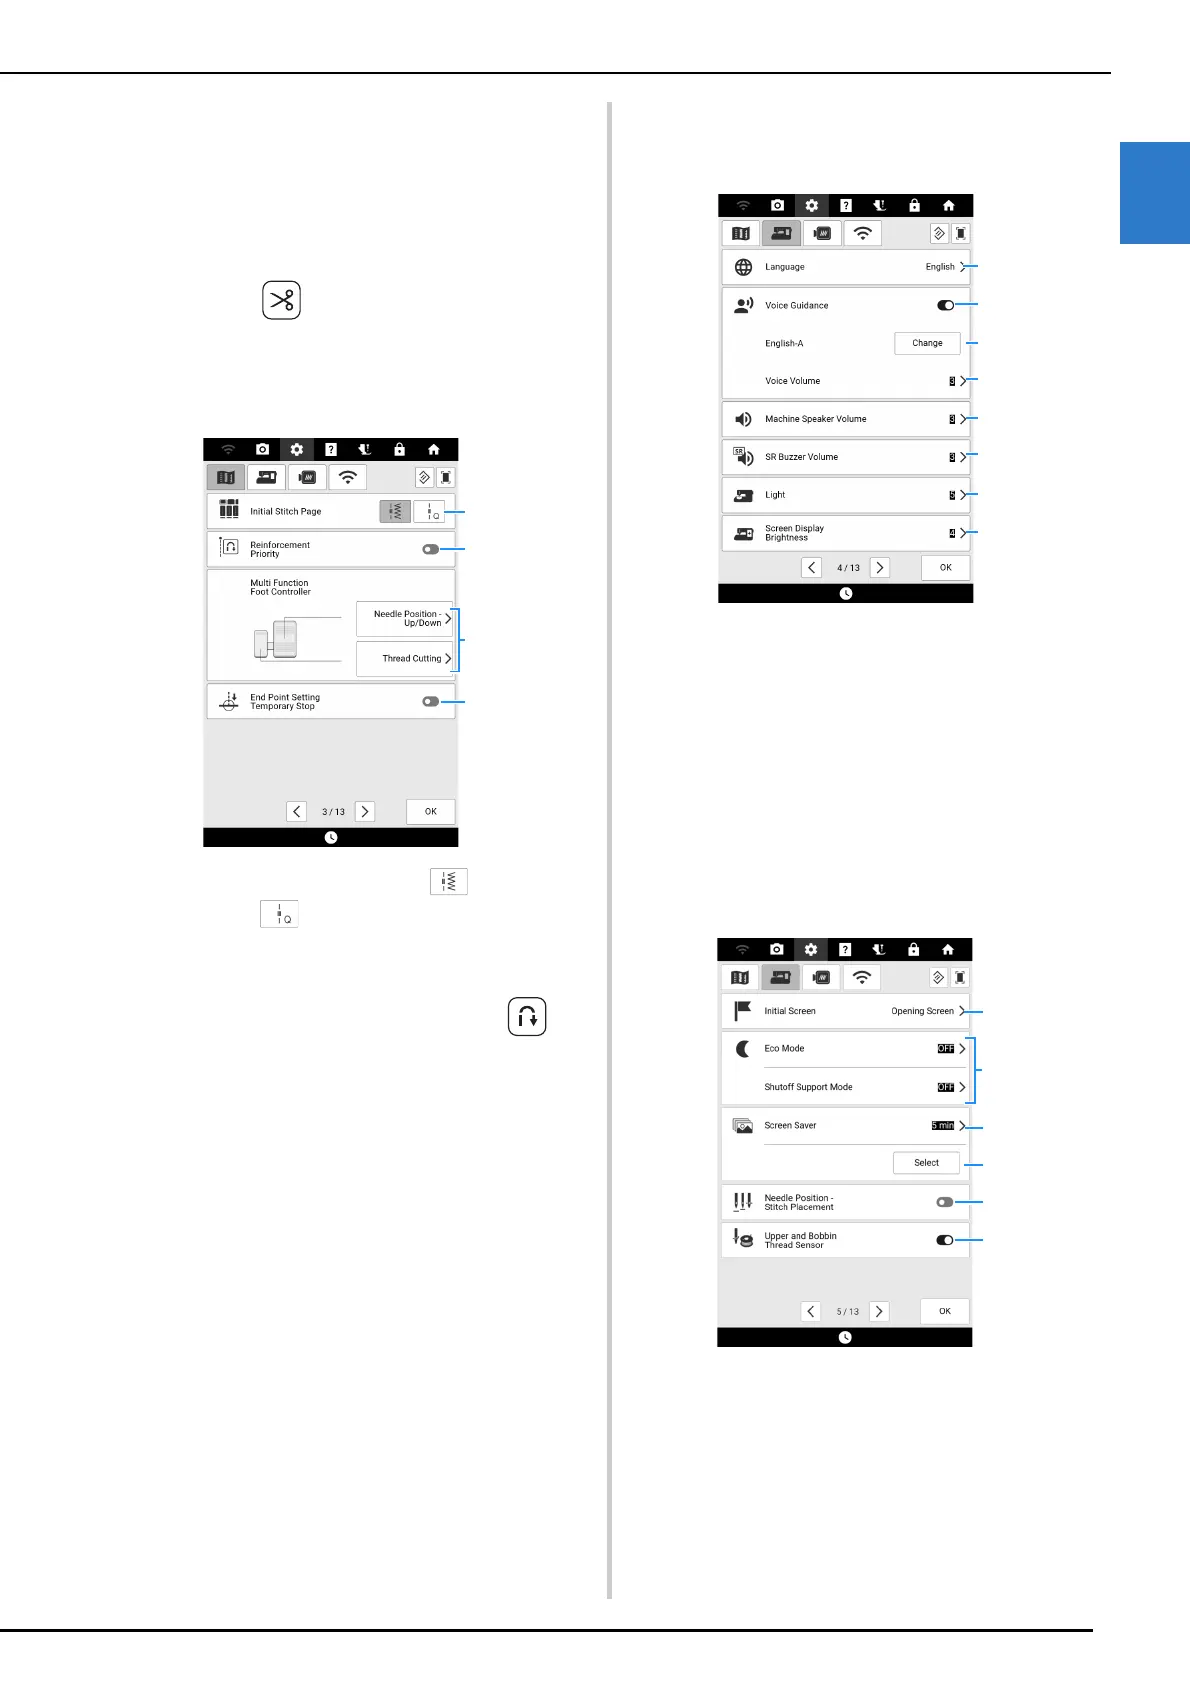
Page 3
a Select whether utility stitches ( ) or quilting
stitches ( ) are displayed first in the stitch
selection screen.
b When set to on, reinforcement stitches are sewn at
the beginning and/or end of sewing for a
reinforcement stitch pattern, even when
(Reverse stitch button) is pressed. (page 56)
c Select the functions to be performed by the multi-
function foot controller. (page 53)
d If this setting is set to on with [End Point Setting] in
the stitch edit menu, the machine will temporarily
stop so the end point sticker can be peeled off.
(page 75)
General Settings
Page 4
a Change the display language.
b Turn on/off the voice guidance function. (page 28)
c Change the language and voice of the voice
guidance. (page 28)
d Adjust the voice guidance volume.
e Change the speaker volume.
f Adjust the stitch regulator warnings volume.
(page 118)
g Change the brightness of the needle area and
work area lights.
h Adjust the brightness of the screen.
Page 5
a Select whether to display the opening screen video
when the machine is turned on.
b Select to save the machine power by setting the
[Eco Mode] or the [Shutoff Support Mode].
(page 27)
c Select the length of time until the screen saver
appears.