Utility Stitches
96
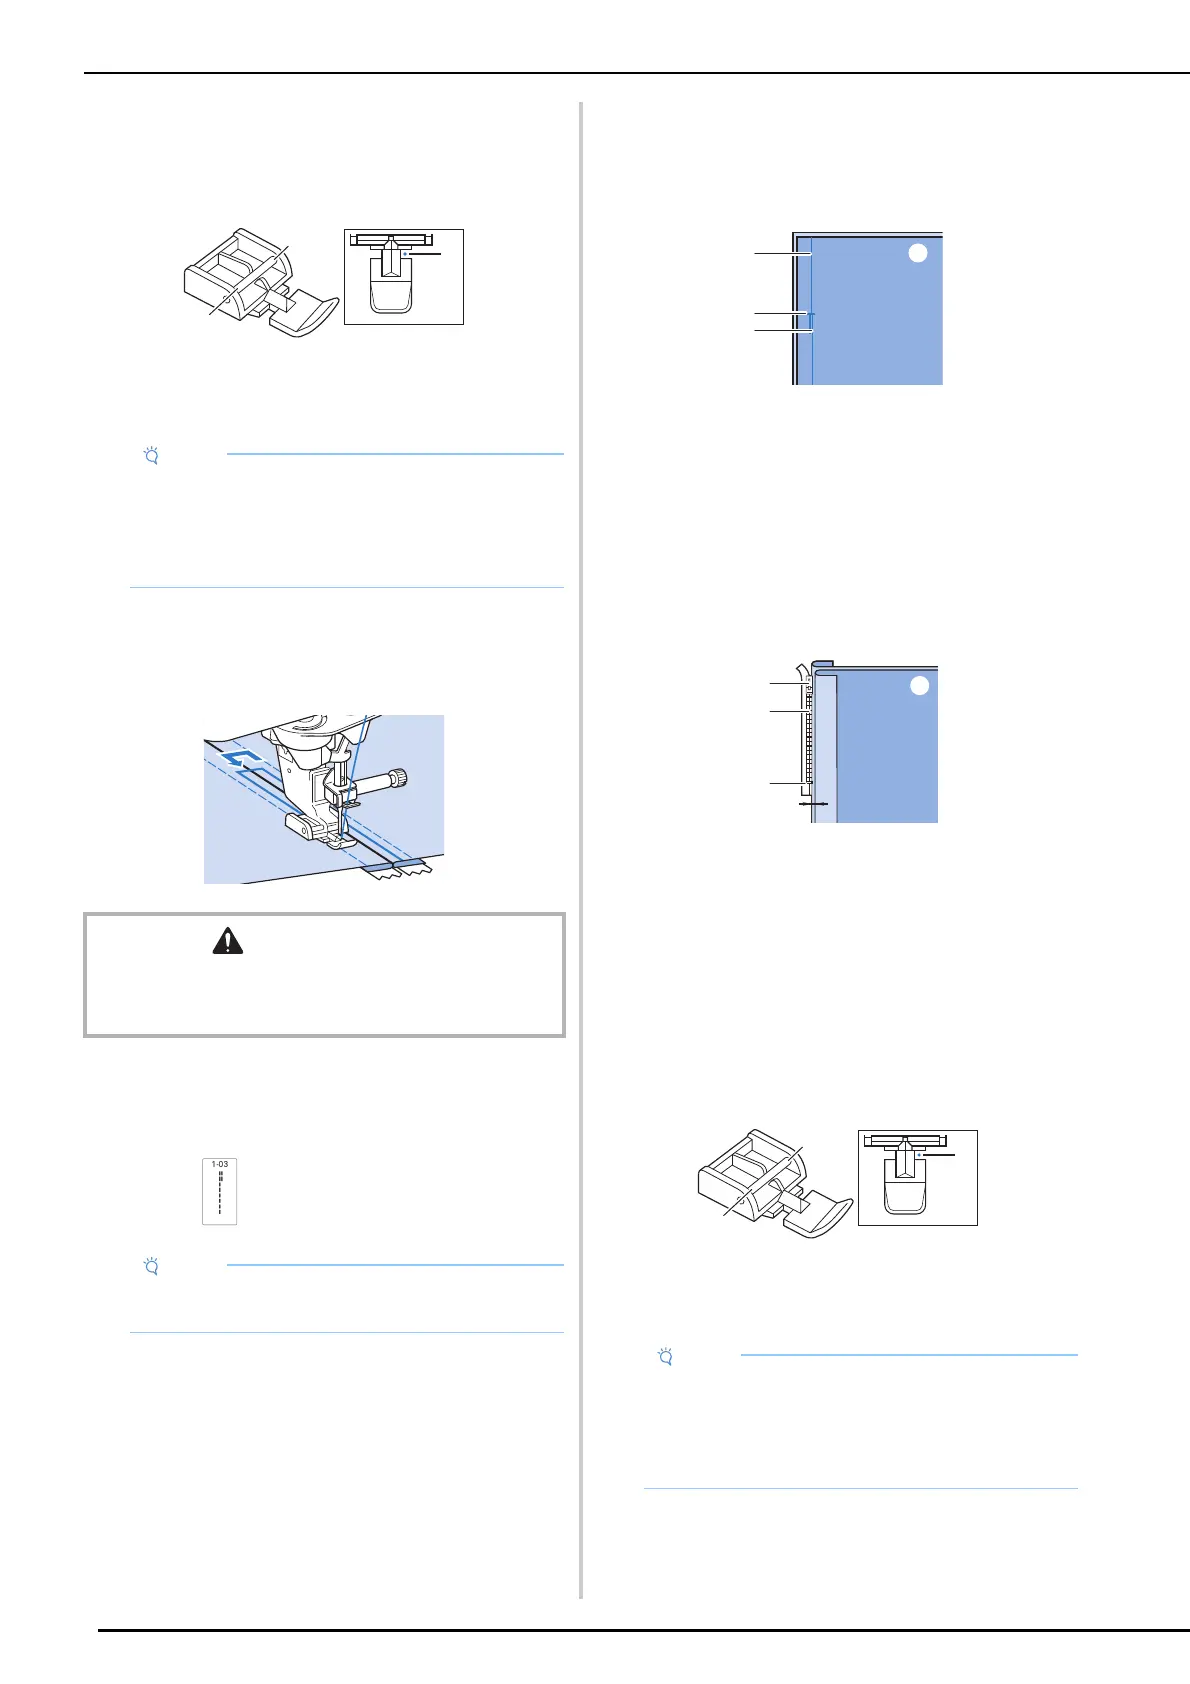
4 Remove zigzag foot “J”. Align the right
side of the pin in zipper foot “I” with the
presser foot holder, and attach the zipper
foot.
a Right
b Left
c Needle drop point
5 Topstitch 7 to 10 mm (approx. 1/4 to 3/8
inch) from the seamed edge of the fabric,
then remove the basting.
Inserting a Side Zipper
Use for side zippers in skirts or dresses.
1 Select .
2 Attach zigzag foot “J” and sew straight
stitches up to the zipper opening.
Change to a basting stitch and sew to the
top of the fabric.
a Reverse stitches
b Wrong side of fabric
c Basting stitches
d End of zipper opening
3 Press the seam allowance open and align
the folded hem along the teeth of the
zipper, while maintaining 3 mm (approx.
1/8 inch) of sewing space.
a Zipper pull tab
b Wrong side of fabric
c Zipper teeth
d End of zipper opening
e 3 mm (approx. 1/8 inch)
4 Remove zigzag foot “J”.
5 Align the right side of the pin in zipper
foot “I” with the presser foot holder, and
attach the presser foot.
a Right
b Left
c Needle drop point
6
Set the presser foot in the 3 mm (approx.
1/8 inch) margin.
• When using zipper foot “I”, make sure the
straight stitch, middle needle position is
selected. Rotate the handwheel toward you
(counterclockwise) to make sure the needle
does not strike the presser foot.
CAUTION
• Make sure the needle does not strike the zipper during
sewing. If the needle strikes the zipper, the needle may
break, leading to injury.
• Make sure you sew using the middle needle
position.
a
b
c
• When using zipper foot “I”, make sure the
straight stitch, middle needle position is
selected. Rotate the handwheel toward you
(counterclockwise) to make sure the needle
does not strike the presser foot.
a
b
c
d
e
a
b
c