Checking/Editing the Embroidery Pattern Projected Onto Fabric
156
4 Press the button of the dual purpose
stylus to turn on the light over or in
order to edit the embroidery pattern.
* The camera detects the light, and the embroidery
pattern is edited as specified.
* When finished editing, touch in the LCD
screen to turn off projection.
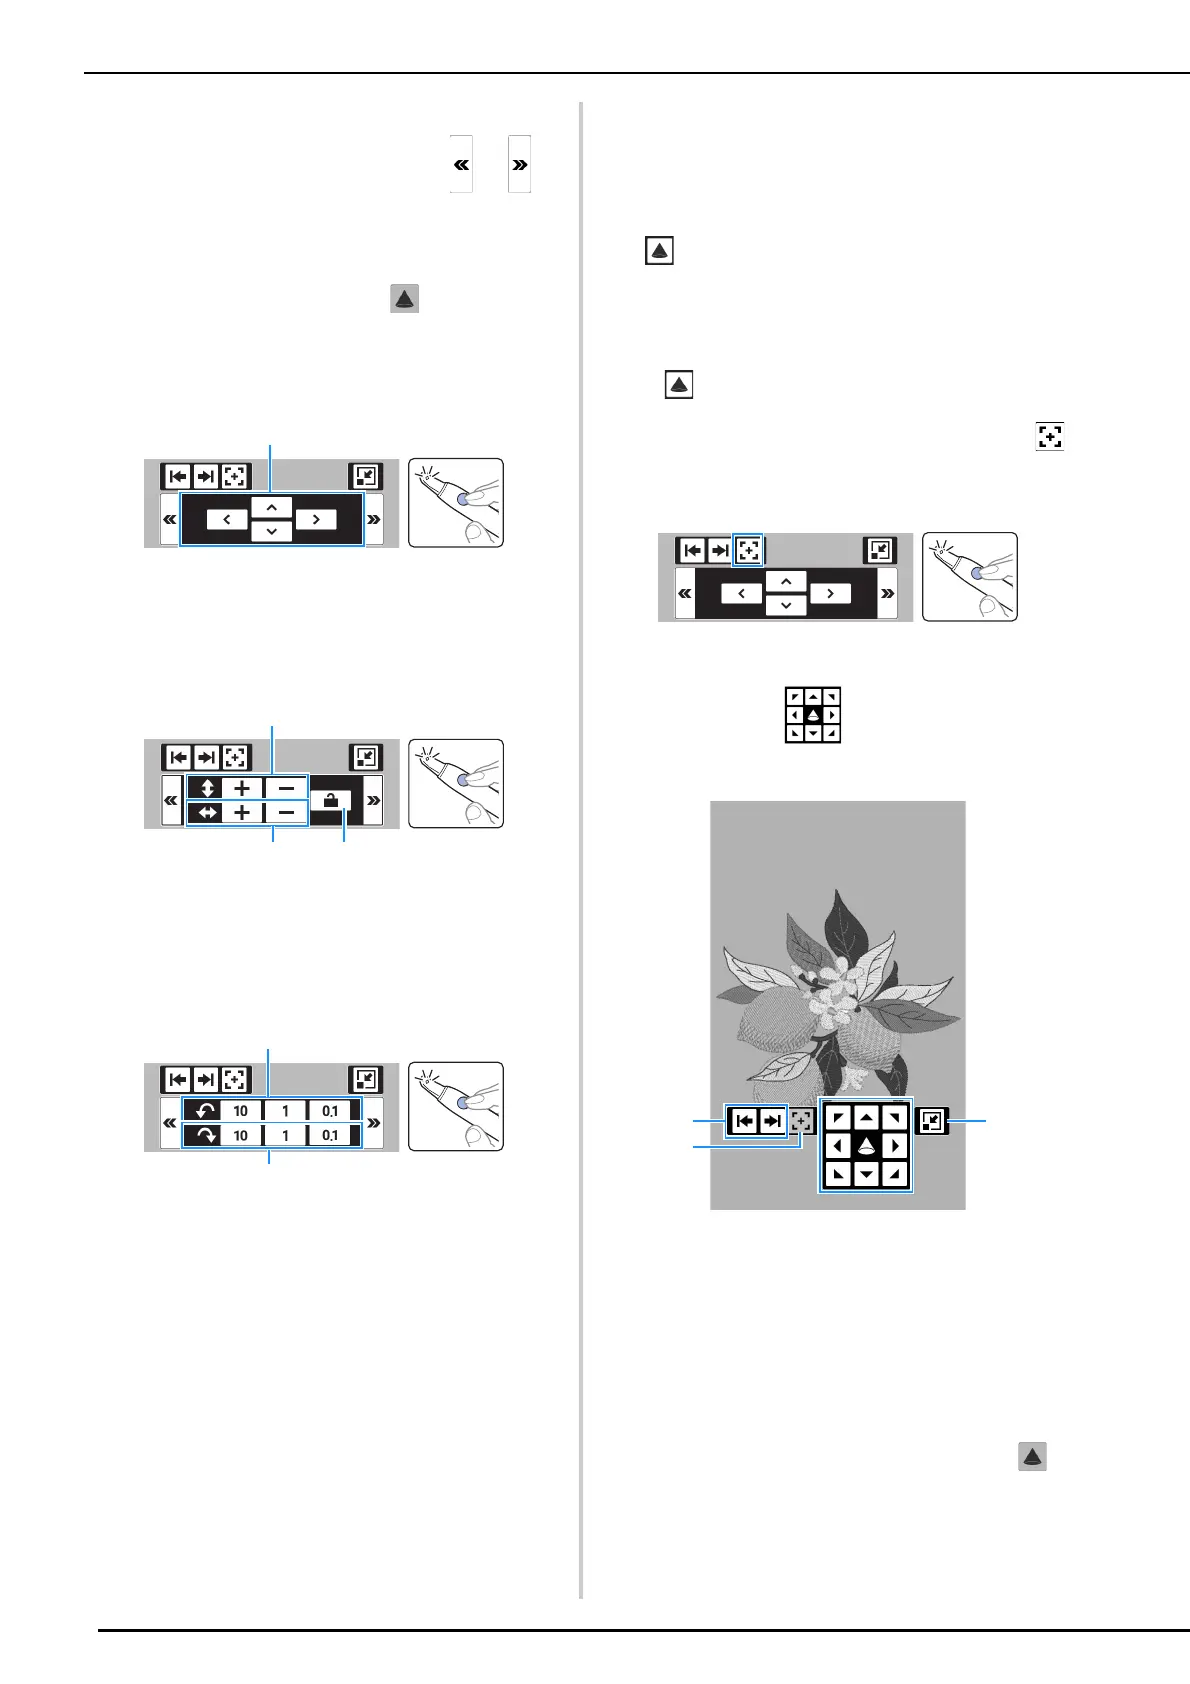
Positioning Mode
a Move the embroidery pattern.
Resizing Mode (Embroidery Edit
Screen Only)
a Changes the height of the embroidery pattern.
b Changes the width of the embroidery pattern.
c Locks/unlocks the aspect ratio.
Rotation Mode
a Rotates the embroidery pattern counterclockwise.
b Rotates the embroidery pattern clockwise.
Changing the Location of the
Projection Area
1
Make sure that the embroidery frame is
attached to the machine, and then touch
in the following screens.
• Embroidery edit screen
• Embroidery screen
• Stitch settings screen of My Design Center
2 If was touched in the embroidery edit
screen or embroidery screen, place the
point of the dual purpose stylus over ,
and then press the button to turn on the
light.
3 Place the point of the dual purpose stylus
over a key in , and then press the
button to turn on the light.
a Select whether to position the keys (projected by
the projector) at the left, right or bottom.
b Switches the projection to edit mode (embroidery
edit screen and embroidery screen only).
(page 155)
c Minimizes the keys projected by the projector.
The camera detects the light of the dual purpose
stylus, and the location of the embroidery pattern
projection area is changed as specified.
4 After confirming the settings, touch in
the LCD screen to turn off projection.
 Loading...

