Useful Functions
Sewing Basics
75
2
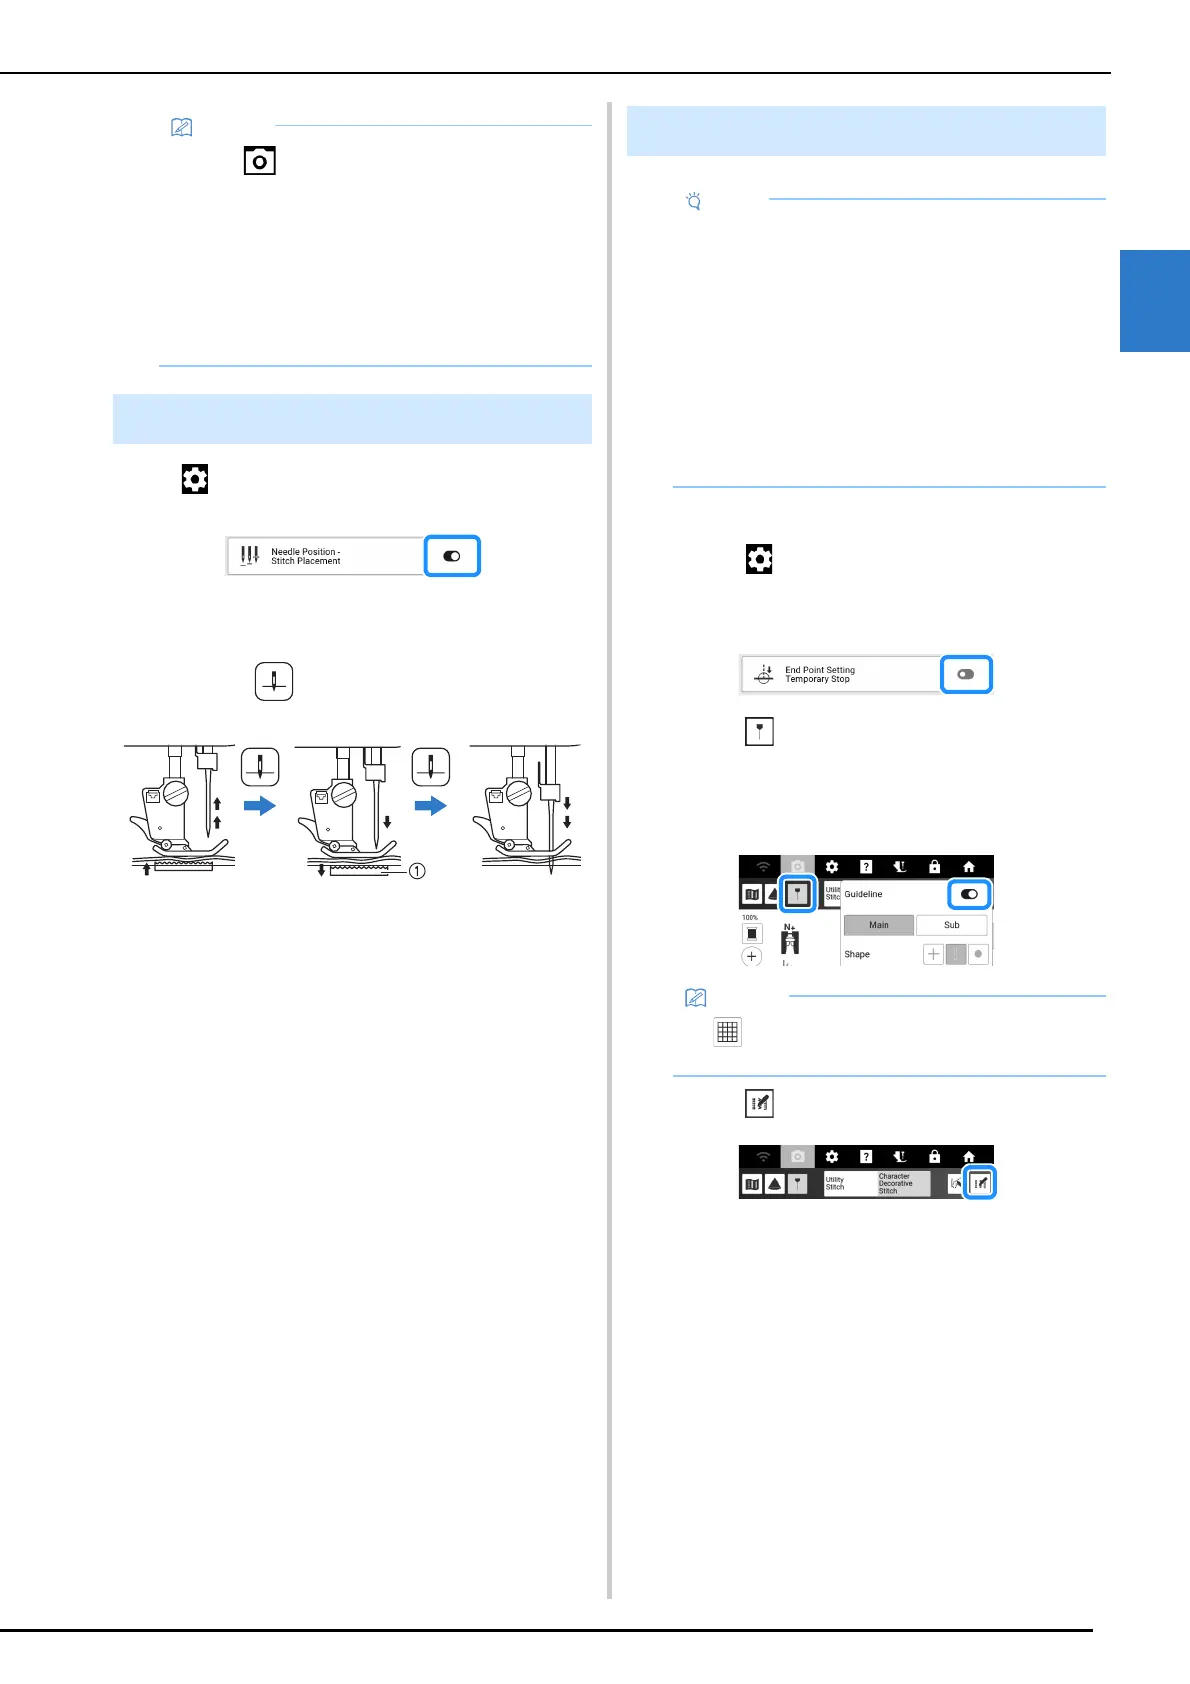
Touch , and then set [Needle Position - Stitch
Placement] to on. (page 23)
When the [Needle Position - Stitch Placement] is
on, the needle will be partially lowered for precise
stitch placement and then completely lowered.
Each press of (Needle position button)
button changes the needle to the next position.
a The feed dogs are lowered. At this time, the fabric
can be shifted to finely adjust the needle drop
point.
1 Select a stitch.
2 Touch , make sure that [End Point
Setting Temporary Stop] in the settings
screen is set to off, and then touch [OK].
3 Touch to set [Guideline] to on. Set the
[Main] line horizontal position according
to the selected stitch pattern. And then
touch [Close].
4 Touch .
• Touch again to turn off the camera view.
• The camera view window disappears when
you start sewing.
• The needle drop point indicated in the screen
may differ from the actual position.
In that case, performing the camera needle
position setting procedure may resolve the
problem. Refer to “Needle Calibration for
Camera/Projector” on page 257.
Needle Position - Stitch Placement
Specifying the Sewing End Point
• Using the same material and stitch pattern as
your project, sew trial stitches to check the
result. The machine’s sewing end point may
become misaligned in the following cases:
- The end point sticker is loose.
- The fabric was not sewn straight.
- The fabric was pushed too hard during
feeding.
- Fabrics difficult to sew, such as
heavyweight, quilted, stretchy, or thin
fabrics, were used.
• If is selected for [Sub], a grid will be
displayed.