Useful Functions
76
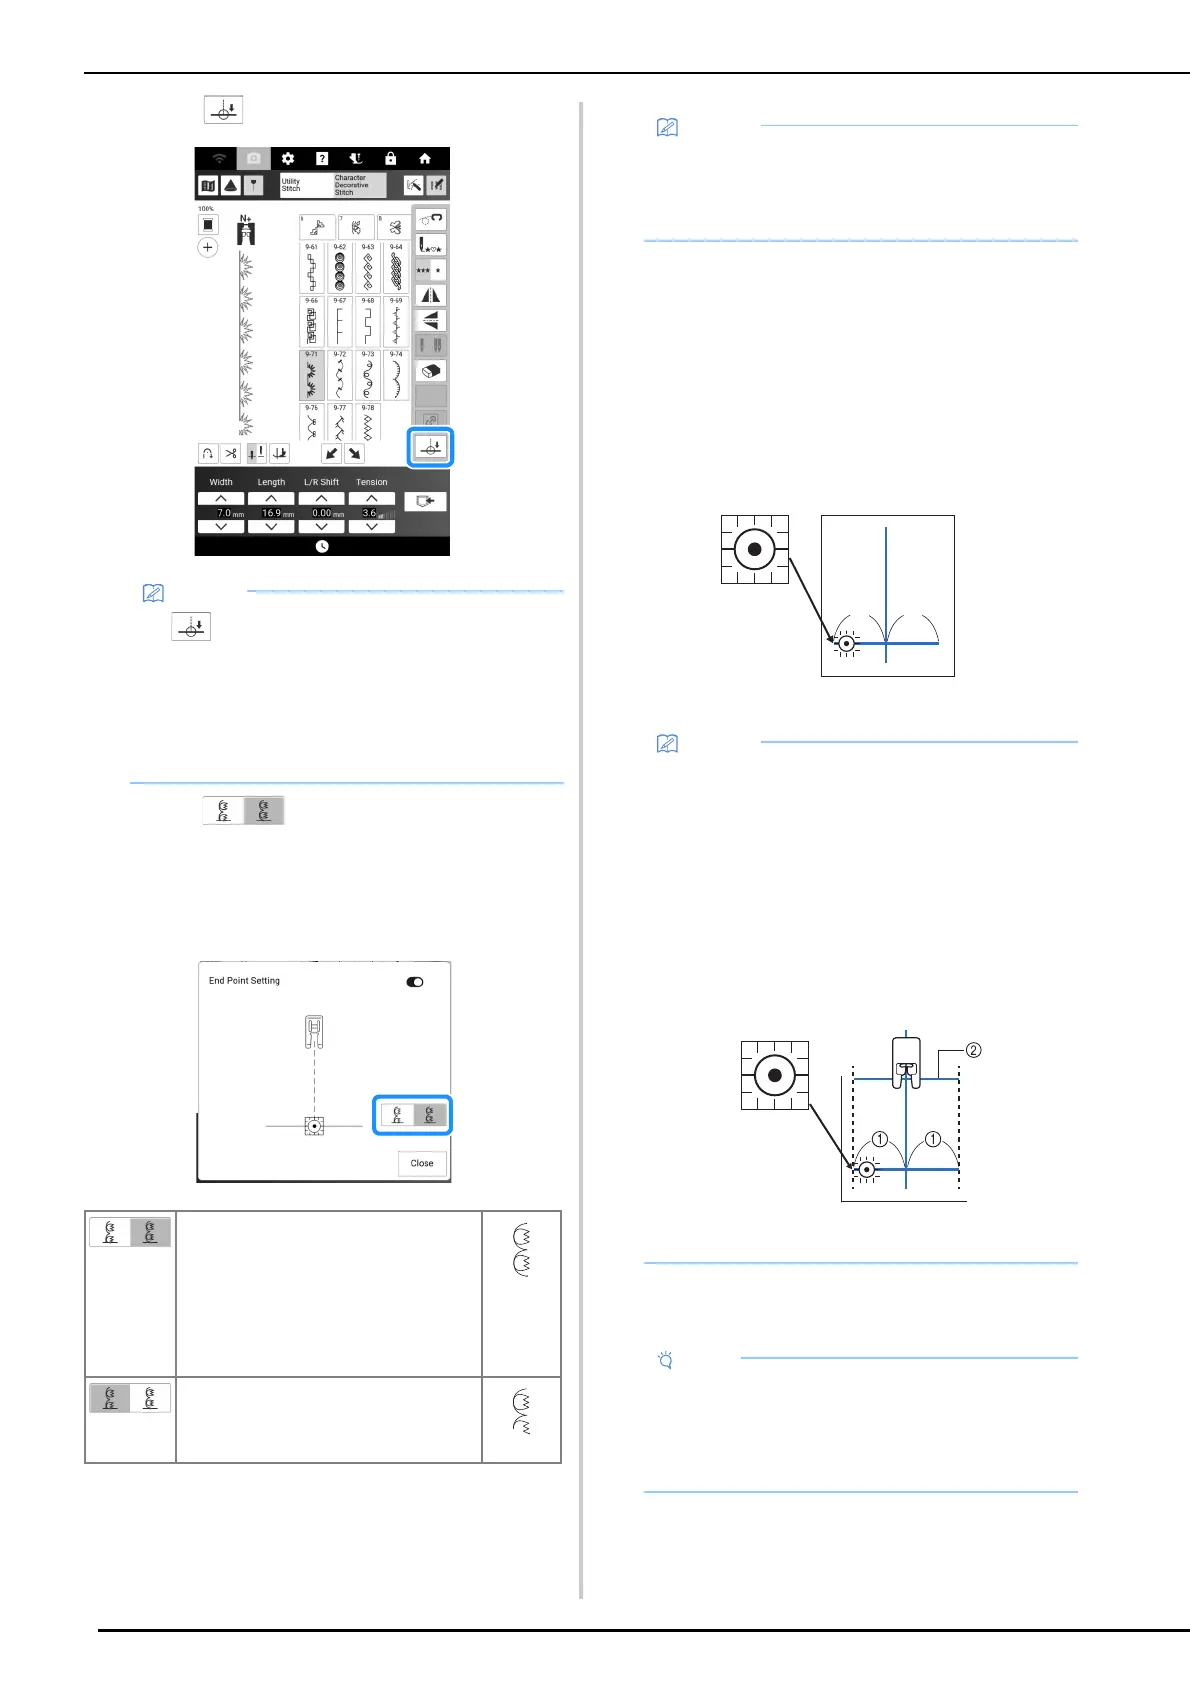
5 Touch .
6 Touch to select whether or not
sewing is ended with a complete stitch
pattern.
If necessary, touch [Close] after making
your selection.
7 With a chalk pencil, mark the fabric with
lines for sewing the stitch pattern and for
the end of stitching.
8 Affix an end point sticker, avoiding the
sewing area. Attach the end point sticker
within 4 cm (approx. 1-1/2 inches) to the
left or right of the chalkline where the end
point for sewing has been drawn.
a 4 cm (Approx. 1-1/2 inches)
9 Place the fabric in the machine, and then
lower the presser foot.
• If appears in light gray and is not
available, the sewing end point cannot be
specified with the selected stitch pattern.
Select a different stitch pattern.
• Automatic reinforcement stitching function and
automatic thread cutting function cannot be
used when using this function.
The length of the stitch pattern is adjusted
so that sewing will stop at the specified
end point with a complete stitch pattern.
If this key appears in light gray and is not
available, this function cannot be used.
This adjustment may cause the stitch
pattern to be sewn slightly stretched
vertically.
The end of stitching is not adjusted. When
the end point is reached, sewing stops
immediately, even if the stitch pattern is
not complete.
• If [End Point Setting] is set to on, the stitch
pattern cannot be projected by the projector.
• To cancel [End Point Setting], set [End Point
Setting] to off, and then touch [Close].
• If the end point sticker can be affixed to either
left or right of the sewing position, we
recommend affixing it to the left side.
• We recommend affixing the end point sticker
as close as possible to the sewing position.
• If you cannot affix an end point sticker
avoiding the sewing area, refer to “Temporary
Stop Setting” on page 77.
• The horizontal guideline at the needle
indicates the distance from the stitching line
where the end point sticker can be affixed.
a 4 cm (Approx. 1-1/2 inches)
b Guideline
• Before sewing, make sure that the end point
sticker has not become detached. In addition,
make sure that the end point sticker is not
covered with your hand. Otherwise, the
machine cannot detect the end point sticker.