Utility Stitches
Various Stitches
81
3
1 Select a stitch.
* For details on stitch patterns, refer to “Stitch Chart”
on page 273.
2 Start sewing.
* For details, refer to “Basic Sewing” on page 51.
* If necessary, sew reverse or reinforcement stitches
at the beginning and end of the stitching. (page 55)
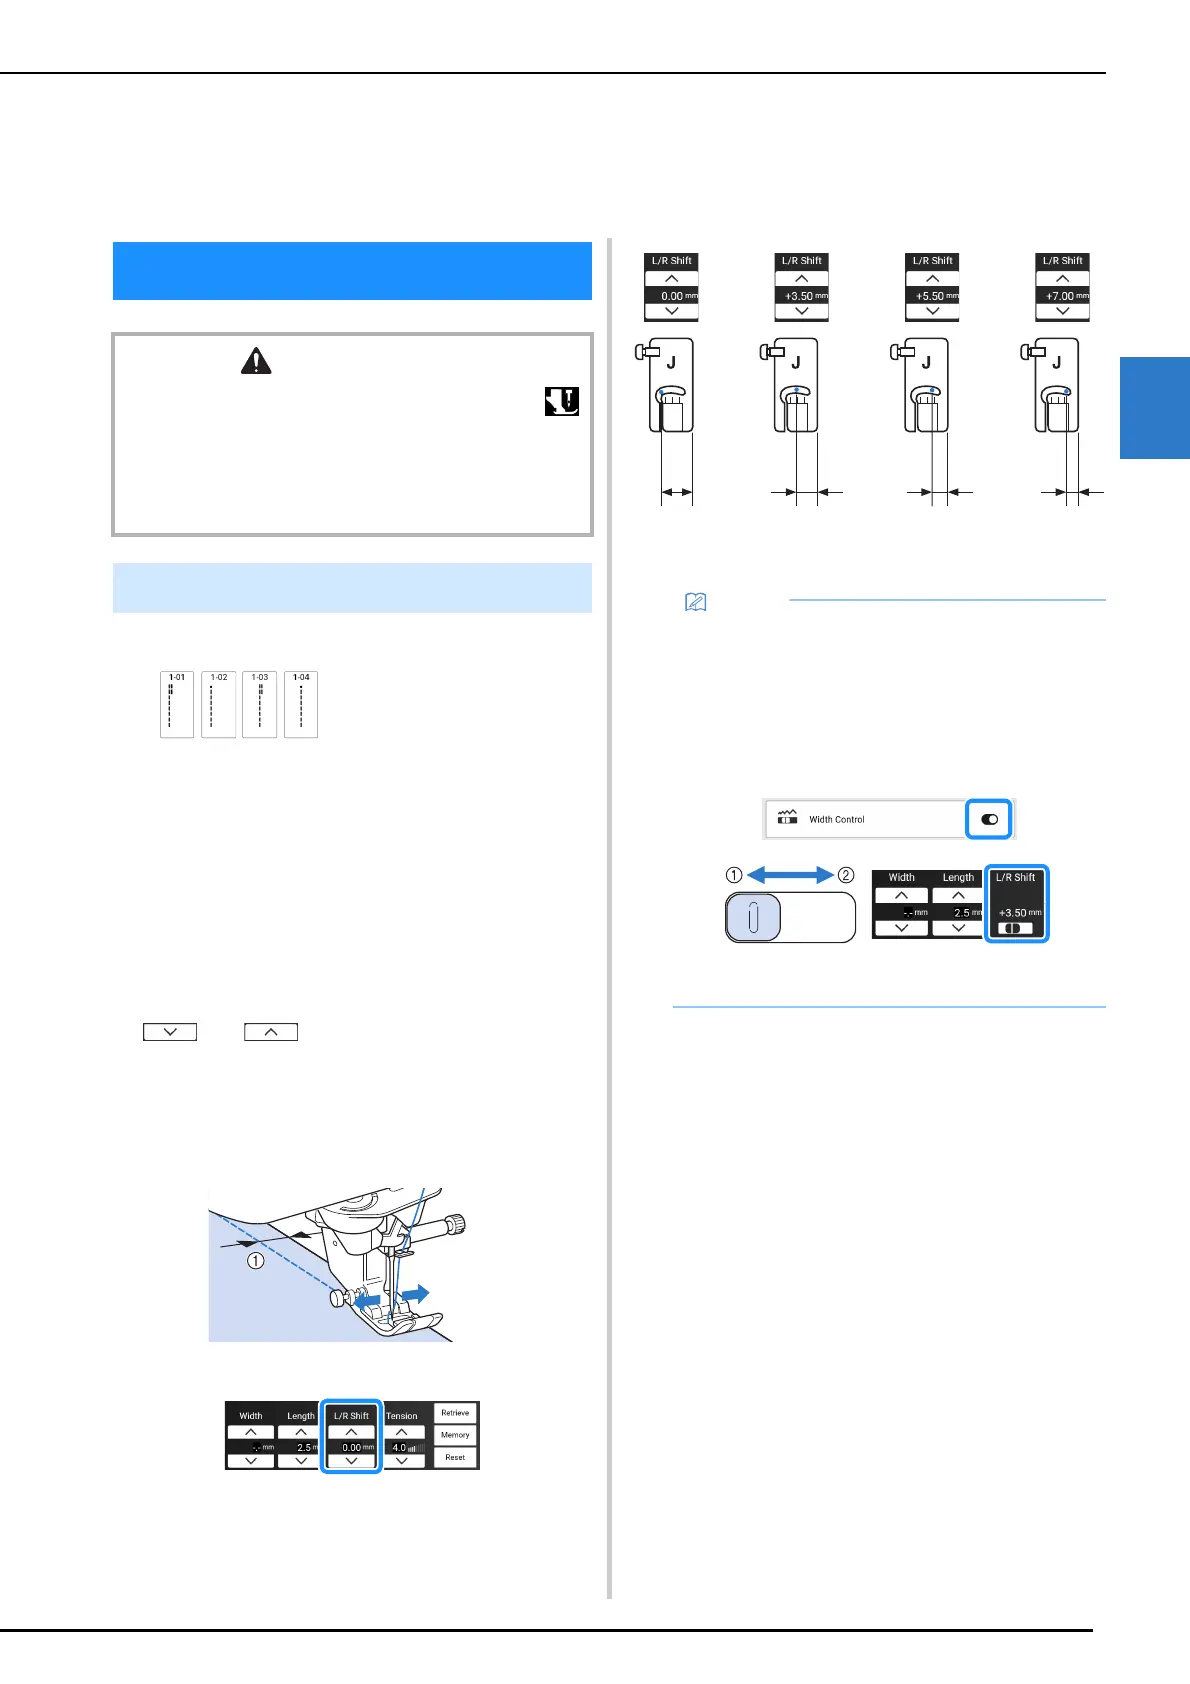
Changing the Needle Position
When you select straight stitches, you can use
and in the [L/R Shift] display to
change the position of the needle. Match the
distance from the right edge of the presser foot to
the needle with the L/R Shift, then align the edge of
the presser foot with the edge of the fabric during
sewing for an attractive finish.
a L/R Shift
Chapter 3
Various Stitches
Utility Stitches
CAUTION
• Before replacing the presser foot, be sure to touch
to lock all keys and buttons, otherwise injuries may
occur if the “Start/Stop” button or any other button is
pressed and the machine starts. For details on changing
the presser foot, refer to “Replacing the Presser Foot” on
page 48.
Straight Stitches
12.0 mm
(approx.
15/32 inch)
8.5 mm
(approx. 21/
64 inch)
6.5 mm
(approx.
1/4 inch)
5.0 mm
(approx. 13/
64 inch)
• Stitch Q-01 will not permit using the L/R Shift
function.
• When [Width Control] in the settings screen is
set to on, the needle position of a straight
stitch can be changed with the sewing speed
controller. Use the foot controller to operate
the machine.
a Shift the stitch pattern to the left.
b Shift the stitch pattern to the right.